- In cPanel go to the Aliases under DOMAINS.
- Enter the domain and create New Alias
- After it is added, Click “Manage Redirection”
- Enter the domain to redirect to and save.


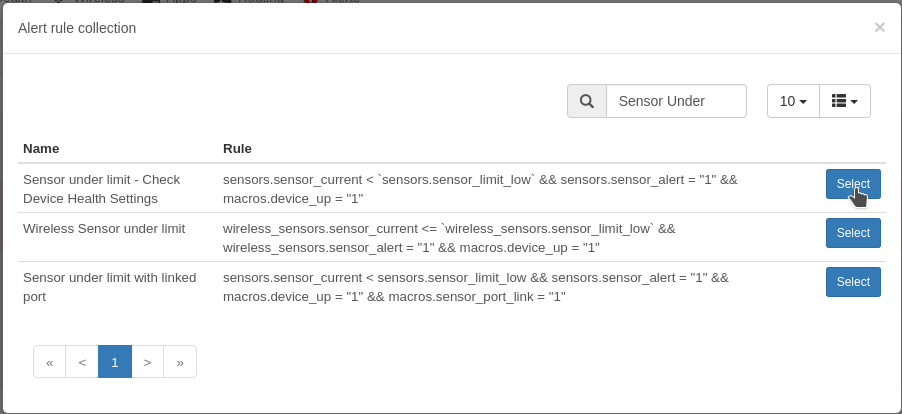
Go to “Alerts -> Alert Rules” Then “Create rule from Collection”
Search for “Sensor under limit” and Select
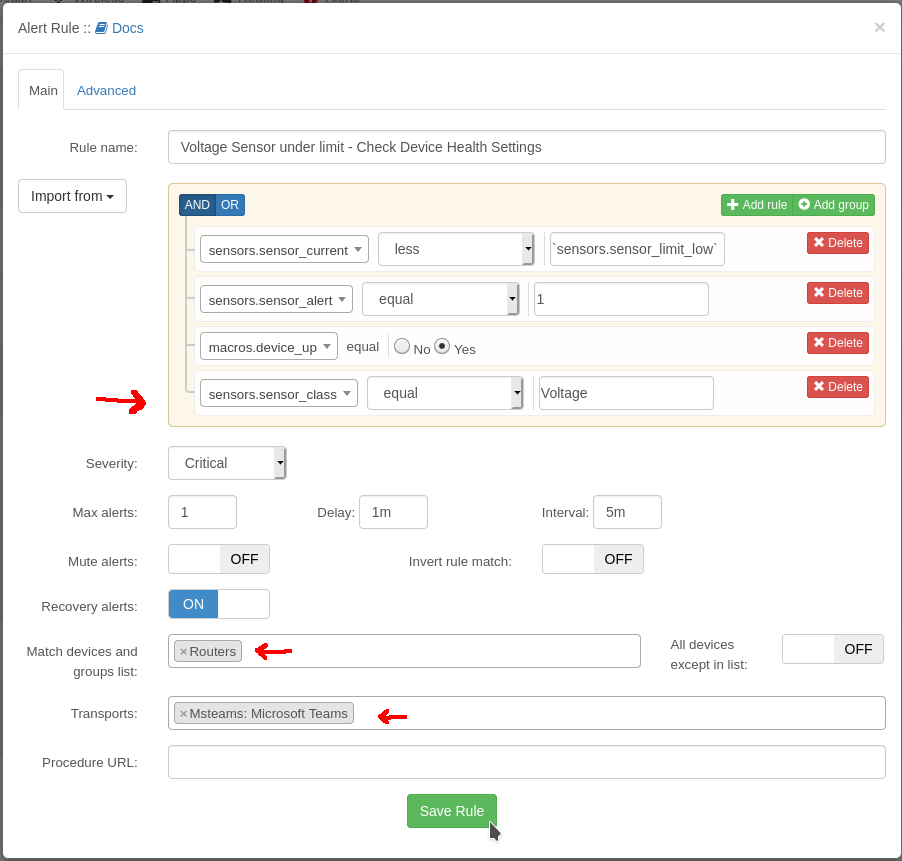
Add another rule to limit to just the Voltage Sensors by using the “sensors.sensor_class = Voltage”
Select your Groups and Transports and Save.
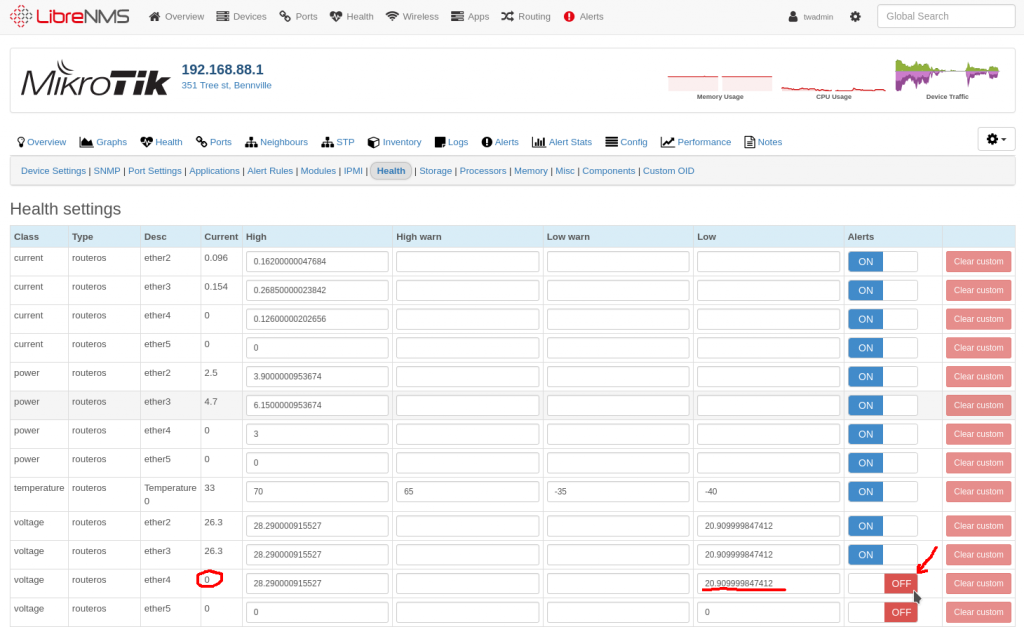
You may get some alerts because there are some ports that do not have any any voltage on them. You can disable them on a per device basis by going to the “device -> Edit -> Health” and turning alerts off
https://wiki.mikrotik.com/wiki/Manual:Interface/VLAN
VLAN successfully passes through regular Ethernet bridges
https://wiki.mikrotik.com/wiki/Manual:Basic_VLAN_switching
https://wiki.mikrotik.com/wiki/Manual:Layer2_misconfiguration
DHCP offering lease without success issue with Mikrotik on the far side of Ubiquiti device.
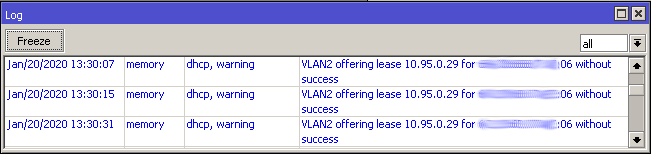
Make sure that radio does not have the VLAN configured on just the WAN interface. Easiest way would be to put it in bridge mode and use the management VLAN.
Install Gnome Display Manager if it is not already installed
sudo apt install gdm3
Stop and disable the currently display manager, replace sddm with the current display manager. May be lightdm
sudo systemctl disable sddm
sudo systemctl stop sddm
Enable GDM
sudo dpkg-reconfigure gdm3
sudo systemctl enable gdm3
sudo systemctl start gdm3
Should be good to go.
When trying to SSH to older devices like a Ubiquiti Bullet2, you may receive an error saying
no matching cipher found. Their offer: aes128-cbc,3des-cbc,aes256-cbc,twofish256-cbc,twofish-cbc,twofish128-cbc,blowfish-cbc
The work around is to manually specify the cipher with the “-c” option. You will also probably need to specify the KexAlgorithm “Key Exchange Algorithm”
ssh -c aes128-cbc -oKexAlgorithms=+diffie-hellman-group1-sha1 admin@192.168.1.20
You can see what ciphers SSH supports by running “ssh -Q cipher”
Example output
ssh -Q cipher
3des-cbc
aes128-cbc
aes192-cbc
aes256-cbc
rijndael-cbc@lysator.liu.se
aes128-ctr
aes192-ctr
aes256-ctr
aes128-gcm@openssh.com
aes256-gcm@openssh.com
chacha20-poly1305@openssh.com
More information
https://www.openssh.com/legacy.html
SSH or gain command line access to XenServer
First we need to enable the Pool to allow auto starting
Second we will need to turn on the auto_poweron to true
In the following examples replace the UUIDs with your UUIDs
You can find the pool UUID by running the “xe pool-list” Command. Note: you’ll still have a pool even if there is only a single server.
# xe pool-list
uuid ( RO) : 2e587aeb-de94-hf29-3eda-923d8he634fe
Enable auto_poweron for the pool
xe pool-param-set uuid=2e587aeb-de94-hf29-3eda-923d8he634fe other-config:auto_poweron=true
Verify that it is enabled
xe pool-param-list uuid=2e587aeb-de94-hf29-3eda-923d8he634fe | grep auto_poweron
Locate the UUID’s of the VM’s you want to start
# xe vm-list
uuid ( RO)           : 521be58a-3495-ea29-02a0-85ffcda06583
     name-label ( RW): CentOS 7
    power-state ( RO): running
Run the following command for each VM you want to auto start. Change the UUID to the UUID of the vm you want to start.
xe pool-param-set uuid=521be58a-3495-ea29-02a0-85ffcda06583 other-config:auto_poweron=true
Use the following command to verify that the auto_poweron option is enabled.
xe vm-param-list uuid=521be58a-3495-ea29-02a0-85ffcda06583 | grep -i poweron | cut -d";" -f1
Example output
other-config (MRW): auto_poweron: trueThe default DSTNATed firewall rule keeps traffic from the WAN accessing LAN side IP addresses.
More info here
Printing the rules on a router with the default config should show the following.
;;; defconf: drop all from WAN not DSTNATed
chain=forward action=drop connection-nat-state=!dstnat in-interface=ether1
If you are wanting to add the rule to a router, you can copy and past the following command. Replace in-interface=ether with your in interface.
/ip firewall add action=drop chain=forward comment=\ "defconf: drop all from WAN not DSTNATed" connection-nat-state=!dstnat in-interface=ether1
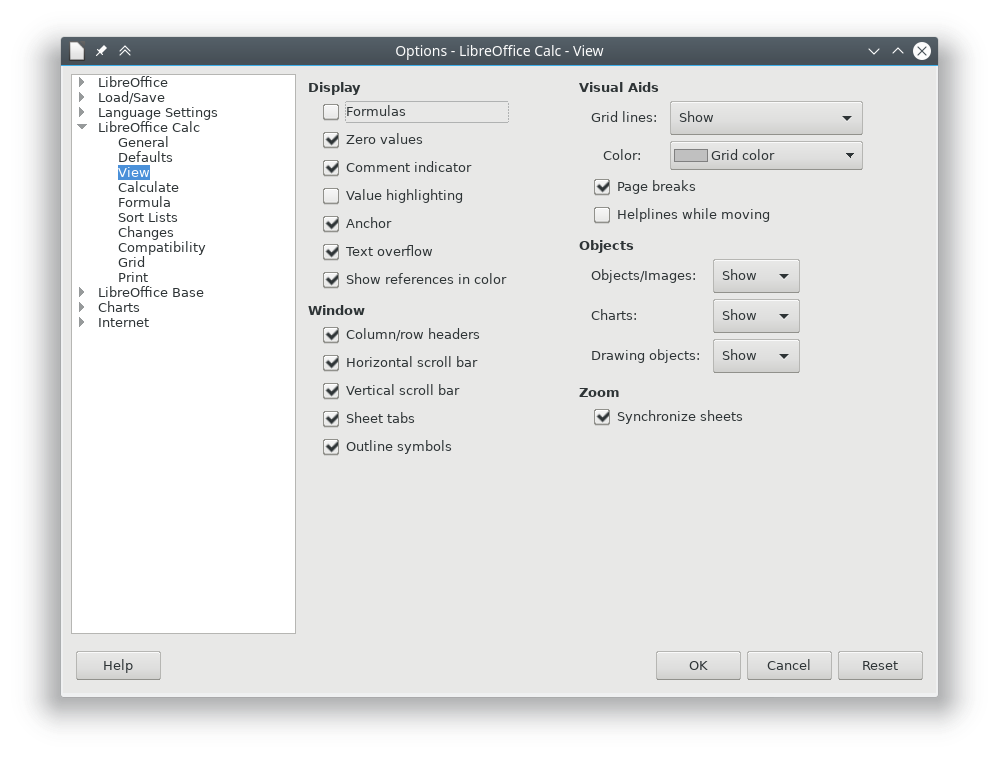
Turning the Page break option on in LibreOffice Calc will show a dotted line in your Calc spreadsheet to show you if you printed it out where the boundaries would be.
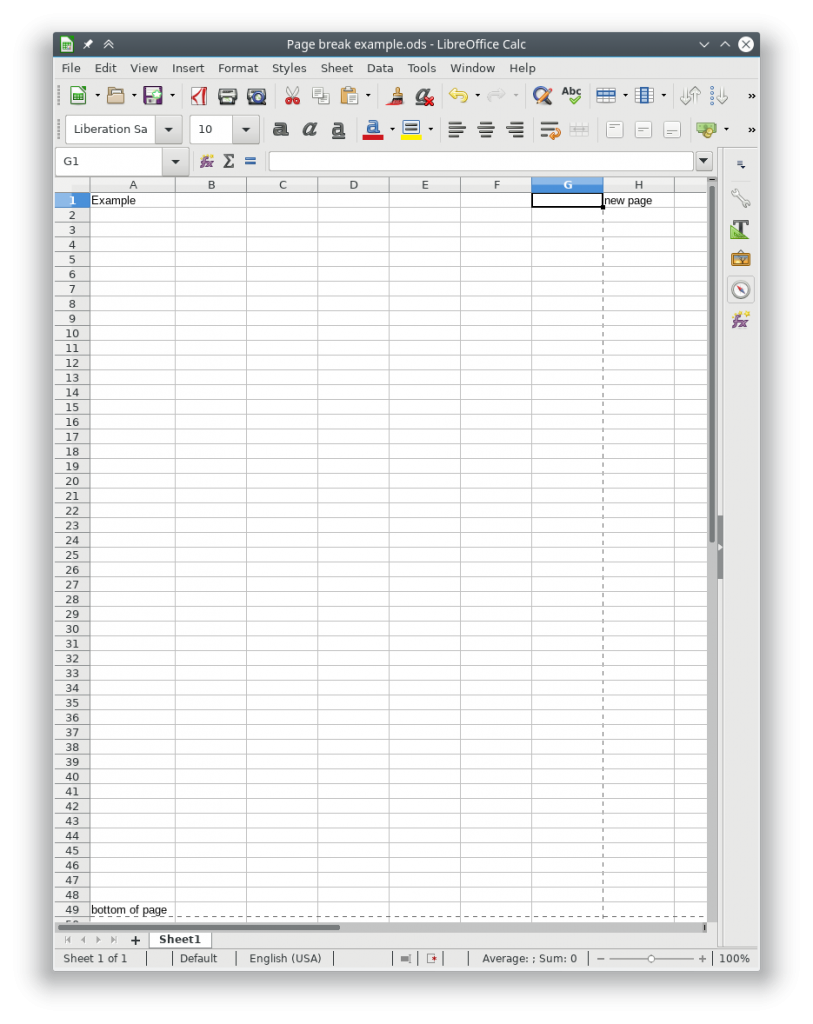
You can turn this behavior on or off by going to
Tools -> Options -> LibreOffice Calc -> View -> Visual Aids -> Page breaks
And turning the check box on or off
The following commands can be run from a ssh session to your UNMS instance.
sudo ~unms/app/unms-cli set-superadmin
Should get something like the following
            UNMS Users
 ┌─────────┬───────────┬───────────────────────────┬──────────────┬────────────┐
 │ (index) │ username  │           email           │     role     │ two-factor │
 ├─────────┼───────────┼───────────────────────────┼──────────────┼────────────┤
 │    0    │  'larry'  │  'larry@incredigeek.com'  │   'admin'    │   false    │
 │    1    │   'bob'   │   'bob@incredigeek.com'   │   'admin'    │   false    │
└─────────┴───────────┴───────────────────────────┴──────────────┴────────────┘To change a user to a Super Admin, add “–username username” to the above command.
Example:
sudo ~unms/app/unms-cli set-superadmin --username bob
            UNMS Users
 ┌─────────┬───────────┬───────────────────────────┬──────────────┬────────────┐
 │ (index) │ username  │           email           │     role     │ two-factor │
 ├─────────┼───────────┼───────────────────────────┼──────────────┼────────────┤
 │    0    │  'larry'  │  'larry@incredigeek.com'  │   'admin'    │   false    │
 │    1    │   'bob'   │   'bob@incredigeek.com'   │ 'superadmin' │   false    │
 └─────────┴───────────┴───────────────────────────┴──────────────┴────────────┘
Note that there does not appear to be a way to
The UniFi cameras are different then the AirMax line in how the configuration works. There is a “/tmp/system.cfg” file, but it does not contain most of the configuration option. In the default directory there are some files which appear to handle the device configuration.
The network configuration file is “ubnt_networkd.conf”
Edit the file by opening it up in vi or a different text editor.
{
     "cfgver": 2,
     "dhcp": {
         "fallbackIP": "192.168.1.20",
         "fallbackNetmask": "255.255.255.0",
         "status": 0  <-- 0=Static 1=DHCP
     },
     "dns": {
         "ns1": {
             "ip": "8.8.8.8",
             "status": 1
         },
         "ns2": {
             "ip": "4.2.2.2",
             "status": 1
         }
     },
     "routes": {
         "gateway": "192.168.5.1"
     },
     "statik": {
         "ip": "192.168.5.11",
         "netmask": "255.255.255.0"
     }
}
If you want to set the static address, you should be able to edit the settings in this config and leave DHCP status disabled.
To set the Camera to use DHCP, under dhcp change “”status”: 0″ to “”status”: 1″
{
     "cfgver": 2,
     "dhcp": {
         "fallbackIP": "192.168.1.20",
         "fallbackNetmask": "255.255.255.0",
         "status": 1
     },
     "dns": {
         "ns1": {
             "ip": "8.8.8.8",
             "status": 1
         },
         "ns2": {
             "ip": "4.2.2.2",
             "status": 1
         }
     },
     "routes": {
         "gateway": "192.168.5.1"
     },
     "statik": {
         "ip": "192.168.5.11",
         "netmask": "255.255.255.0"
     }
}
After the settings are applied the camera will use use DHCP regardless of the statik ip settings.
Use the following command to write the changes to persistent storage
ubnt_cmd_persist.sh
And reboot the camera.
reboot
Camera should pull a DHCP address when it boots up