Exim Troubleshooting Email Logs

The following is a great article explaining the main Exim log.

https://forums.cpanel.net/resources/reading-and-understanding-the-exim-main_log.383/

The following are some helpful tips from the post.

Search log by email address

You can search for specific addresses with the exigrep. Replace email@address with the email address of interest.

exigrep email@address /var/log/exim_mainlog

Message Direction

Looking at entries in the main log, some of the messages will have an indicator from the following table that tell us the status of the message and/or where it came from or went.

<=Indicates the arrival of a message to Exim for handling
=>Shows a normal message delivery
->Additional address for the same delivery, i.e. an Email forwarder.
>>cutthrough is a router precondition
This option requests delivery be attempted while the item is being received. It is usable in the RCPT ACL and valid only for single-recipient mails forwarded from one SMTP connection to another. If a recipient-verify callout connection is requested in the same ACL it is held open and used for the data, otherwise one is made after the ACL completes.
*>delivery suppressed by -N
**delivery failed; address bounced
==delivery deferred; temporary problem
<>For “<>” from the exim manual; Additionally, you will often find A bounce message is shown with the sender address “<>”, and if it is locally generated, this is followed by an item of the form
R=<message id>

Some other posts that may be helpful while troubleshooting mail deliveries.

View messages by ID

Bulk Delete Messages in Queue

Adding Email Disclaimer for Entire Domain on WHM/cPanel

Email Disclaimer

Altermime is a small utility that allows you to append a disclaimer to all outbound emails on a cPanel server.

1. Installing altermime

You should be able to copy and paste the following commands in. You’ll need to be root.

cd /usr/local/src/ 
wget pldaniels.com/altermime/altermime-0.3.10.tar.gz 
tar xvfz altermime-0.3.10.tar.gz 
cd altermime-0.3.10 
make 
make install

2. Setup Disclaimer Text

Create two disclaimer files. One is text and the other is for HTML.

Text file

nano /usr/local/etc/exim/textdisclaimer

Add your disclaimer text.

-------------
incredigeek.com

HTML File

Create the HTML disclaimer file with

nano /usr/local/etc/exim/htmldisclaimer

And add your disclaimer HTML to the file. Example:

<p>
-----
<br />
  <a href="http://www.incredigeek.com">incredigeek.com </a>
</p>

3. Modify Exim Configuration

Now that we have the disclaimer files set up, we can move on to configuring Exim so the disclaimer text gets added to every email sent out.

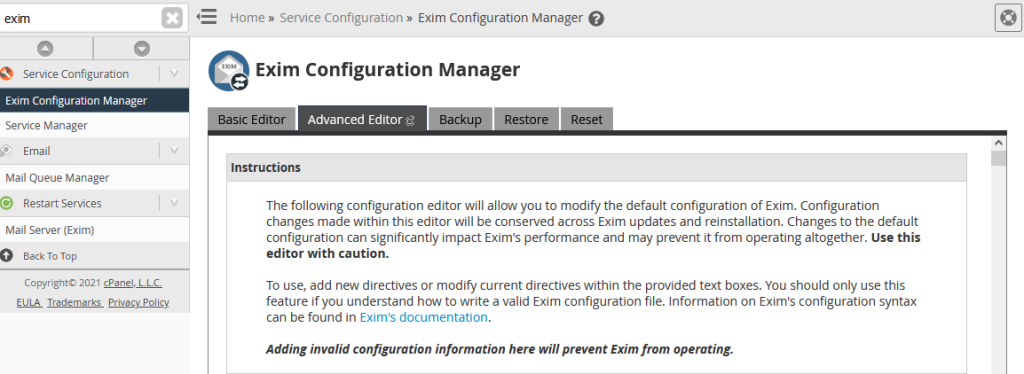
Open up WHM and go to Exim Configuration Editor -> Advanced Editor

Exim Advanced Editor

A. Configuring Routers Configuration

Find the ROUTERS CONFIGURATION section. We will add some configuration in the “Section: PREROUTERS

Add disclaimer to Single Domain

Paste in the following to add the disclaimer to a single domain. Replace “incredigeek.com” with your domain.

disclaimer:
driver = dnslookup
domains = ! +local_domains
transport = ${if eq {$sender_address_domain}{incredigeek.com}{disclaimer_smtp}{remote_smtp}}
no_more
Add Disclaimer to Single Domain

Add Disclaimer to Entire Server (Optional)

If you would rather apply the disclaimer to the entire server, use the following.

disclaimer:
driver = dnslookup
domains = ! +local_domains
transport = disclaimer_smtp
Add Disclaimer to Entire Server

B. Configure Transports Configuration

Once we have that added we can find the “TRANSPORTS CONFIGURATION” section and under the first “Section: TRANSPORTSTART” add

disclaimer_smtp:
driver = smtp
transport_filter = /usr/local/bin/altermime  --input=- --disclaimer=/usr/local/etc/exim/textdisclaimer --disclaimer-html=/usr/local/etc/exim/htmldisclaimer
size_addition = 1
Add Disclaimer to TRANSPOTSTART

That should be everything that you need. Send a test email to an external email account to verify that it works.

Note that it looks like sending an email locally to email addresses on the same domain or to yourself bypass the filter and do not get the disclaimer added.

The following links were helpful for getting this set up.

https://forums.cpanel.net/threads/howto-footer-disclaimer-in-outgoing-mails.98465/

https://pldaniels.com/altermime/

Troubleshooting Backup Errors on WHM / cPanel

Below are some helpful locations of files, logs etc for troubleshooting backup errors on WHM

WHM backup logs
Change date to the correct date. Should be one log per day or I guess every time a backup runs.

/usr/local/cpanel/logs/cpbackup/{date}.log

View WHM backup config

cat /var/cpanel/backups/config

View WHM remote destination config(s)
Replace *** with the appropriate name.

cat /var/cpanel/backups/***.backup_destination

Rysnc.pm file

May need to modify this file to increase time out limits if you are having issues with time out errors for backups.

/usr/local/cpanel/Cpanel/Transport/Files/Rsync.pm

This link has some more info https://forums.cpanel.net/threads/what-commands-does-cpanel-run-over-ssh-to-do-rsync-backups.671777/

Unable to prune transport Rsync Incremental Backup – WHM/cPanel

For some reason I keep getting an alert about the transport failing to prune the incremental backups. Shows “ssh slave failed: timed out”

Going to the backup server shows that the directories have been pruned. This makes the alert a bit confusing.

It appears that others are experiencing the same problem.

https://forums.cpanel.net/threads/remote-incremental-backups-timeouts.606911/page-3

https://forums.cpanel.net/threads/error-pruning-ssh-slave-failed-timed-out.627691/

You can check the backup log to see if it gives you any errors or ideas on what the problem is. Replace {currentdate} with the date of the log file you want.

/usr/local/cpanel/logs/cpbackup/{currentdate}.log

One thing to try is to increase the time out on the

In WHM, go to Backup -> Backup Configuration -> Additional Destinations -> Your Destination
Scroll down to the bottom and enter a higher timeout value

Setting cPanel remote transport timeout

One user said they patched the rsync.pm file. Looks like there may be a 30 second timeout for rsync, so maybe increasing that would help.

/usr/local/cpanel/Cpanel/Transport/Files/Rsync.pm

How To tell if an email on a cPanel server has been read from the command line

All of the emails in the email directories contain one of the following at the end of the filename

$ ls cur/ | cut -d: -f 2 | sort | uniq -c
54 2,               <- Not Read
12 2,ab             <- Not Read
83 2,S              <- Read
61 2,Sab            <- Read

The first two “2, and 2,ab” mean that the message has not been read. The bottom 2 “2,S and s,Sab” mean that the message has been read or “seen?”. Guess that is what the S is for. Not sure what ab is for.

Using SA-Learn to improve spam filtering in cPanel

More information available at the following link
https://forums.cpanel.net/resources/how-to-train-spamassassin-with-sa-learn.623/

Training on Spam

Train Spam from Junk email directories for email account. Replace USER with the domain admin username, DOMAIN.TLD with domain name, and ACCOUNT with the email address.

/usr/local/cpanel/3rdparty/bin/sa-learn -p /home/USER/.spamassassin/user_prefs --spam /home/USER/mail/DOMAIN.TLD/.ACCOUNT@DOMAIN.TLD/.Junk/{cur,new}

Use read emails in inbox as Ham

You can use the following script to feed sa-learn ham. The script looks at all the read messages for the current year in the default inbox and then feeds them individually to sa-learn

cd /home/USER/mail/
for emailHam in `ls -lt --time-style=long-iso {cur/,new/} | grep $(date | awk '{print $6}') | grep "2,S" | awk '{print $8}'`
do
/usr/local/cpanel/3rdparty/bin/sa-learn -p /home/${cpanelUser}/.spamassassin/user_prefs --ham ${mailbox}/{cur,new}/${emailHam}
done

Script to automate the process

You can use the following script to automatically train sa-learn. Create the script and then use Crontab to launch it.

Script

Create a file named sa-learn.sh and add the following contents to it.

#!/bin/bash

# Notes on cpanel mail
# - /home/cpanel_user/mail <- Default mail directory, all the email accounts are located in the domain.com directory, although there are hidden files in here that point to that.
# - the default catch all is in ..../mail

dateYear=`date +%Y`

echo "Starting Training"
for mailbox in `cat mailboxes.txt`; do
        cd ${mailbox}
        echo "training on Ham" for ${mailbox}
        cpanelUser=`echo ${mailbox} | cut -d\/ -f3`
        # Check Spam
        echo "Trainging on Spam, SPAM, spam, junk, Junk Email, and Junk folders"
        /usr/local/cpanel/3rdparty/bin/sa-learn -p /home/${cpanelUser}/.spamassassin/user_prefs --spam ${mailbox}/{".Junk Email"/{new/,cur/},.Junk/{new/,cur/},.junk/{new/,cur/},.spam/{new/,cur/},.Spam/{new/,cur/},.SPAM/{new/,cur/}}
        cd
        # Gets a list of seen messages for the current year to use as Ham
        for emailHam in `ls -lt --time-style=long-iso {cur/,new/} |  grep $(date | awk '{print $6}') | grep "2,S" | awk '{print $8}'`
        do
            /usr/local/cpanel/3rdparty/bin/sa-learn -p /home/${cpanelUser}/.spamassassin/user_prefs --ham ${mailbox}/{cur,new}/${emailHam}
        done
done

Create text file to hold mailbox paths

You’ll need to create a file called mailboxes.txt and put the email paths for the email accounts you want to run sa-learn against. The following is an example of what the file should look like.

/home/incredigeek/mail/.bob@incredigeek_com/
/home/incredigeek/mail/.larry@incredigeek_com/
/home/incredigeek/mail/.steve@incredigeek_com/
/home/incredigeek/mail/.admin@incredigeek_com/

Create Crontab

Add script to cron by running

crontab -e

and paste in the following to launch the script every day at 1AM

0 1 * * * /root/sa-learn.sh train && echo "training run at $(date)" >> /root/email_report.log

Save and you should be ready to go.

WHM/cPanel Firewall

Had a weird issue where a certain address was unable to access the cpanel server, but it was intermittent with it working some times, but failing at other times.

Ended up being the firewall on the WHM server blocking that particular IP address due to failed log in attempts.

Check the status of LFD (Login Failure Daemon)

systemctl status lfd

How do I know which IP’s are being blocked?

Check the logs, dmesg or tail /var/log/messages

[1122639.674605] Firewall: UDP_IN Blocked IN=eth0 OUT= MAC=8e:23:f5:16:a6:b1:cc:51:54:6a:2e:ea:14:00 SRC=72.211.105.113 DST=192.168.1.12 LEN=64 TOS=0x00 PREC=0x00 TTL=246 ID=40014 PROTO=UDP SPT=9307 DPT=161 LEN=44
[1122646.728510] Firewall: TCP_IN Blocked IN=eth0 OUT= MAC=8e:23:f5:16:a6:b1:cc:51:54:6a:2e:ea:14:00 SRC=198.199.98.83 DST=192.168.1.12 LEN=40 TOS=0x00 PREC=0x00 TTL=244 ID=54321 PROTO=TCP SPT=57522 DPT=15672 WINDOW=65535 RES=0x00 SYN URGP=0

CSF keeps a file with addresses to deny in “/etc/csf/csf.deny” Also nice that if gives you a little bit of info on why it was blocked.

# grep -r "192.168.1.21" /etc/csf/csf.deny
192.168.1.21 # lfd: (pop3d) Failed POP3 login from 192.168.1.21 (US/United States/-): 10 in the last 3600 secs - Tue Jun 20 11:36:15 2020

You can also dump all of the rule in iptables with

iptables --list | egrep "192.168.1.21"

Change 192.168.1.21 with the IP you are looking for

Whitelist IP Addresses

Open up /etc/csf/csf.allow with a text editor and add the IP to the bottom of the file.

or add the IP address to the end of the file with the following command. Replace 192.168.1.21 with the IP address you want to whitelist.

echo "192.168.1.21" >> /etc/csf/csf.allow

You can also do all of this from the WHM web interface “Plugins -> ConfigServer Security & Firewall”

Further reading

https://documentation.cpanel.net/display/CKB/How+to+Configure+Your+Firewall+for+cPanel+Services