3 different ways to loop through arrays in JavaScript in 2023

There are at least 3 different ways to loop over arrays in JavaScript. The three we will go over in this article are the

  1. forEach
  2. for of
  3. for loop

Using forEach to loop through an array

The forEach takes a callback function that is executed for element of the array. The callback function’s first argument is the element of the array.

const myArray = ["First", "Second", "Third"]

myArray.forEach(function(myElement, index, array) {
  console.log(`My Element is ${myElement}, index is ${index}, and array is {$array}`
}

Couple things to note about forEach

  1. You can not break out of the loop, it has to go through every element in the array.
  2. It is a higher order function
  3. The first argument is the array element, the second is the index, and the 3rd is the array itself

Using for of to loop through an array

Using the for of loop, we can loop through the array with

const myArray = ["First", "Second", "Third"]

for (const [i, myElement] of myArray) {
  console.log(`My Element is ${myElement}, index is ${i}`)
}

Looping through an array with a for loop

And using just a simple for loop, we can do

const myArray = ["First", "Second", "Third"]

for (let i = 0; i < myArray.length; i++) {
  console.log(`My Element is ${myarray[i]}, index is ${i}`)
}

https://stackoverflow.com/questions/50844095/should-one-use-for-of-or-foreach-when-iterating-through-an-array

JavaScript – How To Execute a Function with Variables when Button is Clicked

If we take the following code, we call the Log function without the (). This calls the Log function every time the buttonObject is clicked.

// Find object id myButton
let buttonObject = document.getElementById('myButton')  

// Add an event listener, and run Log function when clicked.
buttonObject.addEventListener('click', Log) 
// If we call Log(), it will immediately trigger the function

function Log () {
  console.log("Hello World!")
}

But what if we want to pass in a variable to the Log function? We can’t run Log('some text') as the function will run before we click the object.

We can however wrap the Log function inside of an anonymous function like so

let buttonObject = document.getElementById('myButton')

// Now Log() function will be run with the variable getting passed.
buttonObject.addEventListener('click', () => {
  Log('Hello World!')
})

function Log (textVariable) {
  console.log(textVariable)
}

Our Log function gets triggered when the object is clicked, and the variable is passed properly. You can swap out thy arrow function with a nameless function ()

How to Display Pictures on NodeJS http Server

If you are using http for a NodeJS application, you may have run into an issue where none of your images are loading on a site. Instead you are greeted with nice little “no image” logos.

The issue is that our NodeJS server has not been instructed to load anything other than index.html. So other things like images, or even CSS from our style.css file wont work properly.

To fix the issue, we need to to tell NodeJS what to do when other files are requested. As a side note, the person browsing the site may not be requesting the resources directly, but index.html file requests the css file or images hence creating a new web request.

Let’s say we are starting with the following code as a starting point.

var http = require('http')
var fs = require('fs')
var path = require('path')
var url = require('url')

http
  .createServer(function (req, res) {
    let pathname = url.parse(req.url).pathname
    if (
      req.method === 'GET' &&
      (pathname === '/' || pathname === '/index.html')
    ) {
      res.setHeader('Content-Type', 'text/html')
      fs.createReadStream('./index.html').pipe(res)
      return
    }
    return res.end()
  })
  .listen(3000)

Our HTML code is very basic.

<html>
<head>Hello World!</head>
<br />
<body><img src="./image.png" width="128"></body>
</html>

When we launch our server with

$ node server.js

We get

The Fix

Essentially what we need to do is tell the server what to do when image.png is requested.

So we can add the following to our server code before the line “return res.end()”

    if (req.method === 'GET' && pathname === '/image.png') {
      res.setHeader('Content-Type', 'image/png')
      fs.createReadStream('./image.png').pipe(res)
      return
    }

And voila! it is fixed!

Taking it Further

We can improve on this and add a favicon, as well as our style sheet.

var http = require('http')
var fs = require('fs')
var path = require('path')
var url = require('url')

http
  .createServer(function (req, res) {
    let pathname = url.parse(req.url).pathname
    if (
      req.method === 'GET' &&
      (pathname === '/' || pathname === '/index.html')
    ) {
      res.setHeader('Content-Type', 'text/html')
      fs.createReadStream('./index.html').pipe(res)
      return
    }
    if (req.method === 'GET' && pathname === '/image.png') {
      res.setHeader('Content-Type', 'image/png')
      fs.createReadStream('./image.png').pipe(res)
      return
    }

    if (req.method === 'GET' && pathname === '/favicon.ico') {
      res.setHeader('Content-Type', 'image/x-icon')
      fs.createReadStream('./favicon.ico').pipe(res)
      return
    }

    if (req.method === 'GET' && pathname === '/style.css') {
      res.setHeader('Content-Type', 'text/css')
      fs.createReadStream('./style.css').pipe(res)
      return
    }
    return res.end()
  })
  .listen(3000)

This will let us put a favicon.ico image to use as a favicon it will use style.css to stylize the website.

We should note that while the above code does work, you will most likely want to use something like express.
https://github.com/expressjs/express

You can also find better code implementations others of done online.

https://stackoverflow.com/questions/5823722/how-to-serve-an-image-using-nodejs

How To do a simple Timer in JavaScript

https://www.freecodecamp.org/news/javascript-timers-everything-you-need-to-know-5f31eaa37162/

Here are a couple different ways to do timers in JavaScript

Every X seconds do

We can use the setInterval global function to run code (myFunc()) every second.

setInterval(() => {
  myfunc()
}, 1000)

Execute X after Y seconds

Replace console.log with the code you want to execute with a delay.

setTimeout(() => {   
  console.log("Hello World")
}, 1000)

JavaScript Functions

https://developer.mozilla.org/en-US/docs/Web/JavaScript/Guide/Functions

What is a function? A function is a block of code that does a particular task.

JavaScript has 3 different types of functions

  1. Function Declaration
  2. Function Expression
  3. Arrow Function Expression

Functions can also be named, or anonymous. There are a couple helpful things anonymous functions can help with.

Function Declaration

Function declaration’s are your standard functions. Syntax is as follows

function add(num1, num2) {
  return num1 + num2
}


console.log(add(1, 2));

Function Expression

A function expression can be thought of as a variable that is a function. We define function expressions like so

const add = function myFunction (num1, num2) {
  return num1 + num2;
}

console.log(add(1, 2));

Function expressions can be anonymous. To make the above function anonymous, remove “myFunction”. It would then read “function (num1, num2)”

Typically it is a good idea to name your function expressions as debugging anonymous functions can be a bit more difficult.

A warning about function expressions. They are not hoisted like function declarations. Just be sure that you define the function expression before you call it.

Arrow Function Expressions

Arrow functions are a compact version of function expressions that are always anonymous. They can be a bit tricky to get the syntax correct. Refer to the link below to get a better list of syntax and use. Arrow functions also have some other limitations. They do not have bindings to this, arguments or super.

const add = (num1, num2) => num1 + num2;

console.log(add(1, 2);

https://developer.mozilla.org/en-US/docs/Web/JavaScript/Reference/Functions/Arrow_functions

Anonymous Functions

Anonymous functions are functions that don’t have a name. For instance

function () {
  do something
}

Does not have a name and is therefore an anonymous function. Arrow functions are always anonymous.

When would you need to use an anonymous function?

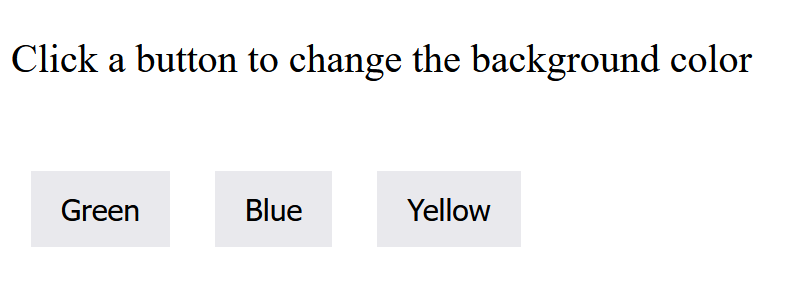
One good example is when you want to call a named function from a timer, or when a button is clicked. For instance

// Find object id myButton
let buttonObject = document.getElementById('myButton')  

// Add an event listener, and run Log function when clicked.
buttonObject.addEventListener('click', Log) 
// If we call Log(), it will immediately trigger the function

function Log () {
  console.log("Hello World!")
}

But what if we want to pass in a variable to the Log function? We can’t run Log('some text') as the function will run before we click the object.

We can however wrap the Log function inside of an anonymous function like so

let buttonObject = document.getElementById('myButton')

// Now Log() function will be run with the variable getting passed.
buttonObject.addEventListener('click', function () {
  Log('Hello World!')
})

function Log (textVariable) {
  console.log(textVariable)
}

And our Log function gets triggered when the object is clicked, and the variable is passed properly. You can swap out function () with an arrow function () =>

How To Play an Audio file in JavaScript

Here is a quick and simple way to play an audio clip in JavaScript

const audio = new Audio('path/to/audio.mp3')
audio.play()

That is literally it.

You can set “audio.play()” to where ever you need in your code so it gets triggered when needed.

https://stackoverflow.com/questions/9419263/how-to-play-audio

JavaScript – The media resource indicated by the src attribute or assigned media provider object was not suitable.

If you receive the following error,

The media resource indicated by the src attribute or assigned media provider object was not suitable.

It could be because your media file is not supported. Try converting your audio file to a different format.

https://stackoverflow.com/questions/57246199/domexception-the-media-resource-indicated-by-the-src-attribute-or-assigned-med

JavaScript Basic Spread and Rest (…) usage

The Spread and Rest operators i.e. the three dots (…) can be used to make code cleaner and more concise.

Difference between Spread and Rest

Spread: Works on elements on the right side of the = operator, and breaks them out into individual elements.

Rest: Works on the left hand side of the = operator, and compresses them into an array.

Using Spread to Iterate over Arrays

Spread works on iterables like strings, arrays, maps and sets.

The spread operator operates similar to taking all the elements out of an array and operating on them or writing them to a new array. Say for instance we have an array of computers and we want to log each element to the console.

const computersA = ['Acer', 'Apple', 'ASUS']

We can log each element by running

console.log(computersA[0], computersA[1], computersA[2])

Or we can use the spread operator

console.log(...computersA)

The output is the same.

Joining Arrays

We can also use the spread operator to join two arrays together. Say we have two arrays

const computersA = ['Acer', 'Apple', 'ASUS']
const computersB = ['HP', 'Dell', 'Lenovo']

And we want to concatenate them together. We can do that simply by

const computerAll = [...computersA, ...computersB]

Rest Example

Rest is simply the opposite of spread. Spread take an item like an array and expands it out into elements we can use. Rest takes elements and packs them into an array. This can be extremely helpful if we want to pass in an unknown amount of elements into a function for processing.

const computersA = ['Acer', 'Apple', 'ASUS']
function writeToLog (...arr) {
  for (const element of arr) {
    console.log(element)
  }
}

Now we can call the function with as many elements in the array and they will all get logged to the console.

writeToLog('Razer', 'Alienware', 'Legion')

We could also use both the Spread and Rest functions

const gamingLaptops = ['Razer', 'Alienware', 'Legion']
writeToLog(...gamingLaptops)

Now as we add more laptops to the gamingLaptops array, the function will automatically process the line and write to console.

https://www.freecodecamp.org/news/three-dots-operator-in-javascript/

JavaScript Delete Object if it Collides or Overlaps with another object that has CSS Class X

Imagine we have a page that has anywhere from 1 to 100 floating blocks. Now what if I want the block(s) to disappear if it runs into another type of block or a boarder? How would we do that?

First lets get a list of all elements with X and Y class. We could swap one of these classes out for an ID if we wanted to.

const elements1 = document.querySelectorAll('.boxes')
const elements2 = document.querySelectorAll('.borders')

The variable elements1 and 2 are both arrays of all the elements that have class .boxes and boarders.

Now lets create a function to detect a collision.

function detectCollision(class1, class2) {
  for (let i = 0; i < class1.length; i++) {
    const e1Rectangle = class1[i].getBoundingClientRect()
    for (let i2 = 0; i2 < e2.length; i2++) {
      const e2Rectangle = class2[i2].getBoundingClientRect()
      if (
        e1Rectangle.left < e2Rectangle.right &&
        e1Rectangle.right > e2Rectangle.left &&
        e1Rectangle.top < e2Rectangle.bottom &&
        e1Rectangle.bottom > e2Rectangle.top
      ) {
        destroyElement(class1[i])
        destroyElement(class1[i2])
      }
    }
  }
}

This function takes two arrays as inputs, loops over each array object and compares to see if any are overlapping. If they are overlapping, run the destroyElement() function for those two specific elements.

Create the destroyElement function with

 function destroyElement(element) {
  elementId.parentNode.removeChild(elementId)
}

Here is our full code

const elements1 = document.querySelectorAll('.boxes')
const elements2 = document.querySelectorAll('.borders')

function detectCollision (class1, class2) {
  for (let i = 0; i < class1.length; i++) {
    const e1Rectangle = class1[i].getBoundingClientRect()
    for (let i2 = 0; i2 < e2.length; i2++) {
      const e2Rectangle = class2[i2].getBoundingClientRect()
      if (
        e1Rectangle.left < e2Rectangle.right &&
        e1Rectangle.right > e2Rectangle.left &&
        e1Rectangle.top < e2Rectangle.bottom &&
        e1Rectangle.bottom > e2Rectangle.top
      ) {
        destroyElement(class1[i])
        destroyElement(class1[i2])
      }
    }
  }
}

// Element is element[arraynumber].etc
function destroyElement(element) {
  elementId.parentNode.removeChild(elementId)
}

// Every second, let's run our collision function to check for collisions
setInterval(function () {
   detectCollision(elements1, elements2)
  }, 1000)

Notes on Buttons with JavaScript

Here are some very basic notes on using buttons to change elements on a web page

We have a very simple page with three buttons that change the background color when the button is clicked.

Clicking a button changes the text and the background color.

Create a button in our html file.

    <button type="button" class="button green">Green</button>

We have two classes assigned to this button, button which is used for styling, and the green, which JavaScript will use to know which button is clicked.

In our JavaScript, we will set up an event listener for when the button is clicked.

document.querySelector('.green').addEventListener('click', function () {
  document.querySelector('body').style.backgroundColor = 'Green'
  console.log('Green')
})

We use the document.querySelector to interact with HTML objects. So we setup the event listener to listen to the button that is in Class green, and we wait for the click event. Once that happens, we run the code in the function(){ }.

Line 2 is what changes our background color. We query the body tag, and set the backgroundColor to Green. Notice that the background color name is slightly different between JavaScript and HTML.
HTML and CSS it has a – in it: background-color
JavaScript is it Camel Case: backgroundColor

Here is the full code for the above screenshots. There are three files. index.html, style.css, and index.js. Should be able to copy them to the same folder and run the index.html file.

Index.html code

<!DOCTYPE html>
<html lang="en">
  <head>
    <link rel="stylesheet" href="style.css" />
    <meta charset="UTF-8" />
    <meta http-equiv="X-UA-Compatible" content="IE=edge" />
    <meta name="viewport" content="width=device-width, initial-scale=1.0" />
    <title>JavaScript DOM Practice</title>
  </head>
  <br />
  <section class="mainwindow">
    <div class="output">Click a button to change the background color</div>
    <br />
    <br />
    <br />
    <button type="button" class="button green">Green</button>
    <button type="button" class="button blue">Blue</button>
    <button type="button" class="button yellow">Yellow</button>
  </section>

  <body>
    <script src="index.js"></script>
  </body>
</html>

JavaScript index.js

'use strict'

document.querySelector('.green').addEventListener('click', function () {
  ChangeBackgrounColor('Green')
  LogBackgroundColor('Green')
})

document.querySelector('.blue').addEventListener('click', function () {
  ChangeBackgrounColor('Blue')
  LogBackgroundColor('Blue')
})

document.querySelector('.yellow').addEventListener('click', function () {
  ChangeBackgrounColor('Yellow')
  LogBackgroundColor('Yellow')
})

function ChangeBackgrounColor (color) {
  document.querySelector('body').style.backgroundColor = color
}

function LogBackgroundColor (color) {
  document.querySelector('.output').innerHTML = `Background is ${color}`
  console.log(`Background color is ${color}`)
}

CSS File style.css

.mainwindow {
  padding: 1rem;
}
body {
  background-color: white;
}
button {
  border: none;
  font-size: 24px;
  cursor: pointer;
  padding: 1rem 1.5rem;
  margin: 1rem;
}
.output {
  font-size: 2rem;
}