How to Extract UniFi AP firmware

Make sure you have binwalk installed

sudo apt install binwalk

Download the firmware from Ubiquiti’s website

https://ui.com/download/software/uap-ac-lite

We’ll need to extract the images a couple of times

binwalk -e 6.5.54.bin
cd ./_6.5.54.bin.extracted
binwalk -e 50FEE 
cd _50FEE.extracted/ 
binwalk -e 3C7CC4

The last binwalk will extract the actual file system.

cd _3C7CC4.extracted/cpio-root  

How to Archive UniFi Protect Footage

Here are some links and notes on archiving a UniFi Protect’s footage.

Apparently, the .ubv files just need to be remuxed to .mp4 so they are easily playable. On the UniFi Protect appliances, they have a ubnt_ubvexport and ubnt_ubvinfo binary that can do the remux. You can copy the binary off and run it with QEMU on x86 hardware.

Helpful Links.

https://github.com/danielfernau/unifi-protect-video-downloader

https://github.com/petergeneric/unifi-protect-remux

https://durdle.com/2022/01/22/extract-unifi-protect-video/

RSYNC

We can setup rsync to copy the raw footage off the Unifi Protect appliance. Once we have it locally, we can use the remux tool to convert the files to .mp4 so we can easily view them.

A cool thing about using rsync, is if our copy gets interrupted, we can just rerun the command and it will pick up where it left off without duplicating anything.

The following command is a mouthful. It searches for all the recorded video files for cameras with the MAC addresses specified. (MAC addresses can be found from the web interface), There are only a couple things to change or tweak for the command to work for you.

MAC1 should be the MAC address of camera 1 while MAC2 is the MAC address of the next camera we want to archive.
Change the dst_directory to the archive directory or drive.
And of course we need to change the IP address (10.0.0.1) to the UniFi Protect IP address.

ssh root@10.0.0.1 'find /srv/unifi-protect/video/ \( -name "MAC1*" -o -name "MAC2*" \) -printf %P\\0\\n' | rsync -a -v --exclude="*timelapse*" --files-from=- root@10.0.0.1:/src/unifi-protect/video/ dst_directory/

Here are the details for the commands.

  • -printf %P\\0\\n : Don’t print the full path, i.e. “/src/unifi-protect/video/”
  • -name “MAC1*” : Search for recording files that start with camera mac1 address.
  • -o -name “MAC2*” : Let’s us search for multiple “cameras” add more -o -name “mac3*” etc
  • rsync
  • -a : archive mode, copies date, permissions etc.
  • -v : verbose output. Not needed, but it is nice to see what it is copying.
  • –exclude=”*timelapse*” : Exclude timelapse files. Remove this if you want to archive them.
  • –files-from=- : Tells rsync to use the standard input for the list of files to download.
  • root@10.10.1.1:/src/unifi-protect/video/ : This is the source directory for where the video files are located
  • /archive/directory : The path where we are archiving the video footage.

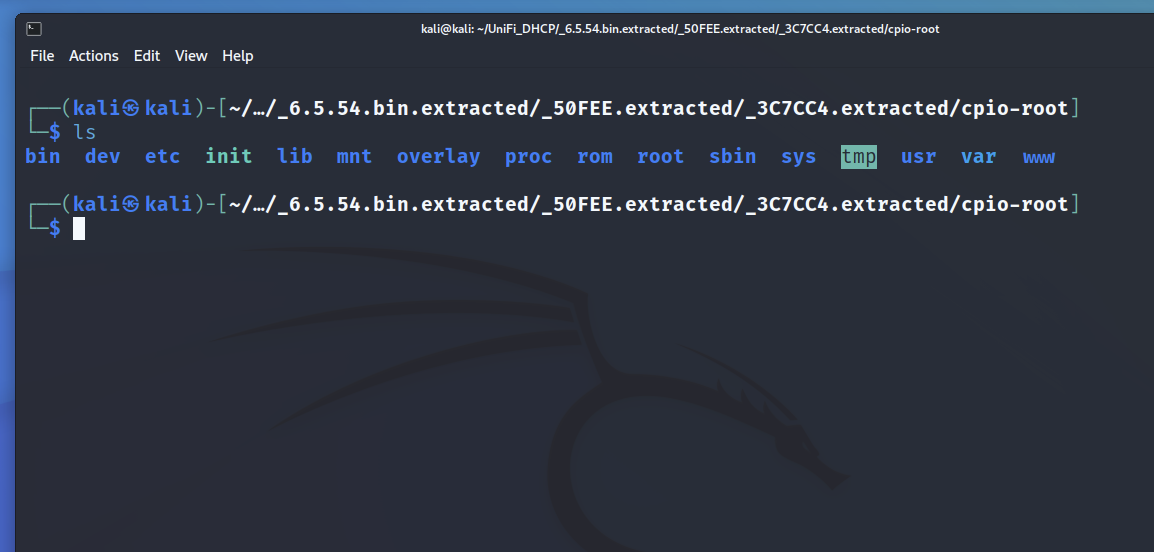
Acquire ubnt_ubvinfo from UDM

Before we can use remux, we need to setup a local copy of ubnt_ubvinfo.

You should be able to use the following scp command to copy the ubnt_ubvinfo or ubnt_ubvexport binary from the UniFi Protect appliance.

scp root@10.0.0.1:/usr/share/unifi-protect/app/node_modules/.bin/ubnt_ubvexport ./

To install on Intel or AMD CPU’s, check out the following section on the unifi-protect-remux page.

https://github.com/petergeneric/unifi-protect-remux#quick-start-for-x86-linux

As a side note, it looks like you can download an old x86 version of ubnt_ubvinfo from archive.org. Use at your own discretion.

wget https://archive.org/download/ubnt_ubvinfo/ubnt_ubvinfo

Install unifi-protect-remux

Install ffmpeg

apt install -y ffmpeg

or

dnf install -y ffmpeg

Now we can download and install remux.

wget https://github.com/petergeneric/unifi-protect-remux/releases/download/v3.0.6/remux-x86_64.tar.gz
tar zxf remux-x86_64.tar.gz
sudo mv remux /usr/bin/

Now we can remux the files.

remux --with-audio=true dst_directory/*.ubv

You will need to script a way to recursively loop through the directories, or just do it manually.

Links for setting up a custom SSL Certificate on a UniFi Cloud Key

Here are some links for setting up a custom SSL Certificate of a UniFi Cloud Key. Should be similar to do on a UDM, or other UniFi Controller.

https://community.ui.com/questions/How-to-install-a-SSL-Certificate-on-Unifi-Cloud-Key/944dbbd6-cbf6-4112-bff5-6b992fcbf2c4

https://community.spiceworks.com/how_to/128281-use-lets-encrypt-ssl-certs-with-unifi-cloud-key

https://www.ssldragon.com/how-to/install-ssl-certificate/unifi-cloud-key/

Find UniFi Network Cloud Inform URL

What is the format for the UniFi Network Cloud inform URL?

The format for the UniFi inform URL should be similar to the following

a38927b1-23aa-e95d-94b4-8394abce9302.unifi-hosting.ui.com

Now Where is the UniFi Cloud Inform Link?

The inform URL is supposed to be on the cloud console page. However, it appears that it doesn’t show the link if you are not Owner.

Web Development Tools to the rescue!

On the UniFi console page, click on “About this Console”

Open up the Web Tools, Click on the Network tab, make sure that you have the Domain column enabled.

Refresh the page.

Look for the Domain that matches the UniFi Cloud URL format.

Example: a38927b1-23aa-e95d-94b4-8394abce9302.unifi-hosting.ui.com

You can confirm this is the correct URL by browsing to it directly. It should redirect to your cloud instance.

Extra tip: If you are migrating from a UniFi Console (CloudKey, UDM, DreamMachine) to UniFi Cloud, you can restore a backup of your CloudKey (Or other console) and then use the Host Inform Override option (from CloudKey) to tell all the devices on the network to connect to the cloud instance. May need to reboot or force provision.

https://community.ui.com/questions/Unifi-Controller-Migration-Question/a49914df-f770-4c2d-a0e4-143d6314c9a4

Restart UniFi services on UDM

Mark manages the Ubiquiti UniFi applications at Incredigeek Inc. and is unable to access the UniFi controller. It starts loading and then stops. The URL bar shows that it is trying to load a null network site.

Thankfully the WiFi is still working, Mark thinks to himself, but how am I supposed to manage the network? I am able to access the UniFi Core application, so maybe I can login using a secure shell and check on the application.

ssh root@192.168.1.1

Once logged in, and after using the google, he finds that unifi-os restart will restart the UniFi applications. But I just need to restart the Network application. Running “unifi-os” –help reveals the following options.

# unifi-os --help
Usage: /usr/sbin/unifi-os [stop start restart shell 'update url']

Oh shell!

unifi-os shell

Alternatively, we know that on the UDM’s the UniFi Applications are run inside a Docker container. We could run “docker ps” to show the containers and then “docker exec -it unifi-os bash”

Now we can restart just the UniFi Network application.

systemctl restart unifi

It can take a little bit to restart.

UDM Pro Error Changing WAN IP Addresses

There appears to be a bug on the UDM Pro that you can encounter while trying to update your WAN IP addresses. The error was similar to “Can’t change IP Address “PublicIP” used in Default Network”

https://community.ui.com/questions/UDM-Pro-Cant-set-Static-IP-Address-on-WAN-interface/9f83c841-da1a-4b16-b963-c4be3ae3fbab?page=2

It appears that the issue stems from the Internet Source IP being used in the LAN Network settings.

The way to work around this is to disable the Internet Source IP. However, this is greyed out which keeps us from making any changes. We can however use the Chrome Developer tools to get around this restriction.

  • Enable the Legacy Interface. UniFi Network Settings -> System -> Legacy Interface
  • Go to Settings -> Networks -> Edit (Select Default Network)
  • Open up the Dev tools with Ctrl + Shift + i and select Console
  • Paste the following in and hit enter
$$('[disabled]').forEach( a => a.disabled=false )
Enable Internet Source IP on UDM Pro
  • Find “Internet Source IP”, Disable and Save!

Swap back to the new user interface and go change the WAN IP address.

List of UniFi SSH Commands

I found the following post that has a very comprehensive list of UniFi commands.

All Unifi SSH Commands that You Want to Know

Some of the most common ones that are used

Reset a device

set-default

or

syswrapper.sh restore-default

Reboot a device

reboot

Connect device to a controller

After you run this command, adopt it in the controller and then run the command again.

set-inform http://ip-of-controller:8080/inform

Also note that the above command does not seem to work over https.

Searching for devices in UniFi via command line / MongoDB

While the UniFi controller is nice and everything, it does make it hard to see if a device is already adopted. At least if you have a ton of sites. Fortunately, we can search the database directly to find out if a UniFi is already adopted and which site it is assigned to.

Connect to Mongo DB

First we need to connect to MongoDB. And then we need to use the ace database.

mongo -port 27117
use ace

List all the devices on the controller

This command will list all the devices on the controller. Regardless of which site they are assigned to.

db.device.find({}, { site_id:"", ip : "", name :"", mac:""})

Example output

{ "_id" : ObjectId("563a4d94e4b054e5376fc600"), "mac" : { "_id" : ObjectId("563a4d94e4b054e5376fc600"), "mac" : "44:d9:e7:34:d1:08", "ip" : "192.168.1.200", "name" : "Main_WiFi", "site_id" : "39485e9abf0e9a047bcded96" }
{ "_id" : ObjectId("9873b39ed1f5d30a6738abe"), "mac" : "44:d9:e7:01:a3:d4", "ip" : "192.168.1.201", "name" : "Testing_Wifi", "site_id" : "39485e9abf0e9a047bcded96" }

Each UniFi will have a “site_id”. You can use that ID to figure out which site it is assigned to.

List all the sites on the controller

db.site.find()

Example output

{ "_id" : ObjectId("39485e9abf0e9a047bcded96"), "name" : "default", "desc" : "Testing Site", "attr_hidden_id" : "default", "attr_no_delete" : true, "anonymous_id" : "83ae20ba-2948-458e-fd0a-1320583ecb04" }

Using our “site_id” from above, we see that the Testing_Wifi device is assigned to the “Testing Site” on the controller.

Something else to look at would be to use the UniFi controller API.

https://ubntwiki.com/products/software/unifi-controller/api

UniFi UNVR – Recover from Failed USB Drive

Some of the UniFi UNVR’s have system files on a USB drive. There seem to be a number of the drives failing recently, rendering the UNVR inoperable. Fortunately it is easy to replace. The following steps should preserve the video recordings.

https://community.ui.com/questions/UNVR-stopped-responding-just-white-flashing-light/a051f869-8349-4a2a-a72a-ce3a8aa8c759

Steps to recover UNVR

  1. Power off the UNVR
  2. Remove the USB drive (use a heat gun or screw driver to break the glue that is holding the USB drive)
  3. Install new USB drive
  4. Temporarily remove UNVR HDDs (this may not be necessary, but rather be safe then sorry.)
  5. Boot UNVR with new USB drive. (Give it a little time to format and copy contents to the new USB drive. Should not take more then 30 minutes.)
  6. Setup the UNVR like it was before
  7. Power off the UNVR again
  8. Reinstall the HDD’s
  9. Power on the UNVR
  10. Log in and reconfigure the users

Note on Recovery

You could potentially mount the failed or failing USB drive on a Linux machine copy off a UniFi backup. Unfortunately, the UniFi Protect backup does not preserve the users. Just the video groups. You will probably have to resend invites to users.

Note on the video storage drives

It sounds like the UniFi Protect system will try to read the drives and if it can preserve the data or read the raid information it will try to use that. That is what it sounds like at least from the forums. More info on drive management.

https://help.ui.com/hc/en-us/articles/360037340954-UniFi-Hard-drive-compatibility-and-management#h_01F8QE56P7EY1P9FMTZHFZD463

Change UniFi User Password from Command Line

  1. SSH into the UniFi server
  2. Connect to MongoDB
  3. Find user ObjectId
  4. Update user info with new Password

You will need a hash of the password to put into the database. We don’t cover that in this post. You could copy the password from a different user account or use a different UniFi instance to change the password and then check the DB to find the hash.

SSH into the UniFi Server

ssh unifiadmin@unifiserver

Connect to MongoDB

Connect to Mongo by typing in the following.

mongo -port 27117

Then select the ace database by typing

use ace

Find user ObjectId

The admins are in the admin collection/table. Use the following command to list all the users and their name, email, and password hash.

db.admin.find({ }, { name:"" , email : "", "x_shadow" : "" })

Update user info with new Password

The following looks complex. Fortunately though you should be able to copy and paste. You should only need to change the
– ObjectId to your User Id
– Password Hash to your password hash

db.admin.update({"_id" : ObjectId("223abc5489de0a93be758493")}, {$set: { "x_shadow" : "$6$nwpi7.q2$OuD9/UZGZt5cD739Dt7j8Gb1uPtfU99p0DeDSurSNBZVizieUrFVFbRufiZMgOk2IaaDZN9BVmL9yUwQ2mC8f."}});

Note: The hash above is password. Not recommended for use.

You should receive a confirmation that it succeeded. Test the new password by logging into the UniFi Controller.

For more MongoDB commands, check out this post.