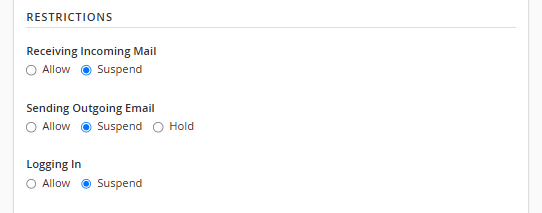
When you suspend an account in cPanel, the users password, in “/home/ACCOUNT/etc/DOMAIN.com/shadow”, gets two exclamation marks prepended to the password hash. This means that the hash of a password from a user trying to login will not match what is in the shadow file effectively blocking the login.
However, there is an option that allows an admin to sign into all email accounts for a domain. The option is in WHM and called “Mail authentication via domain owner password”. It is under “Tweak Settings -> Mail”.
If this option is enabled, then the admin, or an attacker that has compromised the admin password, can continue to login and send mail as a user.
A lot of email spam attacks appear to be automated. So if the admin password was weak and some hacker is using it to send spam, there is a good chance they don’t know it is the admin password. They just want to send out emails. Update the admin password, check and make sure the system is secure and monitor.
ℹ️Exim filters do not appear to allow you to manipulate the body of an email, to do that you would need to use something like altermime.
Steps
Create a new Exim Filter
Enable Filter
Create an Exim Filter
SSH to the server and create a Exim filter. In cPanel there are in /usr/local/cpanel/etc/exim/sysfilter/options/. You can name the filter what ever you want.
vi /usr/local/cpanel/etc/exim/sysfilter/options/external_email_warning
Change “incredigeek.com” to your domain name. You can also change “[External]” to whatever you want to be prepended to the subject.
if
  $header_to: contains "@incredigeek.com>"
  and $sender_address: does not contain "@incredigeek.com>"
  and $header_subject: does not contain "[External]"
then
  headers add "Old-Subject: $h_subject:"
  headers remove "Subject"
  headers add "Subject: [External] $h_old-subject"
  headers remove "Old-Subject"
endif
Save the file.
You can replace $sender_address with $header_from. While both can technically be forged, sender_address refers to the envelope sender provided by the SMTP MAIL FROM command and is harder to spoof if SPF is set up. header_from can be spoofed by just about any email client by change the from name.
Enable Custom Exim Filter
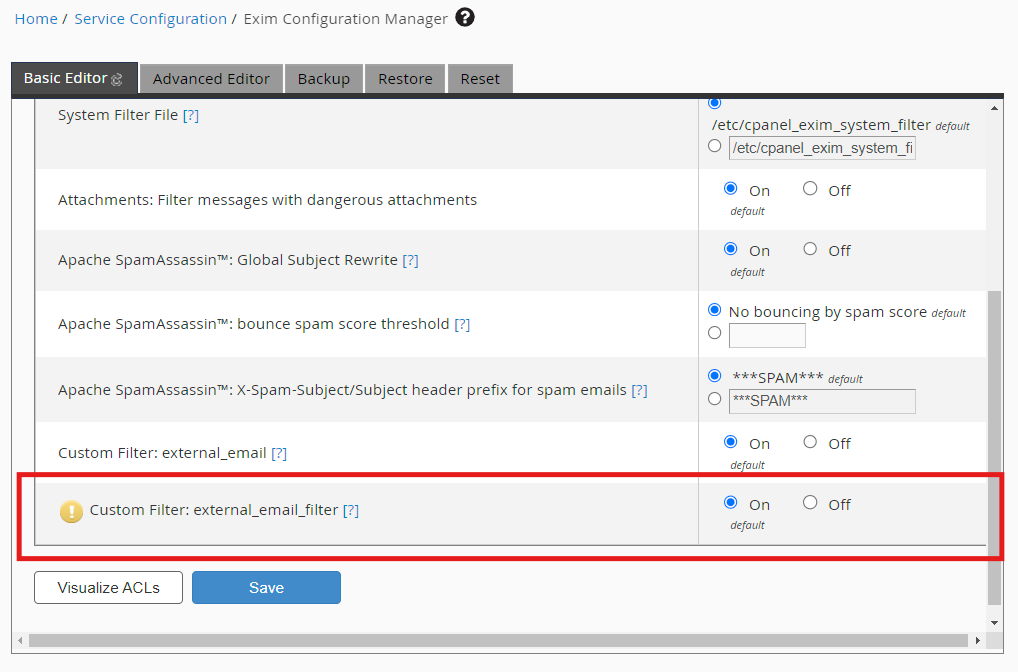
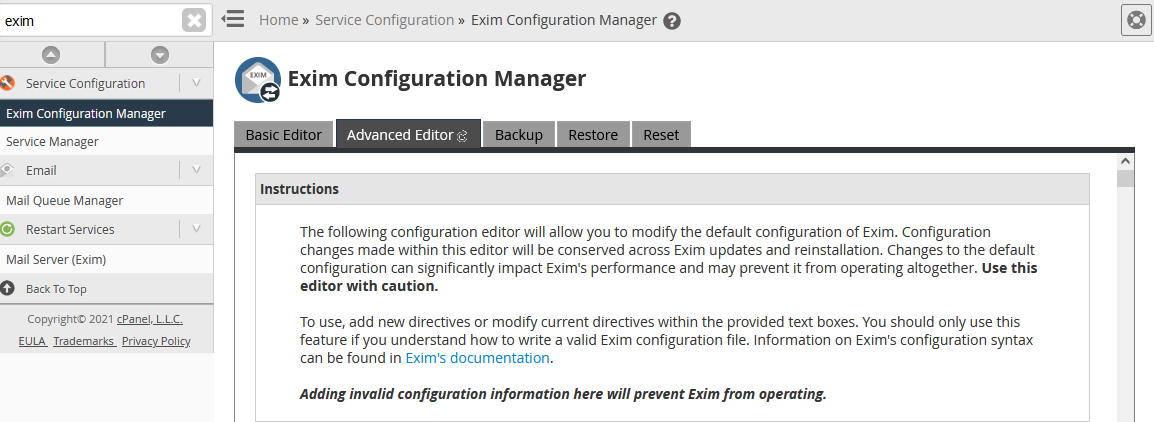
Now log into WHM, go to Service Configuration > Exim Configuration Manager > Basic Editor > Filters
At the bottom of the filters, you should see a new “Custom Filter: external_email_filter” This is the filter you just created. Make sure it is On, and Save changes.
There you go! Any email you receive now that is from an external domain should now have “[External]”, or whatever you specified, prepended to the subject.
If you run into any errors, try reviewing the panic log to see if there are any syntax errors.
Troubleshooting
You can use tail to follow the panic log to verify you have all the syntax correct.
Here are a few ways you can migrate emails without knowing the IMAP credentials.
Use the Admin Password.
Migrate emails using SFTP.
Import/Export using RoundCube?
Use the Admin Password
Some email services allow you to use the administrator password to sign into any email account. This allows you to move emails without knowing the users password.
You can refer to this FAQ on the imapsync website.
This option will only work if you have ftp/ssh/filesystem access. Depending on email volume, you could miss emails that arrive during the transition. If possible, it is recommended to use something like imapsync. There could be format issues if the two email servers use different mailbox formats and/or email server software.
Emails are usually stored in the users home directory. Depending on the hosting provider, it could be /mail or ~/mail
You can zip up the mail directory and then unzip on the target server. This would only work if you have access to the filesystem. Create your email accounts before unzipping.
You could transfer the passwd and shadow files to keep the email passwords the same. Again, create the email addresses on the target server first and then either overwrite, or merge the differences between the shadow and passwd files.
For example, on cPanel servers, the mail directory is in ~/mail and the shadow and passwd files are in ~/etc/DOMAIN.COM
If you are logged in as root, you will need to change ~/ to /home/USER/ substituting USER for the actual cPanel user.
Import/Export messages from RoundCube?
You can import and export emails using the RoundCube webmail interface. However, the export is limited to one. message. at. a. time. This could work for a handful of messages, but can get quite tedious if you have a large number of emails.
What do you do when your email server has been blacklisted and you are unable to send emails to certain domains? It’s best to be proactive and not get on the blacklists in the first place, but in the unfortunate event you do get blacklisted, here are some notes.
Checking Blacklists
First thing is we need to see which lists we are on. There are a couple of services that check multiple blacklists
Send an email to “abuse_rbl@abuse-att.net” with your Mail Server IP address, the domain and ask to be delisted. You should get an auto-reply and then they usually will do something about it in 24-48 hours
These are all fairly straight forward to check out. Some of them you will need to enter in an email, or maybe set up an account, others are as simple as requesting the IP to be delisted.
In this post, we will be using Node.JS and the nodemailer library to send email. We need to have an email account with an email provider to send email. Gmail or some other email provider should work.
Prerequisites
First lets install some tools
sudo apt install nodejs npm
Now lets install nodemailer
npm install nodemailer
Writing the Code to Send Email
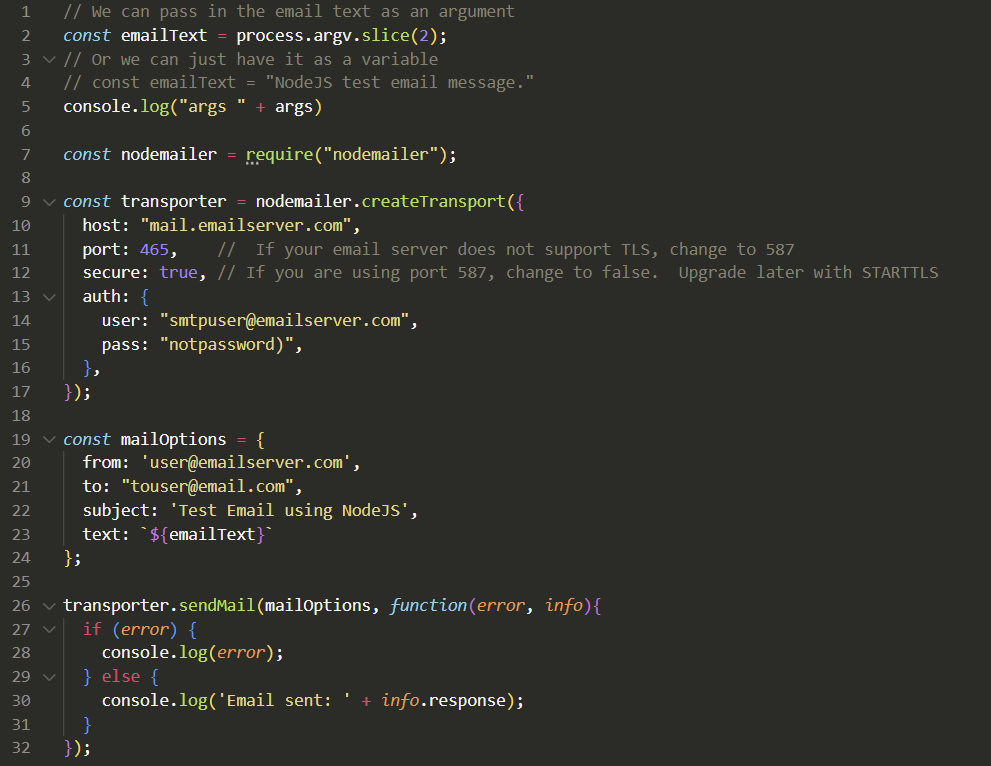
Now that we have nodemailer installed, we can write or copy our code. Create a file called maill.js and make it look similar to the following.
// We can pass in the email text as an argument
const emailText = process.argv.slice(2);
// Or we can just have it as a variable
// const emailText = "NodeJS test email message."
console.log("args " + args)

const nodemailer = require("nodemailer");

const transporter = nodemailer.createTransport({
  host: "mail.emailserver.com",
  port: 465,    //  If your email server does not support TLS, change to 587
  secure: true, // If you are using port 587, change to false.  Upgrade later with STARTTLS
  auth: {
    user: "smtpuser@emailserver.com",
    pass: "notpassword)",
  },
});

const mailOptions = {
  from: 'user@emailserver.com',
  to: "touser@email.com",
  subject: 'Test Email using NodeJS',
  text: `${emailText}`
};

transporter.sendMail(mailOptions, function(error, info){
  if (error) {
    console.log(error);
  } else {
    console.log('Email sent: ' + info.response);
  }
});
Update the following variables
host: to your host email server
user: to the email user that is sending email. It should have an account on the email server
pass: password for your email user that is sending the email
from: email address that is sending the email
to: email account(s) you are sending email to
subject: subject of your email
Now we can proceed to send email
Sending Email
We can now run the code by saving our file and running it directly with NodeJS
nodejs ./mail.js "This is the body text for the email"
Hit Return and look for the email. If something went wrong, it should throw an error.
You can change the emailText variable if you would rather have the message body inside the code.
Code Explanation and Notes
A little explanation on the code.
The second line “const emailText = process.argv.slice(2);” is used to pass in a command line argument to use as the text for the body of the email. You can delete the line and uncomment line 4 if you would rather use a variable inside the code.
Your email server should support using SSL/TLS on port 465. If it does not, you may need to use STARTTLS which uses port 587, and then set secure to false. STARTTLS should upgrade the connection to be encrypted. But it’s opportunistic. You can read more about STARTTLS, SSL/TLS here https://mailtrap.io/blog/starttls-ssl-tls/
You can change the “to: ” in the mailOptions object to an array of email addresses to send the email to multiple people at once.
to: ["email1@email.com", "email2@email.com", "etc"],
We’ll be using telnet to connect to a mail server and send ourselves an email.
The parts in bold are the commands to enter.
[bob@linux ~]$ telnet mail.website.com 25
Trying mail.website.com...
Connected to mail.website.com.
Escape character is '^]'.
220-mail.website.com ESMTP Exim 4.85 #2 Mon, 09 May 2022 22:12:59
220-We do not authorize the use of this system to transport unsolicited,
220 and/or bulk e-mail.
HELO domainto.sendfrom.com
250 mail.website.com Hello domainto.sendfrom.com [192.168.1.2]
MAIL FROM: <bob@incredigeek.com>
250 OK
RCPT TO: <bob@incredigeek.com>
250 Accepted
DATA
354 Enter message, ending with "." on a line by itself
Subject: Test MessageThis is a test.
250 OK id=5a1g7i-1347MT-1p
QUIT
221 mail.website.com closing connection
Connection closed by foreign host.
That should be everything that you need. Send a test email to an external email account to verify that it works.
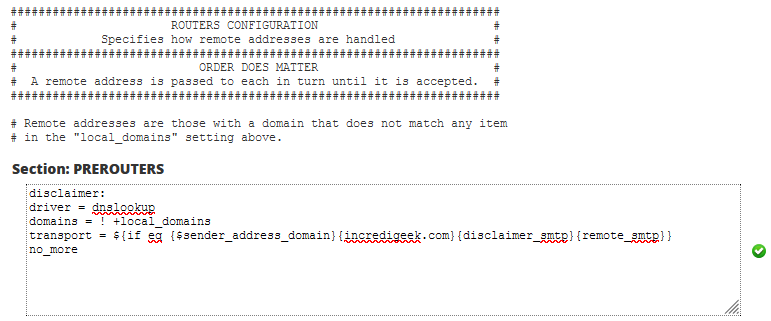
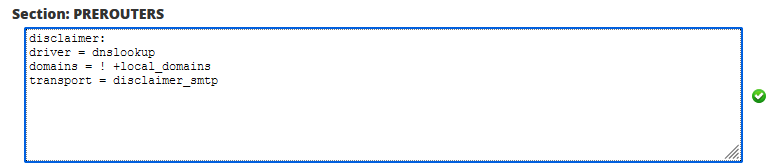
Note that it looks like sending an email locally to email addresses on the same domain or to yourself bypass the filter and do not get the disclaimer added.
The following links were helpful for getting this set up.
The first two “2, and 2,ab” mean that the message has not been read. The bottom 2 “2,S and s,Sab” mean that the message has been read or “seen?”. Guess that is what the S is for. Not sure what ab is for.