The goal for this script is to alert us if a remote site looses power. We can do this using a Mikrotik that has two PSUs. One is plugged into battery backup and the other in the non battery plug.
In this example, we are using PSU2 “number 8” We can find the number using
/system/health/print
We can now create a new scheduler entry with the following. Change out the number 8 to your PSU number, and change the webhook to your Teams webhook.
:local curState [system/health/get value-name=value  number=8]
:local name [/system/identity/get value-name=name]
:local webhook "https://teams.webhook.microsoft.com/webhook/more"

if ($curState != $lastState) do={
if ($curState = "ok") do={
/tool fetch http-method=post http-header-field="Content-Type: application/json" http-data="{\"text\": \"$name : Power is on.\"}" url="$webhook"
}
if ($curState != "ok") do={
/tool fetch http-method=post http-header-field="Content-Type: application/json" http-data="{\"text\": \"$name : Power is off.  On battery backup\"}" url="$webhook"
}
:global lastState $curState
}
Set to the appropriate interval (i.e. 5 minutes). The script will only alert once when the power state changes. This minimizes receiving an alert every 5 minutes while the power is off.
The purpose of these scripts is to update the local DHCP lease table with a remote IP Address Management (IPAM) system.
Scheduler Script
This little script is added to the scheduler and goes through the entire DHCP lease table and uploads each MAC address and IP address pair to a website.
Change out the top three variables. May also need to change out the URL depending on how the website receives data.
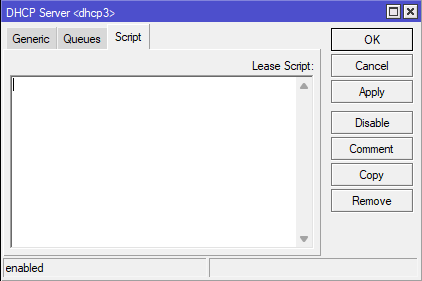
This script is to be used on the DHCP server script. Can add it by going to DHCP Server -> DHCP -> Double Click Server -> Script
Any time a new DHCP lease is obtained, this script is fired. Note that some of the variables like $leaseBound are specific to the script being used by the “DHCP server”
Also helpful to note that the script only runs if a new lease is obtained, or a lease expires and it disappears from the leases page. A DHCP renew does not trigger the script.
:local username "myapiuser"
:global password "myapipassword"
:global url "upload.incredigeek.com"

# The maximum retries
:local max 60
:local attempts 0
:local success 0
:do {
  :set attempts ($attempts+1);
  :if ($leaseBound = 0) do {
    :do {
      /tool fetch url="https://$url/api/v1/network/ipam/dynamic_ip_assignment?ip_address=$leaseActIP&mac_address=$leaseActMAC&expired=1" mode=https keep-result=no user=$username password=$password
      :set success 1;
    } on-error={
      :log error "DHCP FAILED to send unassignment to $url on attempt $attempts out of $max for $leaseActMAC / $leaseActIP";
      :delay 10s;
    }
  } else {
    :delay 1s;
    # see note below
    :local remoteID [/ip dhcp-server lease get [find where address=$leaseActIP] agent-remote-id];
    :do {
      /tool fetch url="https://$url/api/v1/network/ipam/dynamic_ip_assignment?ip_address=$leaseActIP&mac_address=$leaseActMAC&expired=0" mode=https keep-result=no user=$username password=$password
      :set success 1;
    } on-error={
      :log error "DHCP FAILED to send assignment to $url on attempt $attempts out of $max for $leaseActMAC / $leaseActIP";
      :delay 10s;
    }
  }
  :if ($success) do {
    :log info "DHCP lease message successfully sent $leaseActMAC / $leaseActIP to $url";
    :set attempts $max;  # break out of the do..while loop
  }
} while ( $attempts < $max )
}
With support for DES being dropped, you may be faced with having to upgrade device settings to AES. In this post we’ll explore changing the settings in LibreNMS for all Mikrotik devices and then touch on making changes to a group of Mikrotik devices.
Upgrading SNMP Settings for Devices in LibreNMS
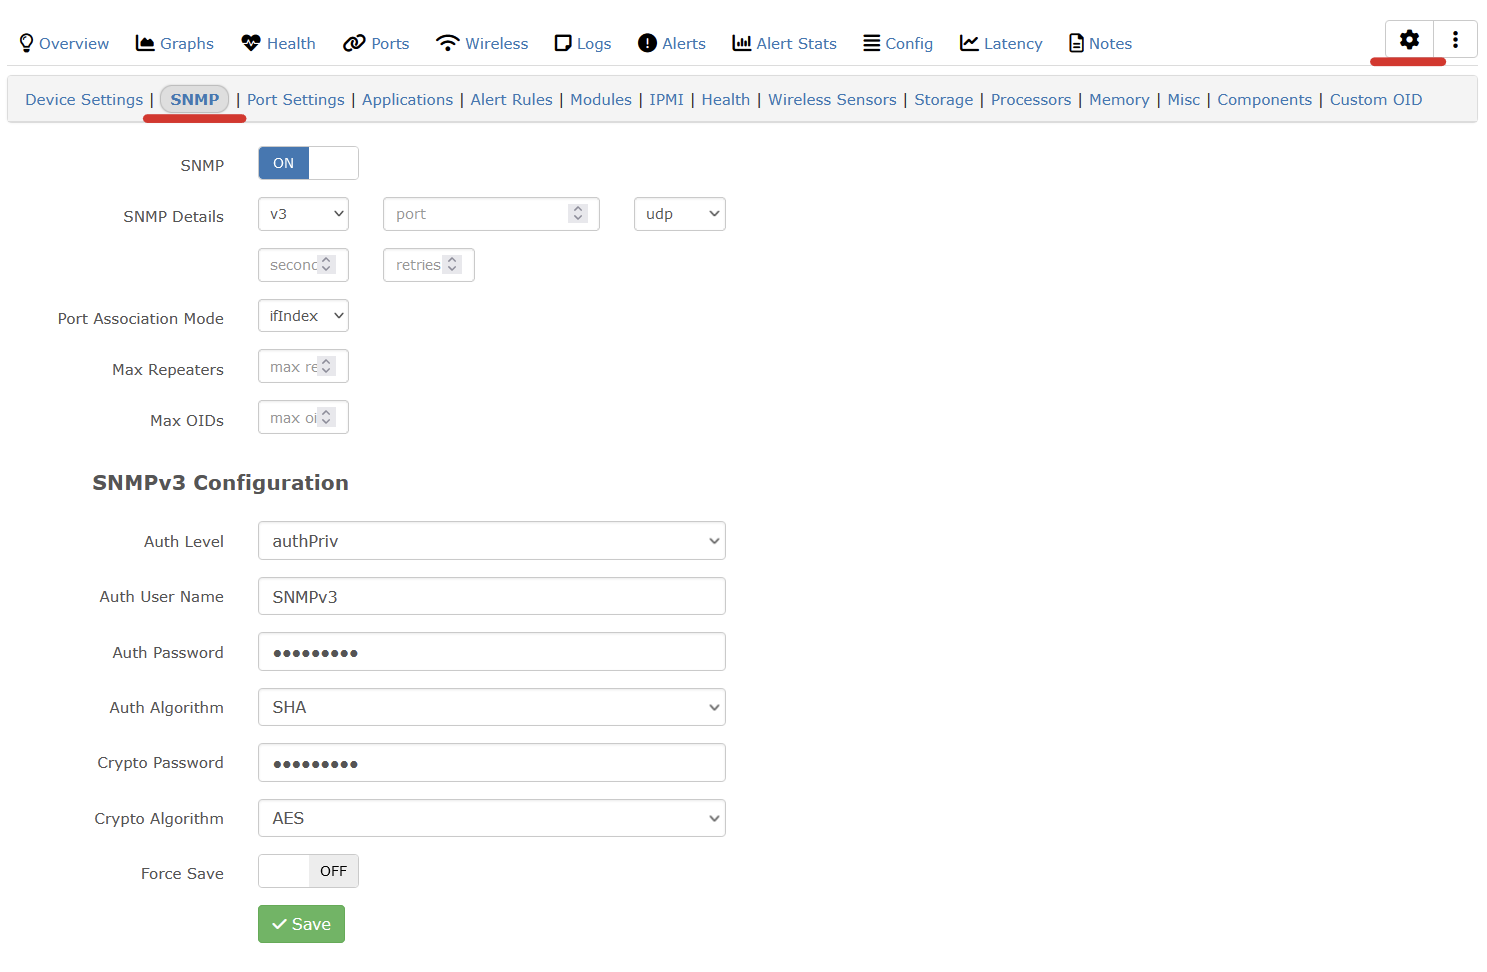
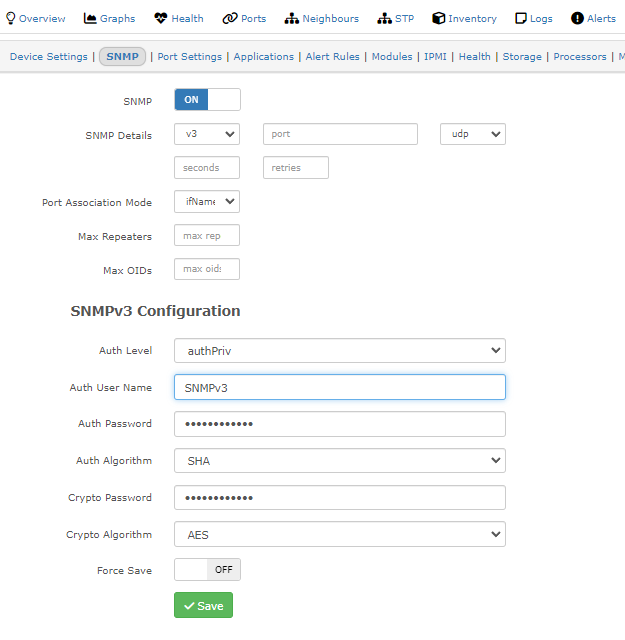
In LibreNMS, we can go to Device -> Device Settings (Gear on the right hand side) -> SNMP, to set the SNMP settings for that device.
Since this would get rather boring to change on multiple devices, and these settings are all in a MySQL database, we can skip using the mouse and use a few MySQL commands to update multiple devices at once.
Log into the LibreNMS server over ssh and then connect to the MySQL database
mysql -u librenms -p librenms
First we can get a list of all the devices (Mikrotik routers in this example) and show the hostname with the SNMP authentication and cryptography algorithms.
select hostname,authalgo,cryptoalgo from devices where os="routeros";
Now if we want to update the cryptography settings for all of our Mikorotik devices, we can do the following.
update devices cryptoalgo set cryptoalgo="AES" where os="routeros";
This will set all of the devices to use AES for the cryptography algorithm.
We can also change the authentication algorithm to SHA with this
update devices authalgo set authalgo="SHA" where os="routeros";
LibreNMS update device SNMP settings
Bulk updating of Network Devices
The bottom “script” can be used for changing SNMP settings on multiple Mikrotik devices.
Create a mikrotik.lst file with all the IP addresses of all the devices you need to update. Can you use the above MySQL commands to get a list from LibreNMS.
Change the following options in the script
routerpassword to the Mikrotik password
admin to your username
encryptionpassword to your SNMP encryption password
authpassword to your authentication password
addresses=192.168.0.0/16 to the list of IP addresses that should be able to access SNMP info on the mikrotik device. AKA your LibreNMS server.
SNMPname to your SNMP username
for ip in `cat mikrotik.lst`
do
echo $ip
timeout 15 sshpass -p 'routerpassword' ssh -o StrictHostKeyChecking=no admin@${ip} -p1022 '/snmp community set addresses=192.168.0.0/16 authentication-protocol=SHA1 authentication-password=authpassword encryption-protocol=AES encryption-password=encryptionpassword security=private read-access=yes write-access=no SNMPname'
done
Copy and paste the above “code” in a shell script file.
Most of the heavy lifting is done by the ubntmod.sh script. All you need is the IP addresses for the access points. The script will figure out the connected devices, reboot them first, then reboot the AP.
Here is a quick run down of the steps we need to perform.
Create list of AP’s and put them into an ap.lst file
Install ubntmod.sh script
Configure usernames and passwords to use with ubntmod.sh
Setup crontab to automatically run
Create list of AP’s and put them into an ap.lst file
This is really as simple as creating the ap.lst file and filling it with the access point IP addresses. One per line. The script uses wstalist to discover connected devices.
nano ap.lst
Install ubntmod.sh script
Installing the script is really hard. 2 lines to get setup.
Setup usernames and passwords to use with ubntmod.shd
When you first run ubntmod.sh without the -y option, it should prompt you to setup usernames and passwords to use. After this is setup, the script automatically reads from the config file for future use.
You can manually modify the ubntmod.conf file update any usernames or passwords.
The following command adds the ~/script_folder to our PATH paths. Once run, we’ll be able to call any script in the script folder like it was a system utility.
PATH="$HOME/script_folder/:$PATH"
If you would like to always be able to call any file in your scripts folder, add the above command to your ~/.bashrc file.
You may need to restart your session for it to work.
Sometimes it is nice to have a list of just the IP addresses and the hostname or mac address. Can be especially helpful when you are trying to get a list of devices to do a bulk update in LibreNMS. Helpful LibreNMS links for renaming and showing down devices
we are going to run the command to pull the DHCP information and then use Unix utilities to parse the data out.
Replace dhcp8 with the correct dhcp server in the mikrotik.
First, SSH into your Mikrotik router.
ssh user@mikrotik
Next we’ll want to go to the ip dhcp-server lease directory
/ip dhcp-server lease
Now we can run the following command to loop through and pull out all the info we need. You can change the info like “mac-address” for something like “status”. You can use Tab to see what options are available. Just delete mac-address and hit tab twice.
This is a very simple ping script I created to run on a remote UniFi device to scan for other IP addresses on it’s network. It works on SH environments as well as Bash.
Paste the script in a ping.sh file and then
chmod +x ping.sh
run like so, replacing 192.168.1. with the IP range you want to scan.
sh ping.sh 192.168.1.
#!/bin/sh
# simple ping scan utility

# i.e. 192.168.0.
ipFirstPart=$1

ip=0
while [ $ip -ne 255 ]
do
  ip=$(($ip+1))
  ping -w1 $ipFirstPart${ip} | grep "64 bytes from"
done
You should be able to copy and paste the following in a backup.sh file and then execute from cron. Should work out of the box, but you can change the backup directory and the teams.sh path if needed/wanted.
#!/bin/bash

# LibreNMS backup script
# Jan 1, 2019

lDate=`date +%Y%m%d-%H%M`       # local date + hour minute
dDate=`date +%Y%m%d`            # todays date

# If you have the teams.sh script, you can trigger a backup notification
ALERT="/home/admin/teams.sh -b"

# Directory to backup to
bDir="/backup"
bName="librenms_backup"

# MySQL settings for tar and sqldump
sqlDir="/var/lib/mysql"
sqlDB="librenms"
sqlUN="root"
sqlPW=""
LOG="${bDir}/${lDate}-${bName}.log"

# Directory that contains data
dDir="/opt/librenms"

# tar LibreNMS dir
# tar SQL dir "the whole thing with the innode files
# sql dump of the db for extra redundancy

if [ -d ${bDir} ]; then
echo "backup dir exist, starting to backup"
else
        echo "backup dir not available.  Quiting"
        exit 1
fi

${ALERT} "Starting backup for ${bName} - `date`"

systemctl stop mariadb httpd
# LibreNMS data backup
tar -zcvf ${bDir}/${lDate}-${bName}.tgz ${dDir}
if [ $? -eq 0 ]; then
        echo "Tar succesfully backed up ${bDir}"
else
        echo "Tar failed while trying to backup ${dDir}"
        echo " ${lDate} - Tar failed while trying to backup ${dDir}" >> ${LOG}
        ${ALERT} "${lDate} - Tar failed while trying to backup ${dDir}"
fi

# MySQL data backup
tar -zcvf ${bDir}/${lDate}-${bName}-mysql.tgz ${sqlDir}
if [ $? -eq 0 ]; then
        echo "Tar succesfully backed up ${sqlDir}"
else
        echo "Tar failed while trying to backup ${sqlDir}"
        echo " ${lDate} - Tar failed while trying to backup ${sqlDir}" >> ${LOG}
        ${ALERT} "${lDate} - Tar failed while trying to backup ${sqlDir}"
fi

systemctl start mariadb httpd
sleep 5

 # SQL dump
mysqldump -u ${sqlUN} -p'4rfvBHU8!' ${sqlDB} > ${bDir}/${lDate}-${bName}.sql
if [ $? -eq 0 ]; then
        echo "MySQL DB dumped"
else
        echo "Ran into error while doing sql dump"
        echo "${lDate} - Ran into error while doing sql dump" >> ${LOG}
        ${ALERT} "${lDate} - Ran into error while doing sql dump"
fi

echo "Removing old backups"
if ( ls ${bDir} | grep -q ${dDate} );then
        find ${bDir}/* -prune -mtime +31 -exec rm {} \;
else
        echo "Looks like there are no backup files!  Aborting!!!"
        ${ALERT} "${lDate} - Error: find failed to find any backup files in backup dir.  Aborting!!!"
fi

${ALERT} "Finished backup for ${bName} - `date`"
Move all the VLANs under ether7 to ether6. Instead of an “=” sign, you can use a “~” to do a partial match.
foreach i in=[/interface vlan find where interface="ether7"] do={interface vlan set interface=ether6-master-local $i }
Move IP address to new port programmatically
Move ip address from ether6 to ether7. Change 192.168.88.1/24 to the address and the find command will find it regardless of the port and assign it to ether6 or whichever port is specified.
ip address set interface=ether6-master-local [find address="192.168.88.1/24"]
Using Delay
You can add a delay before a command runs by specifying delay and then the time to wait.
delay 60
Use the ; to separate commands. Example below, wait 5 seconds then print the ip addresses.
delay 5 ; ip address print
Putting it all together
The following command/s will wait 60 seconds then move all the VLANs on ether7 to ether6 and then move the 192.168.88.1/24 address to ether6.
delay 60 ; foreach i in=[/interface vlan find where interface="ether7"] do={interface vlan set interface=ether6-master-local $i } ; ip address set interface=ether6-master-local [find address="192.168.88.1/24"]