Ansible Playbook for Updating Linux (Debian/Ubuntu)

Video on using Ansible to Update Linux

The three steps to update a machine with Ansible

  1. Create Ansible Inventory/Hosts file
  2. Create Playbook
  3. Run Playbook

Create Inventory

The first thing we need to do is create an inventory file. This will contain a list of our servers along with the credentials.

touch hosts.txt

Now let’s encrypt the file with Ansible Vault.

ansible-vault encrypt hosts.txt

The file is now encrypted. To edit the file, we need to use `ansible-vault edit`.
If you want to, you can configure the hosts.txt file and then encrypt it when you are finished.

ansible-vault edit hosts.txt

Now add some hosts. In this example we add the local Kali machine, because why not. If you have Ubuntu servers, replace debian with ubuntu.

[debian]
kali ansible_host=127.0.0.1 ansible_ssh_user=kali ansible_ssh_port=22 ansible_ssh_password='kali pass' ansible_become_pass='kali sudo pass'

Add as many hosts as you need. For sake of simplicity, we are only adding one, and it is our localhost.

Create Playbook

Create a new playbook.

vi debian_update.yml

Put the following into the playbook. Edit as desired. Change hosts to match the above hosts in the inventory/hosts file.

---
- name: OS update
  hosts: debian
  gather_facts: yes
  become: yes

  tasks:
    - name: dist-upgrade
      ansible.builtin.apt:
        upgrade: dist
        update_cache: yes
      register: upgrade_result

    - name: Check if a reboot is required
      ansible.builtin.stat:
        path: /var/run/reboot-required
        get_checksum: no
      register: reboot_required_file

    - name: Reboot the server (if required).
      ansible.builtin.reboot:
      when: reboot_required_file.stat.exists
      register: reboot_result

    - name: Remove unneeded dependencies
      ansible.builtin.apt:
        autoremove: yes
      register: autoremove_result

    - name: Print errors if upgrade failed
      ansible.builtin.debug:
        msg: |
          Upgrade Result: {{ upgrade_result }}
          Reboot Result: {{ reboot_result }}
          Autoremove Result: {{ autoremove_result }}

A couple of notes

  1. On the 3rd line it defines which group to run this playbook against. In this case debian.
  2. This will check if a reboot is needed and reboot the machine. Reboots are usually needed when the kernel is updated
  3. The 5th line contains `become: yes` this means that the playbook will use sudo. You can specify the sudo password in the hosts file `ansible_become_pass=sudopass` or with the -k or –ask-become options
  4. The update and reboot are natively built into Ansible. Hence the ansible.builtin.
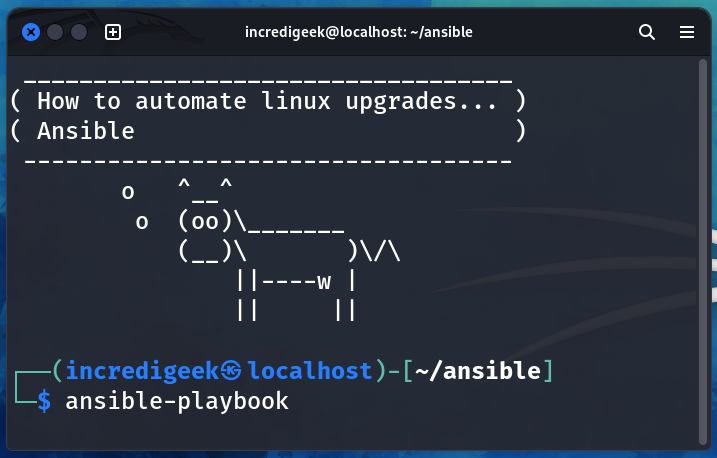
Run Playbook

Now that we have our inventory and playbook, we can upgrade our machines.

ansible-playbook debian_update.yml -i hosts.ini --ask-vault-password

Tip! If you have not specified a “ansible_ask_become” password (that is the sudo password), you can specify it with the -k or –ask-become options.

How To Check if RHEL/AlmaLinux needs a reboot after an update

Typically you’ll need to reboot a server after an update if the Linux Kernel was updated. It is possible that services need to be restarted.

There is some good information here https://serverfault.com/questions/122178/how-can-i-check-from-the-command-line-if-a-reboot-is-required-on-rhel-or-centos

Using Yum Utilities needs-restarting

Install the needs-restarting utility

sudo dnf install -y yum-utils

Once installed, we can check if we need to reboot with

sudo needs-restarting -r

The -r option only reports if a reboot is required.

If we wanted to automatically check and reboot, we could do

sudo needs-restarting -r || sudo shutdown -r

Alternative way

We could alternatively just check the kernel version and if it is different, manually reboot the machine. Note that there could be a couple cases where the kernel didn’t update, but you still need a reboot, or services needed to be restarted View links below for more information.

LAST_KERNEL=$(rpm -q --last kernel | perl -pe 's/^kernel-(\S+).*/$1/' | head -1)
CURRENT_KERNEL=$(uname -r)

test $LAST_KERNEL = $CURRENT_KERNEL || shutdown -r

How to determine if Ubuntu Needs a Reboot after an update

Typically after a Linux Kernel update, you will want to reboot your machine to take advantage of the new kernel. But how do you know if you need to reboot?

Fortunately, there is a simple way to check.

cat /var/run/reboot-required

If it returns

*** System restart required ***

Then we should reboot the machine.

https://www.cyberciti.biz/faq/how-to-find-out-if-my-ubuntudebian-linux-server-needs-a-reboot/

Bulk Update SNMP v3 Settings for Devices in LibreNMS

With support for DES being dropped, you may be faced with having to upgrade device settings to AES. In this post we’ll explore changing the settings in LibreNMS for all Mikrotik devices and then touch on making changes to a group of Mikrotik devices.

Upgrading SNMP Settings for Devices in LibreNMS

In LibreNMS, we can go to Device -> Device Settings (Gear on the right hand side) -> SNMP, to set the SNMP settings for that device.

Since this would get rather boring to change on multiple devices, and these settings are all in a MySQL database, we can skip using the mouse and use a few MySQL commands to update multiple devices at once.

Log into the LibreNMS server over ssh and then connect to the MySQL database

mysql -u librenms -p librenms

First we can get a list of all the devices (Mikrotik routers in this example) and show the hostname with the SNMP authentication and cryptography algorithms.

select hostname,authalgo,cryptoalgo from devices where os="routeros";

Now if we want to update the cryptography settings for all of our Mikorotik devices, we can do the following.

update devices cryptoalgo set cryptoalgo="AES"  where os="routeros";

This will set all of the devices to use AES for the cryptography algorithm.

We can also change the authentication algorithm to SHA with this

update devices authalgo set authalgo="SHA"  where os="routeros";
LibreNMS update device SNMP settings

Bulk updating of Network Devices

The bottom “script” can be used for changing SNMP settings on multiple Mikrotik devices.

Create a mikrotik.lst file with all the IP addresses of all the devices you need to update. Can you use the above MySQL commands to get a list from LibreNMS.

Change the following options in the script

  • routerpassword to the Mikrotik password
  • admin to your username
  • encryptionpassword to your SNMP encryption password
  • authpassword to your authentication password
  • addresses=192.168.0.0/16 to the list of IP addresses that should be able to access SNMP info on the mikrotik device. AKA your LibreNMS server.
  • SNMPname to your SNMP username
for ip in `cat mikrotik.lst` 
do 
echo $ip 
timeout 15 sshpass -p 'routerpassword' ssh -o StrictHostKeyChecking=no admin@${ip} -p1022 '/snmp community set addresses=192.168.0.0/16 authentication-protocol=SHA1 authentication-password=authpassword encryption-protocol=AES encryption-password=encryptionpassword security=private read-access=yes write-access=no SNMPname'
done

Copy and paste the above “code” in a shell script file.

nano mikrotik.sh
chmod +x mikrotik.sh 
./mikrotik.sh

The script should run and update all the SNMP settings on all the devices in mikrotik.lst

Enable Automatic Update for Ubuntu Server 22.04

These steps should work for multiple versions of Ubuntu Server.

Thankfully enabling automatic updates in Ubuntu is super easy.

First make sure that the “unattended-upgrades” package is installed

sudo apt install unattended-upgrades

It was already installed on my Ubuntu 20.04 server instance.
Next run dpkg to reconfigure and enable updates

sudo dpkg-reconfigure unattended-upgrades

You should get the following prompt.

Configuring automatic updates

Hit “Yes” to enable.

Your system should now automatically install updates. however, if it needs to reboot it may not. You can configure the reboot options in

sudo vi /etc/apt/apt.conf.d/50unattended-upgrades

Scroll down to the Reboot lines and uncomment

// Automatically reboot *WITHOUT CONFIRMATION* if
//  the file /var/run/reboot-required is found after the upgrade
Unattended-Upgrade::Automatic-Reboot "true";  // <- Uncomment line

// If automatic reboot is enabled and needed, reboot at the specific
// time instead of immediately
// Default: "now"
Unattended-Upgrade::Automatic-Reboot-Time "02:00";  // <- Uncomment line

Save the file. Your system should now automatically install stable updates.

Disable automatic update

You can disable the automatic updates by running the dpkg command again.

sudo dpkg-reconfigure unattended-upgrades

and selecting “No”

Automatic updates should now be off.

More information can be found at the following link.

https://www.cyberciti.biz/faq/set-up-automatic-unattended-updates-for-ubuntu-20-04/

I deleted apt on Ubuntu, now what?

Apparently if you do

apt purge ubuntu*

You’ll end up deleting apt. Which is a bummer, because you can’t install anything else, or fix the problem. But not to worry, the resolution is fairly easy.

You can go download the apt deb from Ubuntu’s website and install it with dpkg.

Go to the following link and find the packages for your Ubuntu version

https://packages.ubuntu.com/

You’ll need to show “All packages” at the bottom of the page.

https://packages.ubuntu.com/xenial/allpackages

Download and install ubuntu-keyring, apt-transport-https, and apt packages. Example below

wget security.ubuntu.com/ubuntu/pool/main/a/apt/apt_1.6.6ubuntu0.1_amd64.deb
wget security.ubuntu.com/ubuntu/pool/main/a/apt/apt-transport-https_1.2.29ubuntu0.1_amd64.deb
wget mirrors.kernel.org/ubuntu/pool/main/u/ubuntu-keyring/ubuntu-keyring_2012.05.19_all.deb

Install Packages

sudo dpkg -i ubuntu-keyring_2012.05.19_all.deb
sudo dpkg -i apt-transport-https_1.2.29ubuntu0.1_amd64.deb
sudo dpkg -i apt_1.6.6ubuntu0.1_amd64.deb

Run apt and make sure it is all working

sudo apt update && sudo apt upgrade

Update FreeBSD 7.2

The freebsd-update command can be used to update a FreeBSD system

https://www.freebsd.org/doc/handbook/updating-upgrading-freebsdupdate.html

freebsd-update 
usage: freebsd-update [options] command … [path] 
Options:
   -b basedir   -- Operate on a system mounted at basedir
                   (default: /)
   -d workdir   -- Store working files in workdir
                   (default: /var/db/freebsd-update/)
   -f conffile  -- Read configuration options from conffile
                   (default: /etc/freebsd-update.conf)
   -k KEY       -- Trust an RSA key with SHA256 hash of KEY
   -r release   -- Target for upgrade (e.g., 6.2-RELEASE)
   -s server    -- Server from which to fetch updates
                   (default: update.FreeBSD.org)
   -t address   -- Mail output of cron command, if any, to address
                   (default: root)
Commands:
   fetch        -- Fetch updates from server
   cron         -- Sleep rand(3600) seconds, fetch updates, and send an
                   email if updates were found
   upgrade      -- Fetch upgrades to FreeBSD version specified via -r option
   install      -- Install downloaded updates or upgrades
   rollback     -- Uninstall most recently installed updates
   IDS          -- Compare the system against an index of "known good" files.

To get the updates do

freebsd-update fetch

Let it run and download the updates, then run

freebsd-update install

Should say it is installing updates. Then done.

LineageOS Updater crashing when trying to install update

The LineageOS Updater downloads updates fine, but crashes as soon as you hit Install.

Looks like there may be a bug that has something to do with an update that it already downloaded and installed, but waiting on the device to reboot.

Reboot the device to resolve the issue.

Other things to try would include deleting and redownloading the update and/or trying a different update.