You may encounter the following error when SSHing to legacy systems.
Bad server host key: Invalid key length
This happens due to older devices not using a larger key size.
A work around is to add an exception in your SSH config file allowing a smaller key size for specific hosts.
You can do this by adding the following to your ~/.ssh/config file. Change the IP addresses to the hosts you are trying to connect to. You can add more IPs if needed. Just ensure there is a space between them.
Error Summary
-------------
Disk Requirements:
   At least 28MB more space needed on the /boot filesystem.
The above error is due to the /boot partition being out of space. We can fix this issue by removing older unused Linux kernels. You could also increase the disk space, but that is a little more involved.
First we need to list which kernels we have installed.
Bob has a computer running Fedora. When he installed Fedora he didn’t setup the root password and locked the root account. That is best practice. Right? Then one day he goes to upgrade to the latest version of Fedora and types in
sudo dnf update
and is greeted with
sudoers. This incident will be reported.
What happened? I had access before? Bob thinks to himself. Seems like I am not in the wheel group anymore. Bob being a smart person decides to attempt recovery mode. He’ll boot up and just readd his user to the wheel group.
Recovery mode starts up and then fails due to the root account being locked. What?!
Bob then starts talking to himself as he is in need of some expert advice. What other options do I have. I know! He runs to find his handy dandy Live Fedora pen drive. Plugs it in and boots up into a live version of Fedora. Now I can mount and access the main drive.
But wait, I can’t run “usermod -G wheel bob” because that will only affect the Live System. I could chroot into the drive. That would require mounting some extra mount points. Is there a faster way? We could maybe edit the /etc/group and add “wheel:x:10:bob”. That should add bob back to the wheel group. Right?
Wait, what about the sudoers file. We are normally supposed to use “sudo visudo” command to modify the file. Let’s check the file and see if we can just manually edit it.
$ stat -c "%n %a" /etc/sudoers
/etc/sudoers 440
$
Permissions on /etc/sudoers file
Hmm, okay I am going to need to change permissions to save the file. Let’s chmod that to 644 temporarily
$ sudo chmod 644 /etc/sudoers
Alright now I should be able to edit it.
$ sudo vi /etc/sudoers
Okay, now I need to explicitly give myself permission to use sudo. Where is that line. Ah-ha!
root ALL=(ALL) ALL
Lets duplicate that with yy and p, replace root with my username.
root    ALL=(ALL)       ALL
bob     ALL=(ALL)       ALL
Save that with esc then :wq enter
Now change the file permissions back
sudo chmod 400 /etc/sudoers
Reboot the system and now lets login and test sudo.
$ sudo whoami
root
Success!
Bob, satisfied that the problem is resolved, rewards himself by getting a sandwich.
Formatting an unformated “phone” number using sed.
There may be a different and easier way to do this, but the main thing to learn here is the ^, $, and [[:digit:]] options.
^ refers to the first part of a line & which is our searched for pattern $ refers to an end part of the line [[:digit:]] searches for, you guessed it. Digits!
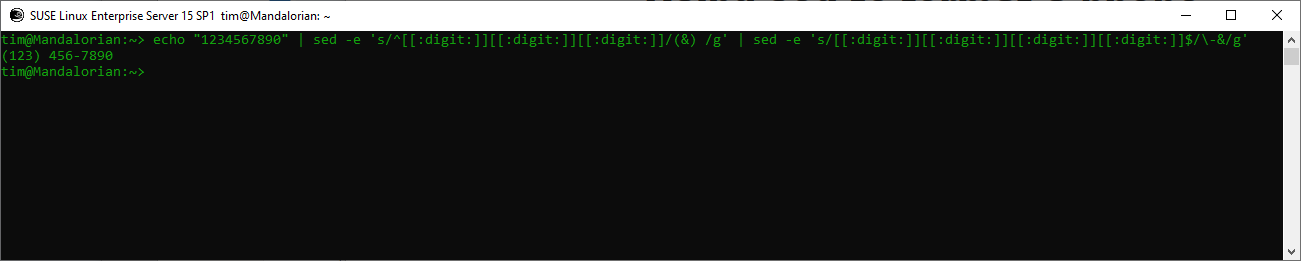
The following command reads the incoming 10 digit number form echo and does the following.
the ^ tells it that the pattern needs to match at the beginning of the line [[:digit:]] repeated tells it to search for three consecutive digits (&) tells it to put brackets around the & which is our searched for pattern in the first part. We then pipe that to another sed command which searches for 4 consecutive digits the $ tells it that it needs to be at the end of the line.
echo "1234567890" | sed -e 's/^[[:digit:]][[:digit:]][[:digit:]]/(&) /g' | sed -e 's/[[:digit:]][[:digit:]][[:digit:]][[:digit:]]$/-&/g'
Resulting output is
(123) 456-7890
The following link was helpful while searching what the ^ and $ options do.
Screen is a handy tool that can help you run scripts on servers remotely without having to worry about the session getting terminated. It seems to operate kinda like a virtual console.
Create Screen Session
Create a new session with a specified name
screen -S SessionName
Example output below. Create session named testsession and print screen sessions.
[bob@localhost imapsync]$ screen -S testsession
[bob@localhost imapsync]$ screen -ls
There are screens on:
3313.testsession (Attached)
1 Sockets in /var/run/screen/S-bob.
[bob@localhost imapsync]$
Disconnect from Screen Session
You can disconnect from a screen session by hitting ctrl + a and then ctrl +d
“ctrl + a” then “ctrl + d”
List Screen Sessions
You can list the screen sessions with
screen -ls
Example
[bob@localhost imapsync]$ screen -ls
There are screens on:
3212.testsession (Detached)
2556.xap (Detached)

2 Sockets in /var/run/screen/S-bob.
[bob@localhost imapsync]$
Connect to screen Session
You can reconnect to a screen session with
screen -r testsession
Terminate Screen Session
To terminate a screen session, connect to that session and then on a clear line hit ctrl + d
Same way as if you were closing a remote ssh connection.
#!/bin/bash
array=(one two three)
echo "Printing first object in array."  #Replace 0 with the place number of the array item
echo ${array[0]}

echo ""

echo "Whole array"
echo ${array[*]}

echo ""

echo "Array indexes"
echo ${!array[*]}
Output
Printing first object in array.
one

Whole array
one two three

Array indexes
0 1 2