If you receive the following error,
The media resource indicated by the src attribute or assigned media provider object was not suitable.
It could be because your media file is not supported. Try converting your audio file to a different format.

If you receive the following error,
The media resource indicated by the src attribute or assigned media provider object was not suitable.
It could be because your media file is not supported. Try converting your audio file to a different format.
The Spread and Rest operators i.e. the three dots (…) can be used to make code cleaner and more concise.
Difference between Spread and Rest
Spread: Works on elements on the right side of the = operator, and breaks them out into individual elements.
Rest: Works on the left hand side of the = operator, and compresses them into an array.
Spread works on iterables like strings, arrays, maps and sets.
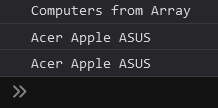
The spread operator operates similar to taking all the elements out of an array and operating on them or writing them to a new array. Say for instance we have an array of computers and we want to log each element to the console.
const computersA = ['Acer', 'Apple', 'ASUS']We can log each element by running
console.log(computersA[0], computersA[1], computersA[2])Or we can use the spread operator
console.log(...computersA)The output is the same.
We can also use the spread operator to join two arrays together. Say we have two arrays
const computersA = ['Acer', 'Apple', 'ASUS']
const computersB = ['HP', 'Dell', 'Lenovo']
And we want to concatenate them together. We can do that simply by
const computerAll = [...computersA, ...computersB]Rest is simply the opposite of spread. Spread take an item like an array and expands it out into elements we can use. Rest takes elements and packs them into an array. This can be extremely helpful if we want to pass in an unknown amount of elements into a function for processing.
const computersA = ['Acer', 'Apple', 'ASUS']function writeToLog (...arr) {
for (const element of arr) {
console.log(element)
}
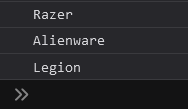
}Now we can call the function with as many elements in the array and they will all get logged to the console.
writeToLog('Razer', 'Alienware', 'Legion')We could also use both the Spread and Rest functions
const gamingLaptops = ['Razer', 'Alienware', 'Legion']
writeToLog(...gamingLaptops)
Now as we add more laptops to the gamingLaptops array, the function will automatically process the line and write to console.
https://www.freecodecamp.org/news/three-dots-operator-in-javascript/
Imagine we have a page that has anywhere from 1 to 100 floating blocks. Now what if I want the block(s) to disappear if it runs into another type of block or a boarder? How would we do that?
First lets get a list of all elements with X and Y class. We could swap one of these classes out for an ID if we wanted to.
const elements1 = document.querySelectorAll('.boxes')
const elements2 = document.querySelectorAll('.borders')
The variable elements1 and 2 are both arrays of all the elements that have class .boxes and boarders.
Now lets create a function to detect a collision.
function detectCollision(class1, class2) {
  for (let i = 0; i < class1.length; i++) {
    const e1Rectangle = class1[i].getBoundingClientRect()
    for (let i2 = 0; i2 < e2.length; i2++) {
      const e2Rectangle = class2[i2].getBoundingClientRect()
      if (
        e1Rectangle.left < e2Rectangle.right &&
        e1Rectangle.right > e2Rectangle.left &&
        e1Rectangle.top < e2Rectangle.bottom &&
        e1Rectangle.bottom > e2Rectangle.top
      ) {
        destroyElement(class1[i])
        destroyElement(class1[i2])
      }
    }
  }
}
This function takes two arrays as inputs, loops over each array object and compares to see if any are overlapping. If they are overlapping, run the destroyElement() function for those two specific elements.
Create the destroyElement function with
 function destroyElement(element) {
  elementId.parentNode.removeChild(elementId)
}
Here is our full code
const elements1 = document.querySelectorAll('.boxes')
const elements2 = document.querySelectorAll('.borders')

function detectCollision (class1, class2) {
  for (let i = 0; i < class1.length; i++) {
    const e1Rectangle = class1[i].getBoundingClientRect()
    for (let i2 = 0; i2 < e2.length; i2++) {
      const e2Rectangle = class2[i2].getBoundingClientRect()
      if (
        e1Rectangle.left < e2Rectangle.right &&
        e1Rectangle.right > e2Rectangle.left &&
        e1Rectangle.top < e2Rectangle.bottom &&
        e1Rectangle.bottom > e2Rectangle.top
      ) {
        destroyElement(class1[i])
        destroyElement(class1[i2])
      }
    }
  }
}

// Element is element[arraynumber].etc
function destroyElement(element) {
  elementId.parentNode.removeChild(elementId)
}

// Every second, let's run our collision function to check for collisions
setInterval(function () {
   detectCollision(elements1, elements2)
}, 1000)Here are some very basic notes on using buttons to change elements on a web page
We have a very simple page with three buttons that change the background color when the button is clicked.
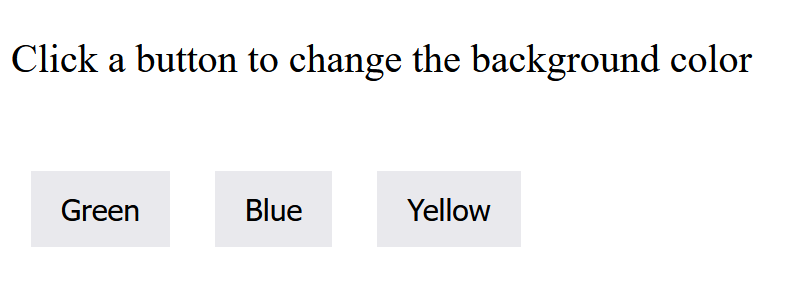
Clicking a button changes the text and the background color.
Create a button in our html file.
<button type="button" class="button green">Green</button>We have two classes assigned to this button, button which is used for styling, and the green, which JavaScript will use to know which button is clicked.
In our JavaScript, we will set up an event listener for when the button is clicked.
document.querySelector('.green').addEventListener('click', function () {
  document.querySelector('body').style.backgroundColor = 'Green'
  console.log('Green')
})
We use the document.querySelector to interact with HTML objects. So we setup the event listener to listen to the button that is in Class green, and we wait for the click event. Once that happens, we run the code in the function(){ }.
Line 2 is what changes our background color. We query the body tag, and set the backgroundColor to Green. Notice that the background color name is slightly different between JavaScript and HTML.
HTML and CSS it has a – in it: background-color
JavaScript is it Camel Case: backgroundColor
Here is the full code for the above screenshots. There are three files. index.html, style.css, and index.js. Should be able to copy them to the same folder and run the index.html file.
Index.html code
<!DOCTYPE html>
<html lang="en">
  <head>
    <link rel="stylesheet" href="style.css" />
    <meta charset="UTF-8" />
    <meta http-equiv="X-UA-Compatible" content="IE=edge" />
    <meta name="viewport" content="width=device-width, initial-scale=1.0" />
    <title>JavaScript DOM Practice</title>
  </head>
  <br />
  <section class="mainwindow">
    <div class="output">Click a button to change the background color</div>
    <br />
    <br />
    <br />
    <button type="button" class="button green">Green</button>
    <button type="button" class="button blue">Blue</button>
    <button type="button" class="button yellow">Yellow</button>
  </section>

  <body>
    <script src="index.js"></script>
  </body>
</html>
JavaScript index.js
'use strict'
document.querySelector('.green').addEventListener('click', function () {
ChangeBackgrounColor('Green')
LogBackgroundColor('Green')
})
document.querySelector('.blue').addEventListener('click', function () {
ChangeBackgrounColor('Blue')
LogBackgroundColor('Blue')
})
document.querySelector('.yellow').addEventListener('click', function () {
ChangeBackgrounColor('Yellow')
LogBackgroundColor('Yellow')
})
function ChangeBackgrounColor (color) {
document.querySelector('body').style.backgroundColor = color
}
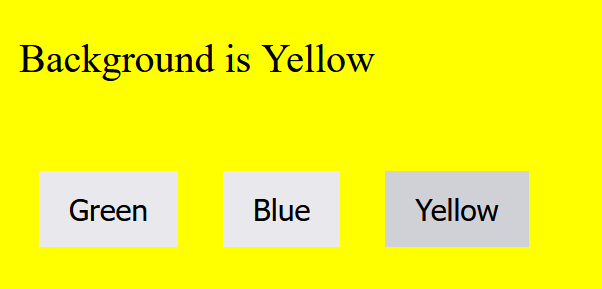
function LogBackgroundColor (color) {
document.querySelector('.output').innerHTML = `Background is ${color}`
console.log(`Background color is ${color}`)
}
CSS File style.css
.mainwindow {
  padding: 1rem;
}
body {
  background-color: white;
}
button {
  border: none;
  font-size: 24px;
  cursor: pointer;
  padding: 1rem 1.5rem;
  margin: 1rem;
}
.output {
  font-size: 2rem;
}
The ternary operator is a conditional operator that takes three (ternary) options. We can almost think of it as a concise if then statement.
The basic syntax is as follows.
Condition ? Value-If-True : Value-If-FalseFor an example
const isOver21 = age >= 21 ? "Is over 21" : "Is Under 21"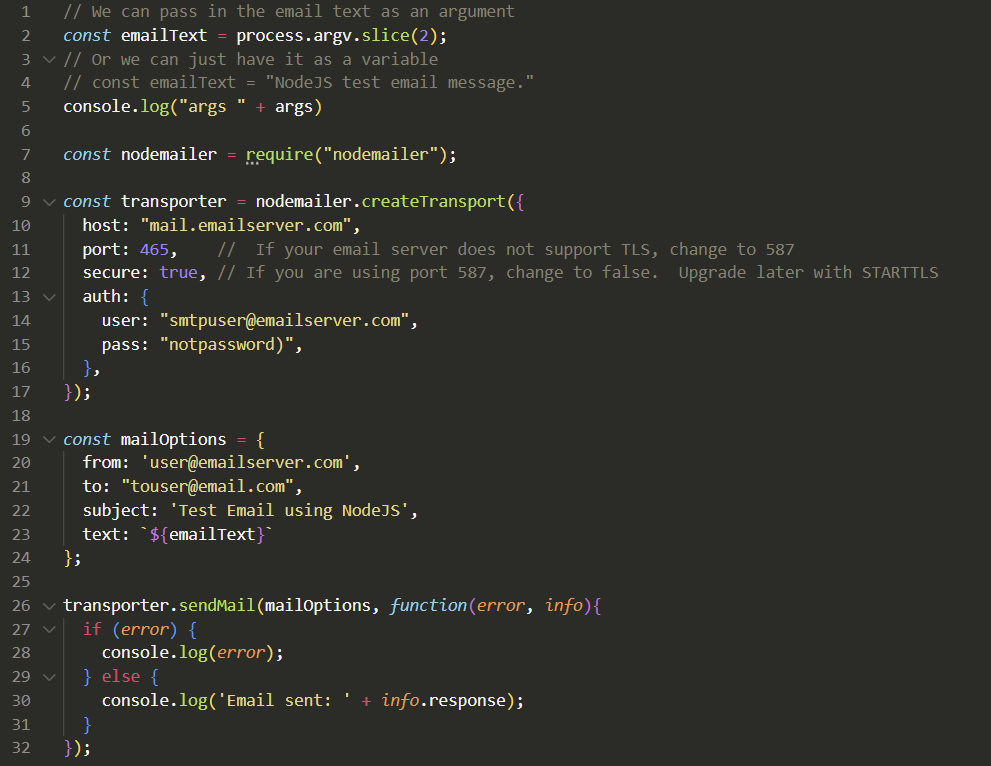
In this post, we will be using Node.JS and the nodemailer library to send email. We need to have an email account with an email provider to send email. Gmail or some other email provider should work.
First lets install some tools
sudo apt install nodejs npm
Now lets install nodemailer
npm install nodemailer
Now that we have nodemailer installed, we can write or copy our code. Create a file called maill.js and make it look similar to the following.
// We can pass in the email text as an argument
const emailText = process.argv.slice(2);
// Or we can just have it as a variable
// const emailText = "NodeJS test email message."
console.log("args " + args)

const nodemailer = require("nodemailer");

const transporter = nodemailer.createTransport({
  host: "mail.emailserver.com",
  port: 465,    //  If your email server does not support TLS, change to 587
  secure: true, // If you are using port 587, change to false.  Upgrade later with STARTTLS
  auth: {
    user: "smtpuser@emailserver.com",
    pass: "notpassword)",
  },
});

const mailOptions = {
  from: 'user@emailserver.com',
  to: "touser@email.com",
  subject: 'Test Email using NodeJS',
  text: `${emailText}`
};

transporter.sendMail(mailOptions, function(error, info){
  if (error) {
    console.log(error);
  } else {
    console.log('Email sent: ' + info.response);
  }
});
Update the following variables
Now we can proceed to send email
We can now run the code by saving our file and running it directly with NodeJS
nodejs ./mail.js "This is the body text for the email"
Hit Return and look for the email. If something went wrong, it should throw an error.
You can change the emailText variable if you would rather have the message body inside the code.
A little explanation on the code.
The second line “const emailText = process.argv.slice(2);” is used to pass in a command line argument to use as the text for the body of the email. You can delete the line and uncomment line 4 if you would rather use a variable inside the code.
Your email server should support using SSL/TLS on port 465. If it does not, you may need to use STARTTLS which uses port 587, and then set secure to false. STARTTLS should upgrade the connection to be encrypted. But it’s opportunistic. You can read more about STARTTLS, SSL/TLS here https://mailtrap.io/blog/starttls-ssl-tls/
You can change the “to: ” in the mailOptions object to an array of email addresses to send the email to multiple people at once.
to: ["email1@email.com", "email2@email.com", "etc"],

In the following code we will be checking a string and check if any of the words in the string match some or any elements in an array.
We can imagine that our “stringToCheck” variable is an email or message response. We want to know if it contains a mention to afternoon, tomorrow, or evening. Presumably so we can automate something. Note that the matches are case sensitive.
// Check if any text in a string matches an element in an array

const stringToCheck = "Let's grab lunch tomorrow";
const arrayToCompareTo =["afternoon", "tomorrow", "evening"];

// We are checking to see if our string "stringToCheck"
// Has any of the words in "arrayToCompareTo".
// If it does, then the result is true.  Otherwise false.
const resultsOfCompare = arrayToCompareTo.some(checkVariable => stringToCheck.includes(checkVariable));

if (resultsOfCompare == true){
    console.log(stringToCheck + " Contains a value in our Array " + arrayToCompareTo);
} else {
    console.log(stringToCheck + " Does NOT contain a value in our Array " + arrayToCompareTo);
}
More examples and ways to do it are available at the following link.
Below is a code example for creating a basic object and using a function to calculate the fuel economy.
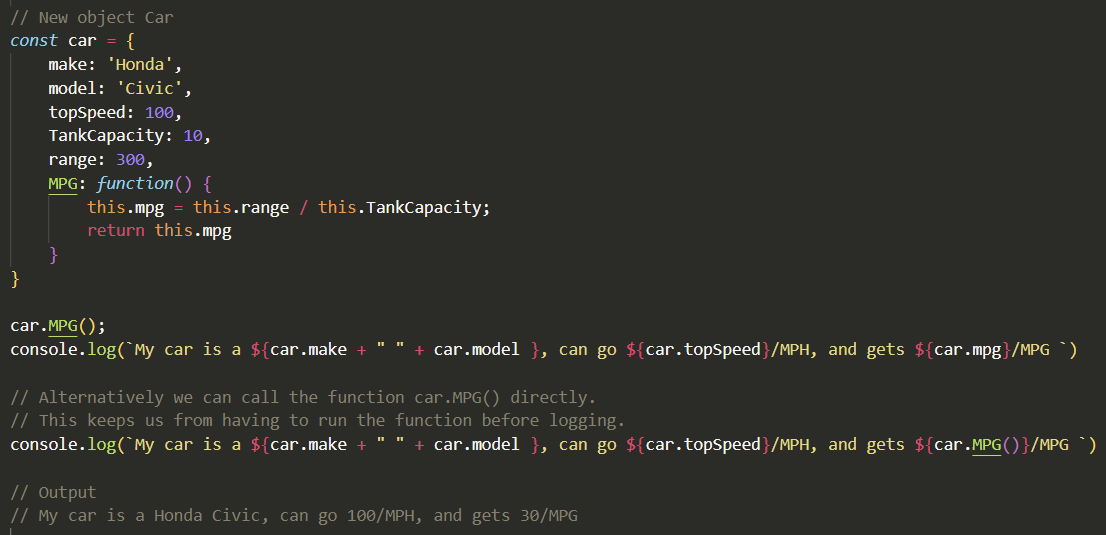
// New object Car
const car = {
    make: 'Honda',
    model: 'Civic',
    topSpeed: 100,
    tankCapacity: 10,
    range: 300,
    MPG: function() {
        this.mpg = this.range / this.tankCapacity;
        return this.mpg
    }
}

car.MPG();  // We need to call this to calculate the MPG, otherwise we get undefined

console.log(`My car is a ${car.make + " " + car.model }, can go ${car.topSpeed}/MPH, and gets ${car.mpg}/MPG `)

// Alternatively we can call the function car.MPG() directly.
// This keeps us from having to run the function before logging.
console.log(`My car is a ${car.make + " " + car.model }, can go ${car.topSpeed}/MPH, and gets ${car.MPG()}/MPG `)
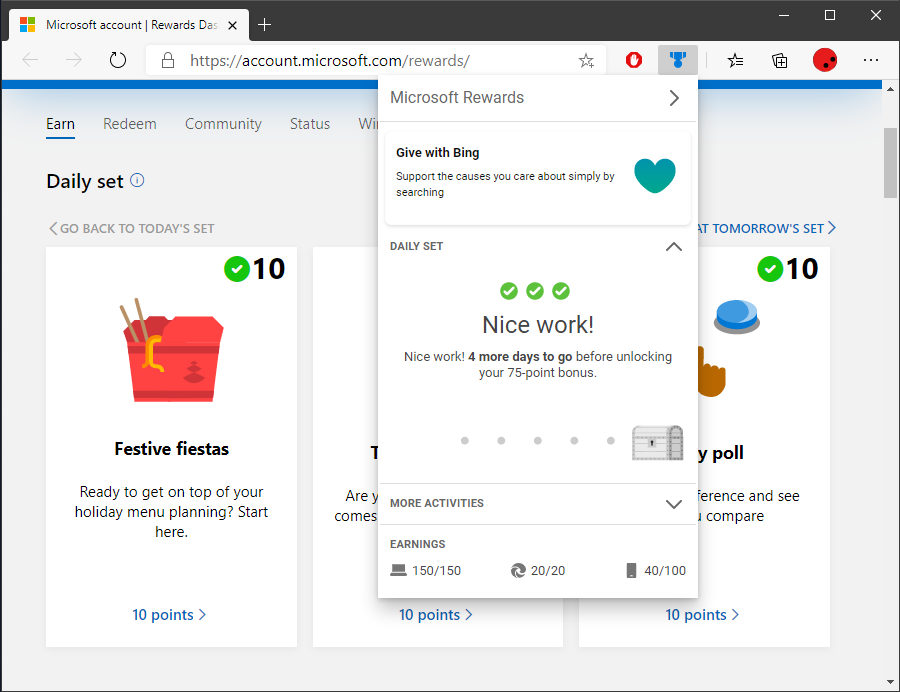
You can earn Microsoft rewards by using Bing for searching. What if you could automate Bing searches to automatically get rewards? Oh wait. PowerShell can launch Edge with a Bing search! So we can acquire Microsoft Rewards with PowerShell!
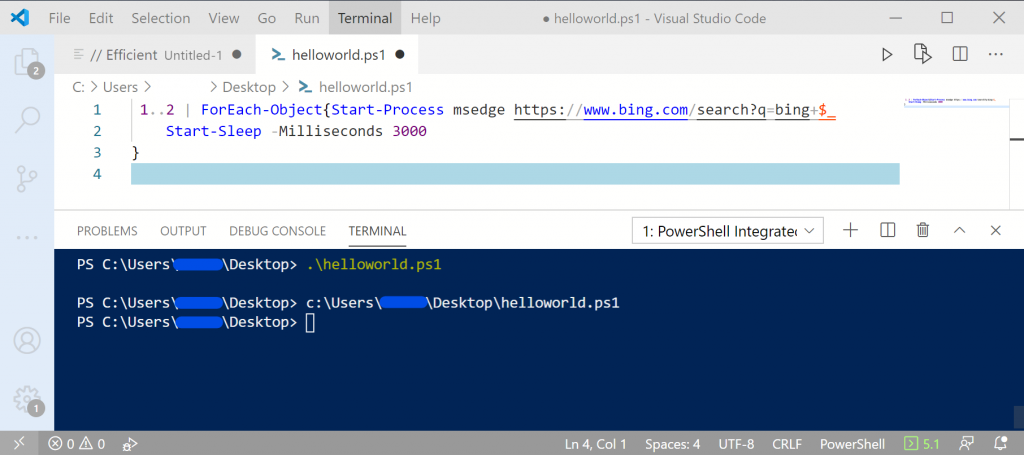
Create a new PowerShell file and past the following in.
1..30 | ForEach-Object{Start-Process msedge https://www.bing.com/search?q=bing+$_
    Start-Sleep -Milliseconds 3000
}
The script will launch 30 Edge tabs with a Bing search of “Bing 1” next tab will be “Bing 2” etc. You could definitely be more creative with what and how you search for things, but this works as a proof of concept.
I created and ran this script from Visual Studio Code. But you should be able to create it with a normal text file and launch it in PowerShell.
The person at the following link did an excellent job at creating a system for this. Looks really cool.
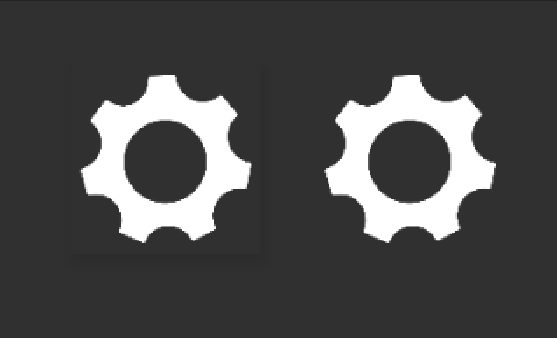
We can remove the border and shadows from a button by adding the following style code in your activity_main.xml file. Or what ever your XML file is.
style="?android:attr/borderlessButtonStyle"
Code for button. We are setting an image as the background.
  <Button
        android:id="@+id/button"
        style="?android:attr/borderlessButtonStyle"
        android:layout_width="48dp"
        android:layout_height="48dp"
        android:background="@drawable/gear"
        android:onClick="launchSettings"
        android:textSize="12sp"/>
Comparison of buttons. One on the left still has the shadow on it
More info here
https://stackoverflow.com/questions/28756035/how-to-remove-button-shadow-android
https://stackoverflow.com/questions/27867284/remove-shadow-effect-on-android-button/30856094