Unable to access old HTTPS login for WiFi router

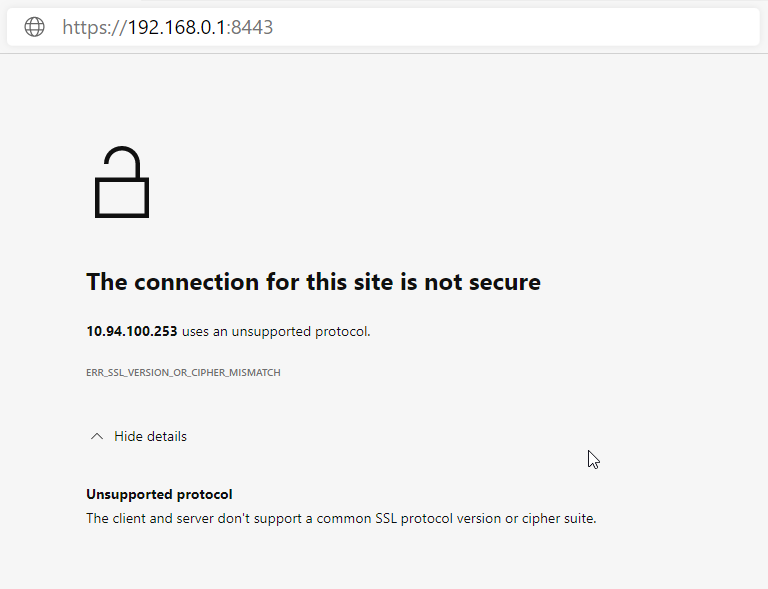
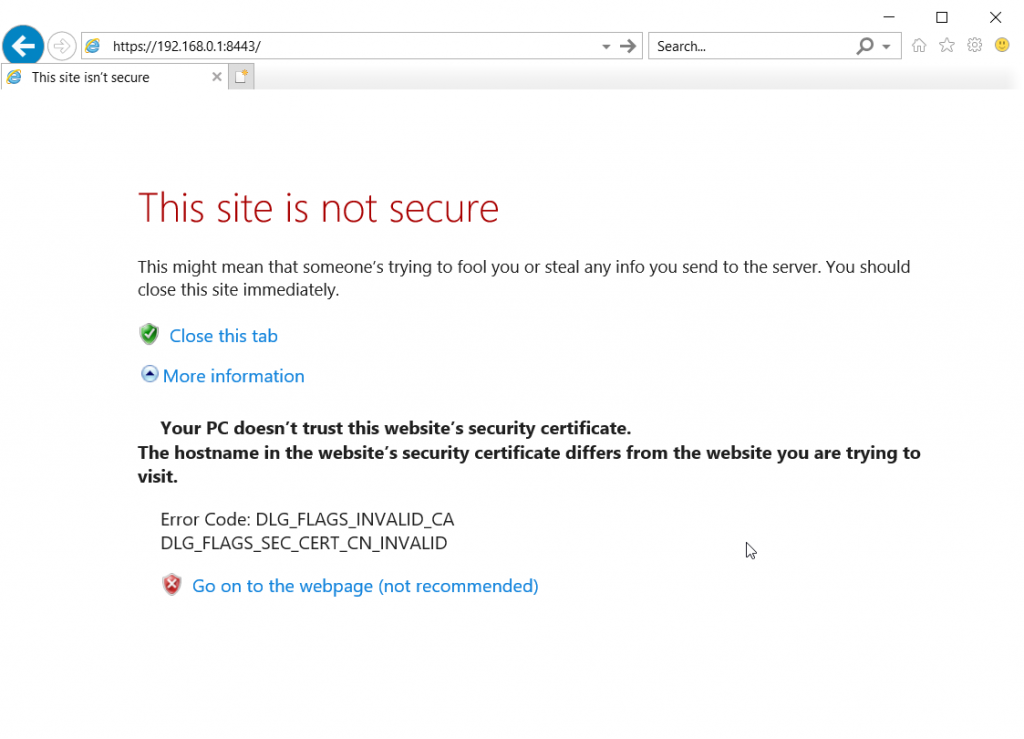
Part of the reason some of the older sites do not work is due to insecurities in older SSL protocol’s. Some of the older versions are disabled in newer browsers thereby keeping someone from accessing the device.

Unsupported protocol

Work Around

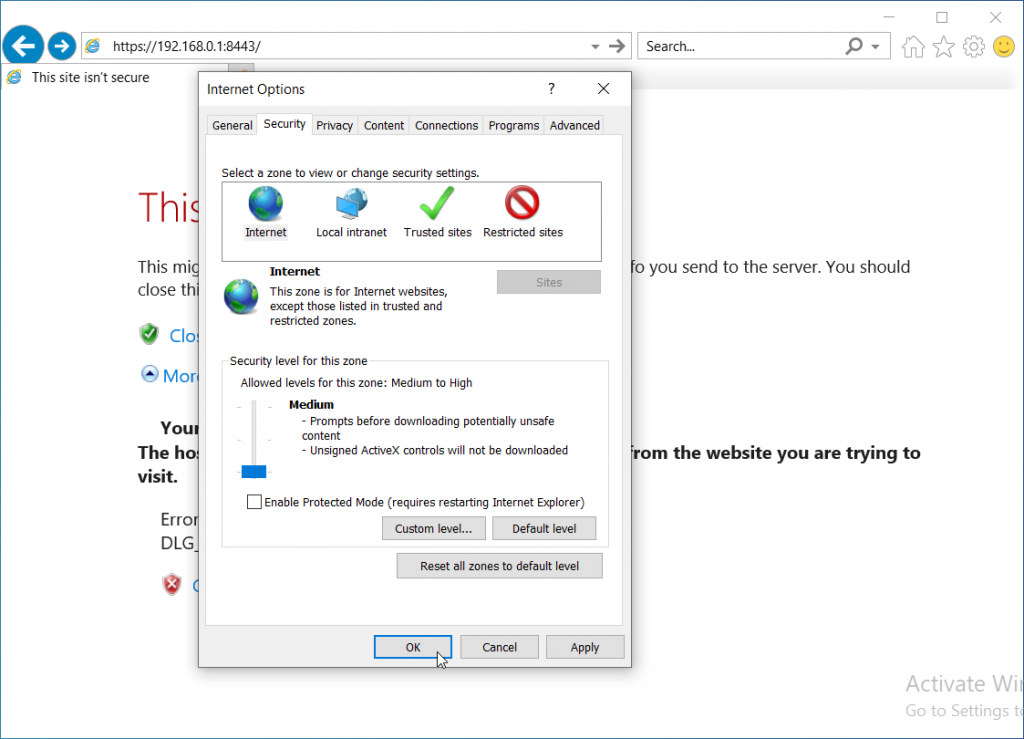
Internet Explorer will let you change the security settings to allow older security protocols to work. Chrome and Firefox seem to have issues letting you do that.

Open Internet Explorer and then go to the Internet Options and find the Advanced tab. Scroll down and locate the “Use SSL3.0” option and enable it.

Enable SSL 3.0

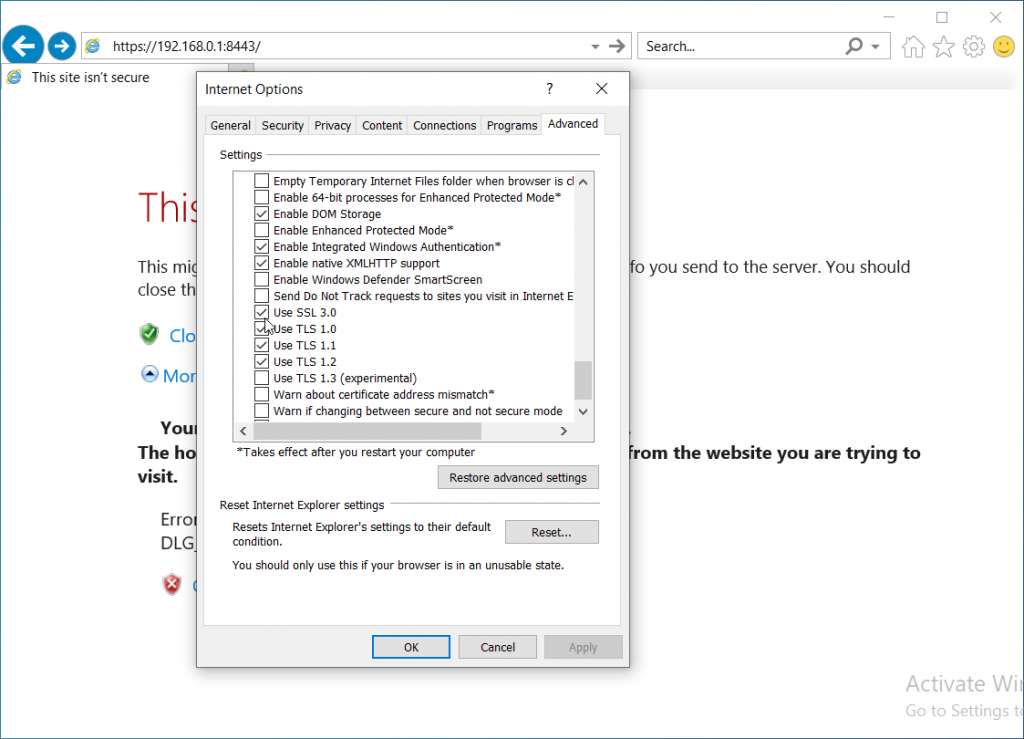
You may also need to modify the Zones.

Change Internet Zones

You should now be able to accept the Security Certificate and log in.

Proceed to login page for site

This should only be done if absolutely needed and only on sites you trust. It would be a good idea to change the settings back when finished.

More info.
https://community.spiceworks.com/topic/1958251-just-purchased-a-sonicwall-via-ebay-but-after-doing-the-initial-config

How to reset Minecraft Demo timer without resetting the World – Windows

Open Windows File Explorer, in the Address Bar paste the following and hit enter.

%APPDATA%\.minecraft\saves\Demo_World\

You should now be in the demo world folder.

Delete the “level.dat” and “level.dat_old” files and restart minecraft.  Your timer should now be reset as well as all the game objectives.

Unity Game Scene tab flickers during game play

There appears to be an issue with HDPI displays and the Unity Game tab while testing the game in unity. Have had issues where the UI elements will resize and not work correctly. Issue seems to be with how Windows scales the screen.

Dropping the scaling to 100% and/or the resolution down to 1920×1080 seems to resolve the issue.

Videos flashing and resizing on Internet Explorer

Had a problem with a NVR not displaying cameras correctly in the web interface in Internet Explorer. The issue appears to be something wrong with how it is interacting with Windows scaling.

To resolve the issue you can set the scaling to 100%

or

If the monitor is a HDPI, set it to a 1920×1080 resolution with scaling at 100%.

Setup Windows File Share for Citrix XenServer

Setup Share in windows

You may need to enable the Network Sharing and discovery in the network sharing center before proceeding with the following steps.

Create a new directory, right click and hit properties.

Under Sharing, hit Advanced Sharing…

Enable the Check mark for “Share this folder” and verify the share name is correct. In this example we are sharing a folder called XenServerShare

Setup Share in XenCenter

From XenCenter, hit add new Storage Repository and run through the wizard. When you get to the Share path put in \\share-ip-address\Share\Path

Example: If the IP address of the computer with the Share is 192.168.1.2 and you shared your Downloads folder, the path would be as follows

\\192.168.1.2\Downloads

Use the share computers username and password to log in to it.

Recovery, Your PC/Device needs to be repaired

File: \EFI\Microsoft\Boot\BCD
Error code: 0x000000f 
The Boot Configuration data for your PC is missing or contains errors.

The following notes may be of some help when trying to resolve the above error. Think the primary issue had to do with cloning a GPT drive to a RAID array that was using MBR. So think everything worked after converting it to GPT

All the commands are/were run from a recovery Command Prompt

Convert MBR disk to GPT

After running the following command the EFI directory was automatically created.
The command is supposed to be non destructive. Change the disk to whichever disk your trying to change to gpt.

gpt2efi /validate /disk:0

Other commands

If running the above command did not work then you may give the following command a try. Change the drive names where appropriate.

bcdboot c:\windows /s s: /f UEFI /v

You may be able to get away with just using

cdboot c:\windows

You can check if the above worked by seeing if it created any files in the directory, if new efi partition is S:, then from a command prompt run

S:
dir

Commands for recreating the EFI partition (WARNING! MAY DESTROY DATA!)

diskpart
list disk
select disk # Note: Select the disk where you deleted the EFI System partition.
list partition
create partition efi
format quick fs=fat32
list partition
list volume


Verify Ubuntu iso on Windows

On Windows you can use the CertUtil utility to verify an iso image.

First, you’ll need the checksum of the iso. Should be on the page where you downloaded the iso. More info about that here.

Next generate the hash by running the following in a command prompt. Replace the path and ISO name with the one you downloaded

certutil -hashfile Downloads\ubuntu-19.04-live-server-amd64.iso sha256

Example output

SHA256 hash of Downloads\ubuntu-19.04-live-server-amd64.iso:
25d483341ccd0d522a6660b00db933787c86c47b42f1845bcf997127f4b61e9d
CertUtil: -hashfile command completed successfully.

Compare the output with the checksum. If they are the same, you should be good to go.