Who is this mcuser on ubiquiti devices? Nothing shows up in the radio config file about it, but the user shows up in /etc/passwd
mcuser is used for AirControl2. If we look what is in the passwd file, we’ll notice that there is a ! at the beginning of the hash. Meaning that this password is disabled as the hash is not a proper hash. It’s only 10 characters long instead of the normal 13 for Unix DES hashes.
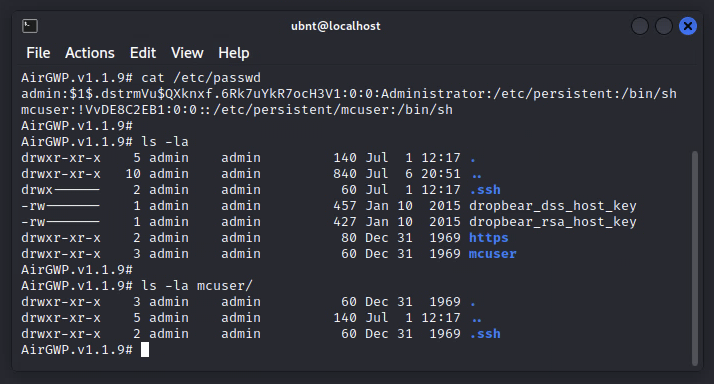
There is a valid ssh key, so the mcuser can ssh to the device without a password and do what it needs to do. Doing an ls on a device shows the following.
Refer to the following article on removing AirControl Provisioning
Recently ran across some AirGateway configs that had an extra user account on them. Typically on most Ubiquiti AirMax and AirGateway equipment, there are two user accounts that show up in the config.
users.1.* which is the admin user.
users.2.* which is the read only user. Disabled by default
A cool trick we can do is add users in the config i.e. (users.3, users.4 etc.)
So what do you do when you see a third user showing up that you didn’t put there?!
The username was the MAC address of the device and the password field is a DES(Unix) hash of what appears to be an 8 character randomly generated upper and lower case password.
Older AirOS versions only let a user select a password up to 8 characters long. You could create a longer one and log in via SSH, but you wouldn’t be able to log into the web interface.
Identifying Access
So how did these get on here in the first place?
I am guessing that the users were created at some point while trying to adopt them to UNMS/UISP before there was firmware that supported it. The user name is the actual MAC address of the device and the passwords do seem to be randomly generated. There do not appear to be any major differences between the support files from a normal AirGateway and a suspicious AirGateway.
Also appears to only affects AirGateways which were the only devices that had issues in the past connecting to UNMS/UISP. The rest of the AirMax equipment uses very similar firmware so if there was a security issue, it should have affected all the devices.
The hashing type “DES(Unix)” does not appear to be used anymore, being replaced with MD5 Crypt. So this does appear to have happened awhile ago.
the -1?l?u let’s us specify a custom character list made up of -l and -u. Lower and Upper case letters. –session airgateway will record a checkpoint ever so often. So if our run gets interrupted, we can restore the session with
./hashcat.bin --session airgateway --restore
Remediation
Fortunately, remediation is fairly simple.
SSH into the affected device and open up the config file
vi /tmp/system.cfg
Find the lines that start with “users.3.”, delete them, and save the file
Run the following command to save the changes.
/usr/etc/rc.d/rc.softrestart save
If you are not comfortable with the command line, then you can, through the web gui, download a backup, edit the backup file in a text editor, then upload/restore the backup.
Other notes
Something else you may run across is a mcuser that shows up in /etc/passwd. This is typically a user used for AirControl, so if you have used AirControl in the past that is most likely why it is there. Check out the following article to remove the user.