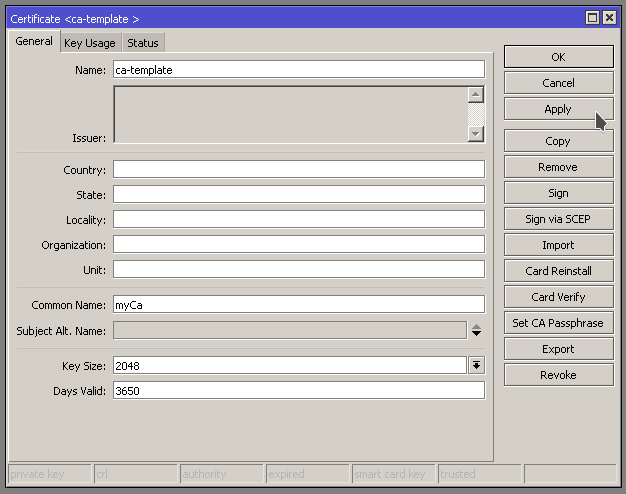
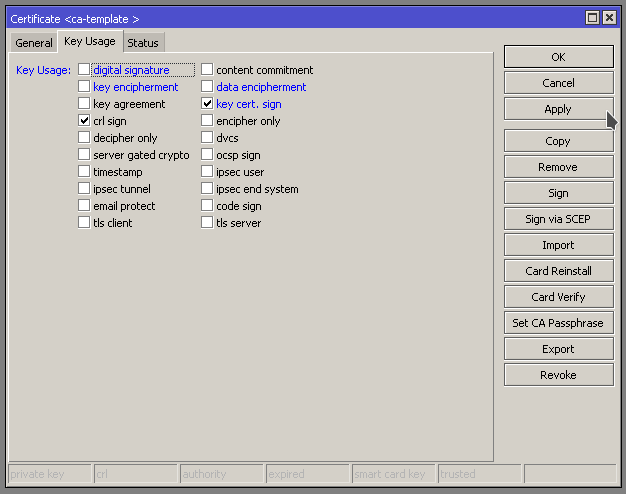
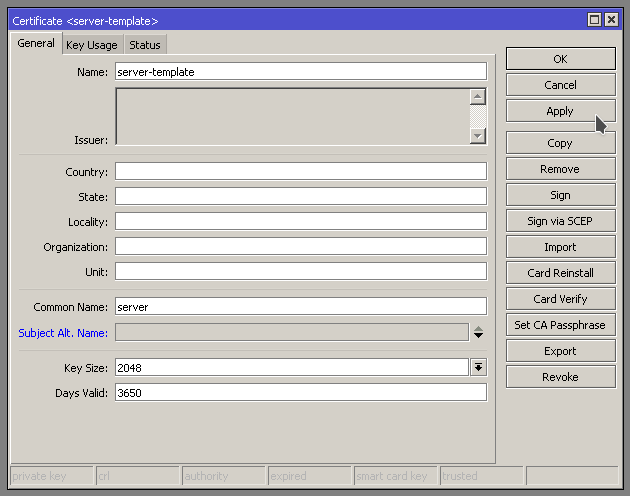
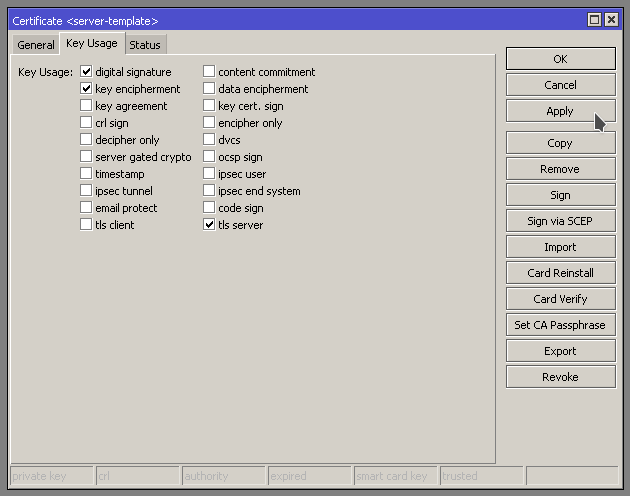
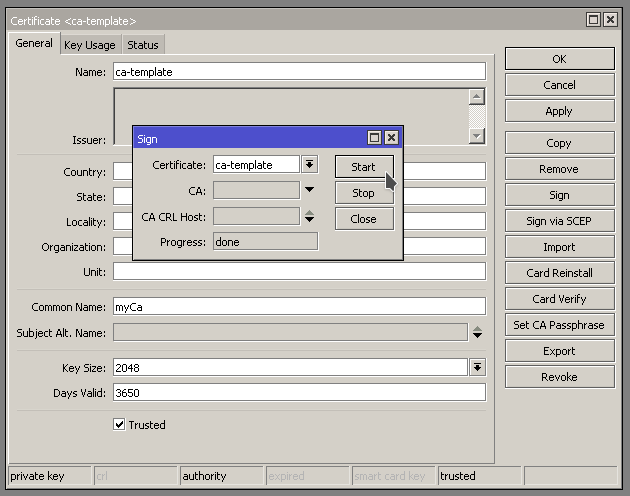
Create Certificate
Can look here to set a certificate up in Winbox
or here to configure from command line
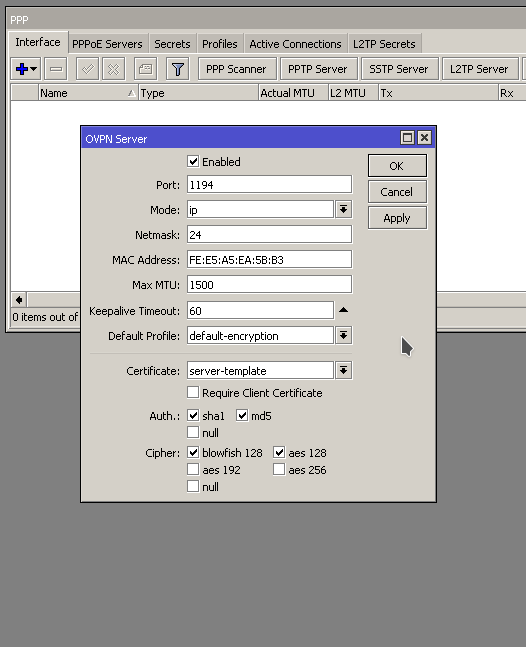
Enable OpenVPN server
To setup a OpenVPN server on a router there are a few things that need to be done.
- Create certificates (See top of post)
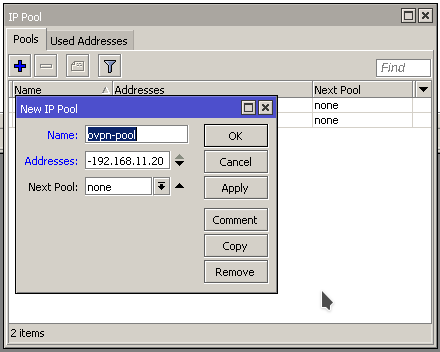
- Create IP pool for clients to use
- Configure default-encryption profile
- Create User
- Configure OpenVPN server
Create IP Pool
Create an IP pool that clients can pull and address from when they connect
Modify Profiles
Modify the default-encryptoin Profile and specify the VPN IP pool.

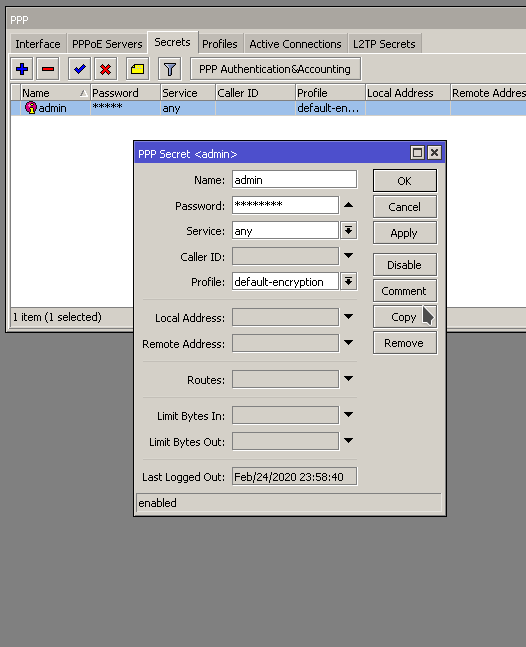
Create User
Create new user, specify the default-encryptio profile
Turn OVPN Server on
Enable the OVPN server. Specify the “Default Profile:” to be the default-encyption, specify the certificate to be the server-template, or whatever the name is of the certificate you created.