Create Certificate on Mikrotik – Command Line

https://wiki.mikrotik.com/wiki/Manual:Create_Certificates
https://www.medo64.com/2016/12/simple-openvpn-server-on-mikrotik/

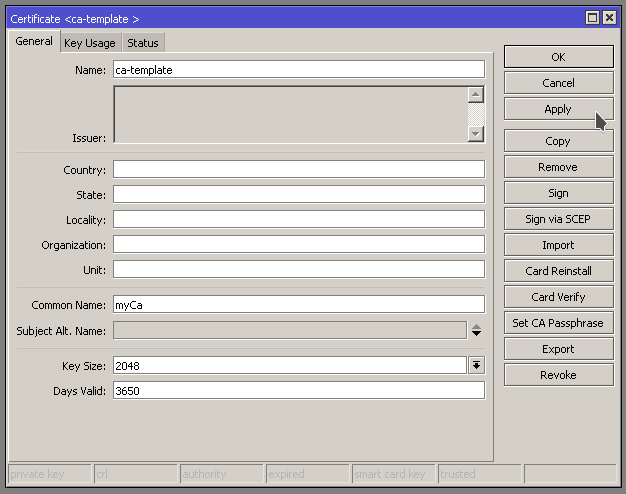
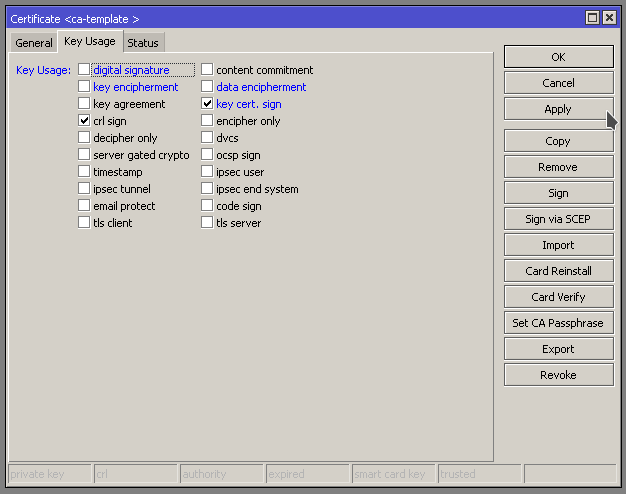
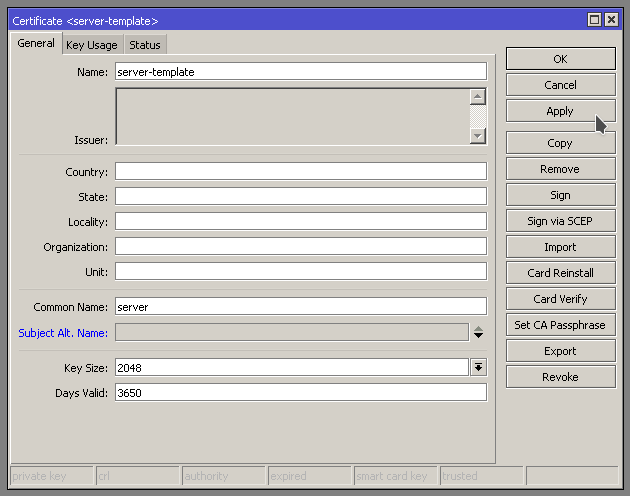
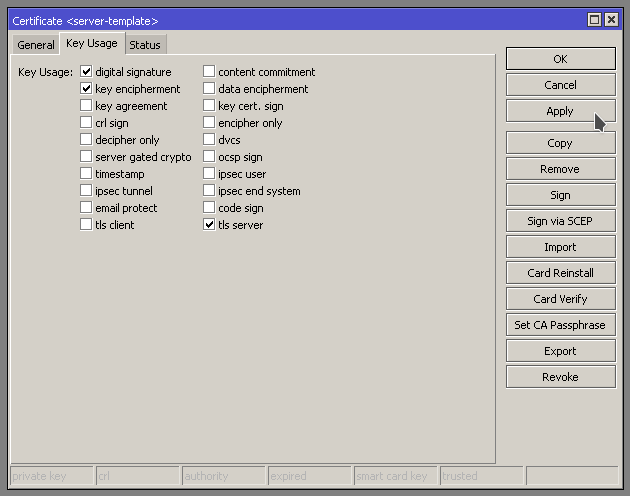
Create Certificate Authority and Server Certificate

/certificate add name=ca-template common-name=myCa days-valid=3650 key-size=2048 key-usage=key-cert-sign,crl-sign

/certificate add name=server-template common-name=server days-valid=3650 key-size=2048 key-usage=digital-signature,key-encipherment,tls-server
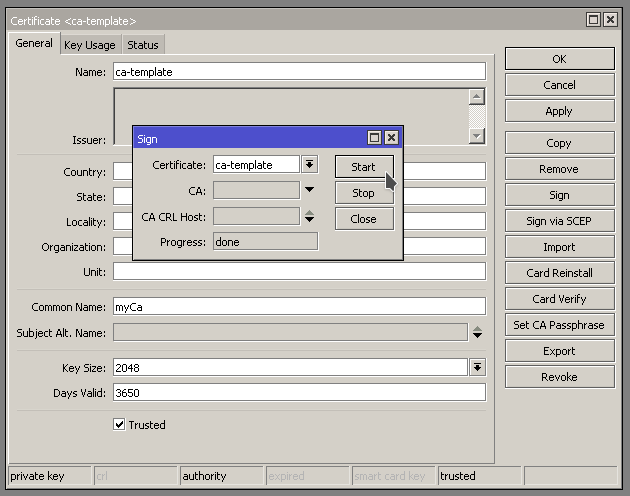
Sign certificates

/certificate sign ca-template name=myCa

/certificate sign server-template ca=myCa name=server

Trust certificates

/certificate set myCa trusted=yes

/certificate set server trusted=yes

Create Certificate on Mikrotik – WinBox

Create Certificates

Open up the Certificates window by going to /System -> Certificates. Hit the + to add a new certificate

Create Certificate Authority Certificate

First we are going to create a Certificate Authority template

Setup Certificate Authority template

Specify the key usage to “crl sign” and “key cert. sign” and apply

Set Certificate Authority Key Usage

Setup Server Certificate

Now we are going to create a server template

Setup Server Template

We need to specify “Digital signature, key encipherment, and tls server” You may need to enable/disable more depending on your use case scenario. In this case we are setting it up for OpenVPN.

Configure Server Key Usage

Sign Templates

First we need to sign the ca-template by opening up the the Certificate and hitting Sign on the right hand side. Should get the little Sign window pop up.

Sign Certificate Authority

Progress will show done when it is finished signing.

Next we need to sign the server-template. When Signing the server template, specify the ca-template in the CA: field. See below

Sign Server Certificate