Created a little web interface to use Whisper, technically using whisper-ctranslate2 which is built on faster-whisper.
This is not currently ready to be run on the public web. It doesn’t have any sort of TLS for encrypting communications from client to server and all the files are stored on server. Only use in a trusted environment.
Now create an index.html file and paste the following in
<!DOCTYPE html>
<html lang="en">
<head>
<meta charset="UTF-8" />
<meta http-equiv="X-UA-Compatible" content="IE=edge" />
<meta name="viewport" content="width=device-width, initial-scale=1.0" />
<title>Voice Transcribing Using Whisper</title>
<link type="text/css" rel="stylesheet" href="style.css" />
</head>
<style>
body {
background-color: #b9dbe7;
align-items: center;
}
.box {
border-radius: 25px;
padding: 25px;
width: 80%;
background-color: azure;
margin: auto;
border-bottom: 25px;
margin-bottom: 25px;
}
.button {
border-radius: 25px;
margin: auto;
width: 50%;
height: 50px;
display: flex;
justify-content: center;
border-style: solid;
background-color: #e8d2ba;
}
h1 {
text-align: center;
padding: 0%;
margin: 0%;
}
p {
font-size: larger;
}
.headings {
font-size: large;
font-weight: bold;
}
input {
font-size: medium;
}
select {
font-size: medium;
}
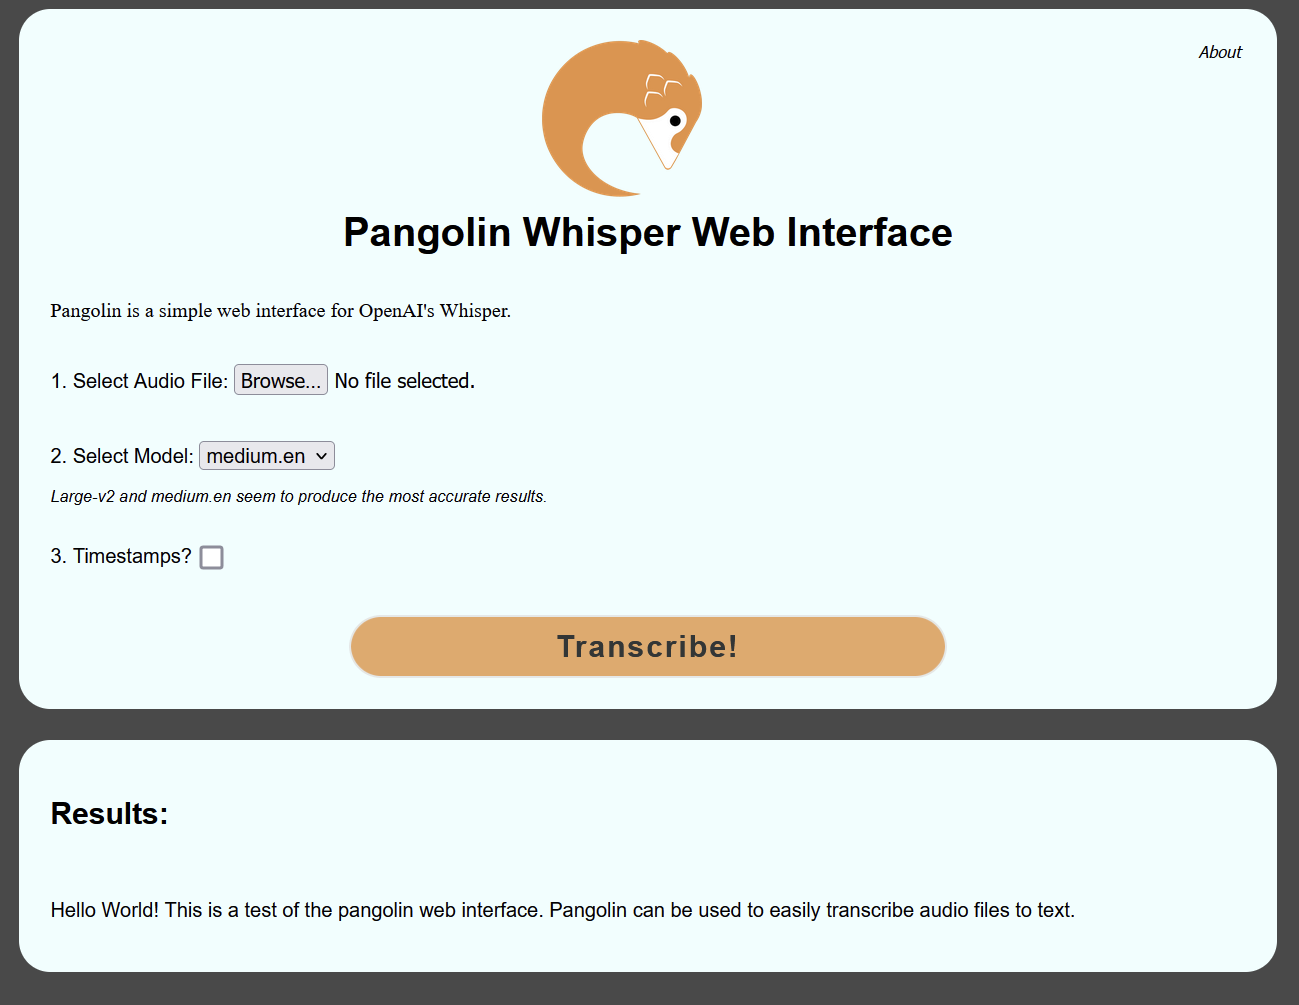
.results {
white-space: pre-wrap;
border-radius: 25px;
padding: 25px;
width: 80%;
align-self: center;
background-color: azure;
margin: auto;
}
.note {
font-style: italic;
font-size: small;
font-weight: normal;
}
</style>
<body>
<script></script>
<div class="box">
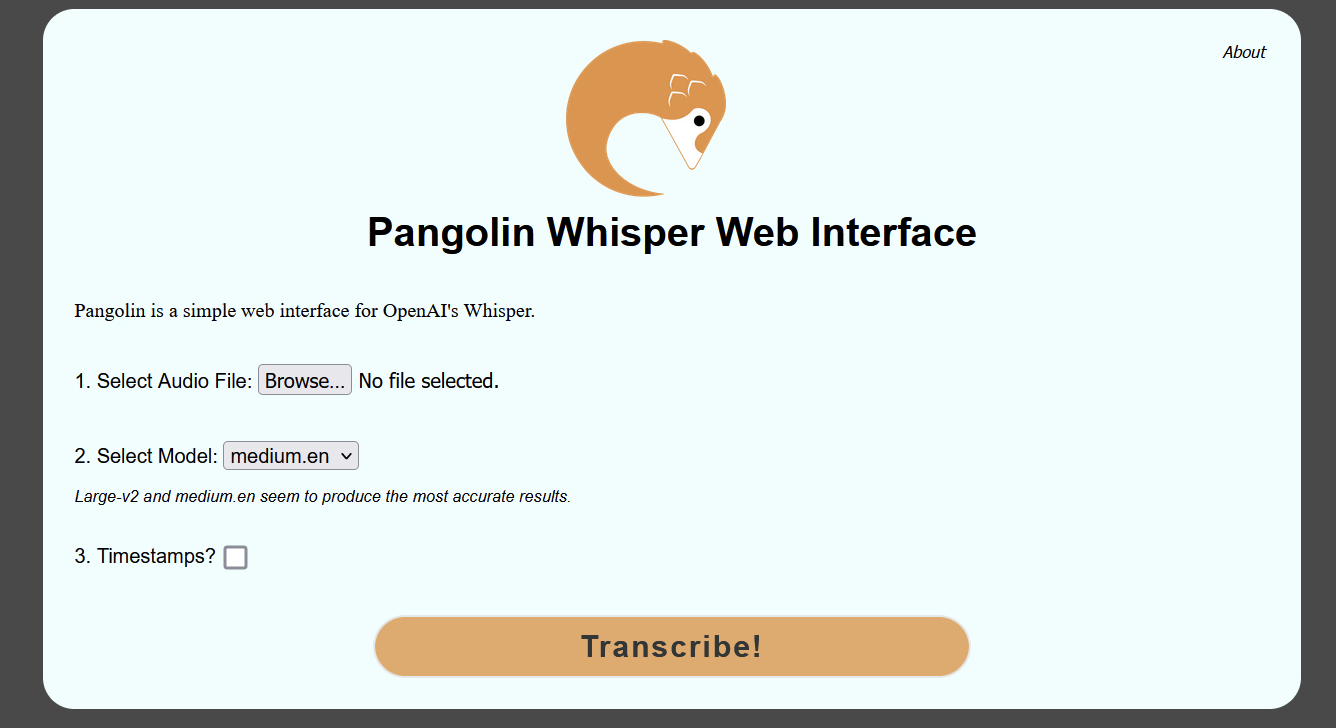
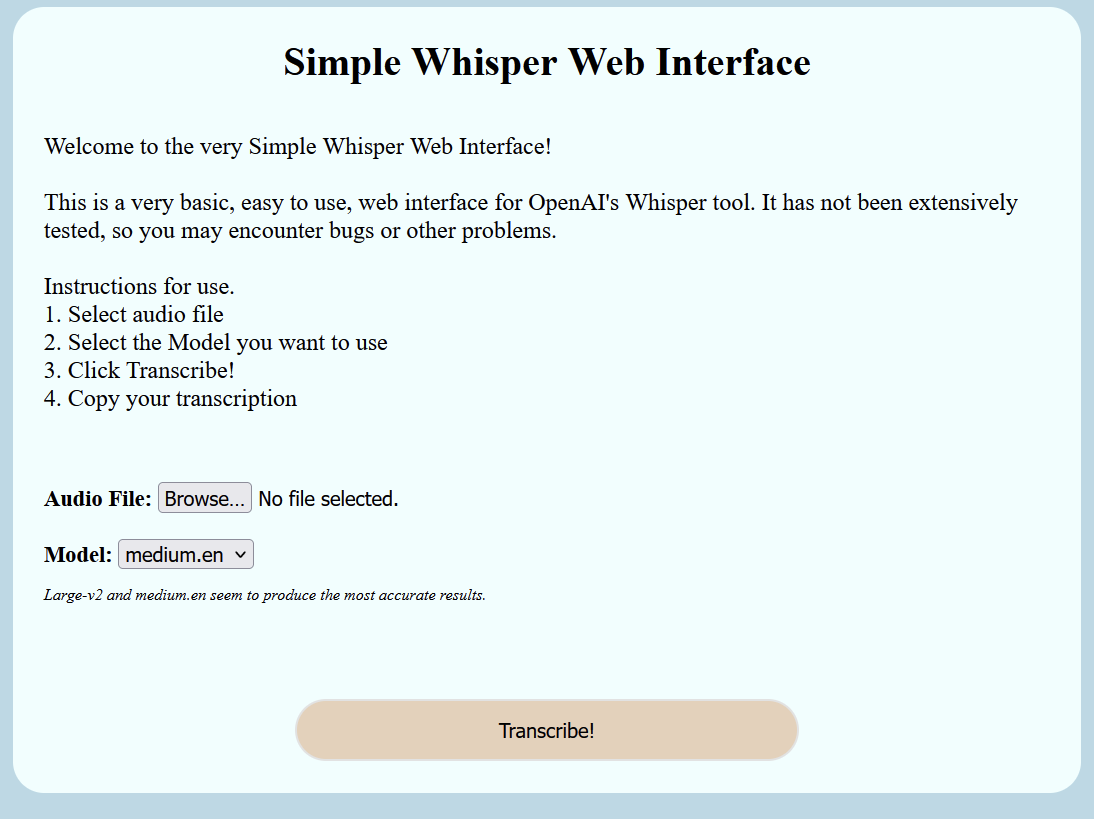
<h1>Simple Whisper Web Interface</h1>
<br />
<p>
Welcome to the very Simple Whisper Web Interface!<br /><br />
This is a very basic, easy to use, web interface for OpenAI's Whisper
tool. It has not been extensively tested, so you may encounter bugs or
other problems.
<br /><br />
Instructions for use. <br />1. Select audio file <br />2. Select the
Model you want to use <br />
3. Click Transcribe! <br />4. Copy your transcription
</p>
<br />
<br />
<div class="headings">
<form action="fileupload" method="post" enctype="multipart/form-data">
Audio File: <input type="file" name="filetoupload" /><br />
<br />
Model:
<select name="modeltouse" id="modeltouse">
<option value="medium.en">medium.en</option>
<option value="tiny">tiny</option>
<option value="tiny.en">tiny.en</option>
<option value="base">base</option>
<option value="base.en">base.en</option>
<option value="small">small</option>
<option value="small.en">small.en</option>
<option value="medium">medium</option>
<option value="medium.en">medium.en</option>
<option value="large-v1">large-v1</option>
<option value="large-v2">large-v2</option>
</select>
<p class="note">
Large-v2 and medium.en seem to produce the most accurate results.
</p>
<br />
<br />
<br />
<input class="button" type="submit" value="Transcribe!" />
</form>
</div>
</div>
</body>
</html>
Now we should be set to go.
Fire the web server up with
node ./main.js
If we want to start it in the background, run
node ./main.js &
Known Limitations or Bugs
If you hit Transcribe with no file selected, the server crashes.
We are calling whisper-ctranslate2 directly, if it is not in the path, then it won’t work.
We are currently using the medium.en model, if the model is not downloaded, then the first transcription may take awhile while it downloads. Would like to add a menu for selecting which model to use. We fixed this by adding a drop down that let’s you select a model.
Would be nice to have an option for getting rid of the timestamps.
We can use prompts to improve our Whisper transcriptions.
We can add “–initial_prompt” to our command like the following.
--initial_prompt "Computer Historical etc"
We can also look into suppressing Tokens to eliminate words that we won’t use. Believe we need to find the tokens for words, and then we can use the token ID to ignore those words. More links below.
For some reason initially the quality was worse then vanilla Whisper. Adding the “–compute_type float32” option improved the quality to where there was not any difference between them.
After it is installed, it should be able to run it like
whisper audio.mp3 --model medium
Change out medium to the model you would like to use. It will then download the model and then work get to work on transcribing it. The .en models i.e. medium.en, seem to perform better then the other ones. If you are using English that is.
If you receive a “Command ‘whisper’ not found” error, you may not have ~/.local/bin in your user PATH. Either add ~/.local/bin to your PATH, or run whisper with the full path