How to Create a Self Signed TLS Certificate in Linux

Here is a quick way to create a self signed certificate in Linux.

Run the following command. Fill out the required info.

openssl req -x509 -sha256 -nodes -days 3652 -newkey rsa:4096 -keyout /etc/pki/tls/private/localhost.key -out /etc/pki/tls/certs/localhost.crt
chmod 400 /etc/pki/tls/private/localhost.key

Now in your Apache or Nginx files, specify the path to the Key and the Certificate.

Note that if you’ll need to add the

https://www.linode.com/docs/guides/create-a-self-signed-tls-certificate/

How to Display Pictures on NodeJS http Server

If you are using http for a NodeJS application, you may have run into an issue where none of your images are loading on a site. Instead you are greeted with nice little “no image” logos.

The issue is that our NodeJS server has not been instructed to load anything other than index.html. So other things like images, or even CSS from our style.css file wont work properly.

To fix the issue, we need to to tell NodeJS what to do when other files are requested. As a side note, the person browsing the site may not be requesting the resources directly, but index.html file requests the css file or images hence creating a new web request.

Let’s say we are starting with the following code as a starting point.

var http = require('http')
var fs = require('fs')
var path = require('path')
var url = require('url')

http
  .createServer(function (req, res) {
    let pathname = url.parse(req.url).pathname
    if (
      req.method === 'GET' &&
      (pathname === '/' || pathname === '/index.html')
    ) {
      res.setHeader('Content-Type', 'text/html')
      fs.createReadStream('./index.html').pipe(res)
      return
    }
    return res.end()
  })
  .listen(3000)

Our HTML code is very basic.

<html>
<head>Hello World!</head>
<br />
<body><img src="./image.png" width="128"></body>
</html>

When we launch our server with

$ node server.js

We get

The Fix

Essentially what we need to do is tell the server what to do when image.png is requested.

So we can add the following to our server code before the line “return res.end()”

    if (req.method === 'GET' && pathname === '/image.png') {
      res.setHeader('Content-Type', 'image/png')
      fs.createReadStream('./image.png').pipe(res)
      return
    }

And voila! it is fixed!

Taking it Further

We can improve on this and add a favicon, as well as our style sheet.

var http = require('http')
var fs = require('fs')
var path = require('path')
var url = require('url')

http
  .createServer(function (req, res) {
    let pathname = url.parse(req.url).pathname
    if (
      req.method === 'GET' &&
      (pathname === '/' || pathname === '/index.html')
    ) {
      res.setHeader('Content-Type', 'text/html')
      fs.createReadStream('./index.html').pipe(res)
      return
    }
    if (req.method === 'GET' && pathname === '/image.png') {
      res.setHeader('Content-Type', 'image/png')
      fs.createReadStream('./image.png').pipe(res)
      return
    }

    if (req.method === 'GET' && pathname === '/favicon.ico') {
      res.setHeader('Content-Type', 'image/x-icon')
      fs.createReadStream('./favicon.ico').pipe(res)
      return
    }

    if (req.method === 'GET' && pathname === '/style.css') {
      res.setHeader('Content-Type', 'text/css')
      fs.createReadStream('./style.css').pipe(res)
      return
    }
    return res.end()
  })
  .listen(3000)

This will let us put a favicon.ico image to use as a favicon it will use style.css to stylize the website.

We should note that while the above code does work, you will most likely want to use something like express.
https://github.com/expressjs/express

You can also find better code implementations others of done online.

https://stackoverflow.com/questions/5823722/how-to-serve-an-image-using-nodejs

Auto renew SSL Cert with UniFi running in Docker

Setting up the SSL cert for UniFi service when running in docker is fairly easy to do. All you have to do is modify the UniFi SSL renew script to use the UniFi Docker directory and change the start and stop service to start and stop the Docker container. The script below should be ready to go.

Download, chmod +x it, and run, drop it in cron to auto renew.

In the below script, change (unifiDir=”/docker/unifi”) to your UniFi directory.

Note: this triggers calling the teams.sh script that will send an update to Microsoft Teams to let you know that the certs should be renewed. Check here for more info.

#!/usr/bin/env bash
# Added support to do UniFi and UniFi controllers at the same time using the same cert.
# Original script from https://git.sosdg.org/brielle/lets-encrypt-scripts/raw/branch/master/gen-unifi-cert.sh
# More info here https://www.reddit.com/r/Ubiquiti/comments/43v23u/using_letsencrypt_with_the_unifi_controller/ 
# And here https://www.reddit.com/r/Ubiquiti/comments/43v23u/using_letsencrypt_with_the_unifi_controller/
# Modified script from here: https://github.com/FarsetLabs/letsencrypt-helper-scripts/blob/master/letsencrypt-unifi.sh
# Modified by: Brielle Bruns <bruns@2mbit.com>
# Download URL: https://source.sosdg.org/brielle/lets-encrypt-scripts
# Version: 1.7
# Last Changed: 04/10/2020
# 04/10/2020: Changed directories and commands to work with a UniFi Docker install
# 02/02/2016: Fixed some errors with key export/import, removed lame docker requirements
# 02/27/2016: More verbose progress report
# 03/08/2016: Add renew option, reformat code, command line options
# 03/24/2016: More sanity checking, embedding cert
# 10/23/2017: Apparently don't need the ace.jar parts, so disable them
# 02/04/2018: LE disabled tls-sni-01, so switch to just tls-sni, as certbot 0.22 and later automatically fall back to http/80 for auth
# 05/29/2018: Integrate patch from Donald Webster <fryfrog[at]gmail.com> to cleanup and improve tests
# 09/26/2018: Change from TLS to HTTP authenticator

# Location of LetsEncrypt binary we use.  Leave unset if you want to let it find automatically
# LEBINARY="/usr/src/letsencrypt/certbot-auto"

# Change to your UniFi Docker directory
unifiDir="/docker/unifi"

PATH="/usr/local/sbin:/usr/local/bin:/usr/sbin:/usr/bin:/sbin:/bin"

function usage() {
  echo "Usage: $0 -d <domain> [-e <email>] [-r] [-i]"
  echo "  -d <domain>: The domain name to use."
  echo "  -e <email>: Email address to use for certificate."
  echo "  -r: Renew domain."
  echo "  -i: Insert only, use to force insertion of certificate."
}

while getopts "hird:e:" opt; do
  case $opt in
    i) onlyinsert="yes";;
    r) renew="yes";;
    d) domains+=("$OPTARG");;
    e) email="$OPTARG";;
    h) usage
       exit;;
  esac
done

DEFAULTLEBINARY="/usr/bin/certbot /usr/bin/letsencrypt /usr/sbin/certbot
  /usr/sbin/letsencrypt /usr/local/bin/certbot /usr/local/sbin/certbot
  /usr/local/bin/letsencrypt /usr/local/sbin/letsencrypt
  /usr/src/letsencrypt/certbot-auto /usr/src/letsencrypt/letsencrypt-auto
  /usr/src/certbot/certbot-auto /usr/src/certbot/letsencrypt-auto
  /usr/src/certbot-master/certbot-auto /usr/src/certbot-master/letsencrypt-auto"

if [[ ! -v LEBINARY ]]; then
  for i in ${DEFAULTLEBINARY}; do
    if [[ -x ${i} ]]; then
      LEBINARY=${i}
      echo "Found LetsEncrypt/Certbot binary at ${LEBINARY}"
      break
    fi
  done
fi

# Command line options depending on New or Renew.
NEWCERT="--renew-by-default certonly"
RENEWCERT="-n renew"

# Check for required binaries
if [[ ! -x ${LEBINARY} ]]; then
  echo "Error: LetsEncrypt binary not found in ${LEBINARY} !"
  echo "You'll need to do one of the following:"
  echo "1) Change LEBINARY variable in this script"
  echo "2) Install LE manually or via your package manager and do #1"
  echo "3) Use the included get-letsencrypt.sh script to install it"
  exit 1
fi

if [[ ! -x $( which keytool ) ]]; then
  echo "Error: Java keytool binary not found."
  exit 1
fi

if [[ ! -x $( which openssl ) ]]; then
  echo "Error: OpenSSL binary not found."
  exit 1
fi

if [[ ! -z ${email} ]]; then
  email="--email ${email}"
else
  email=""
fi

shift $((OPTIND -1))
for val in "${domains[@]}"; do
        DOMAINS="${DOMAINS} -d ${val} "
done

MAINDOMAIN=${domains[0]}

if [[ -z ${MAINDOMAIN} ]]; then
  echo "Error: At least one -d argument is required"
  usage
  exit 1
fi

if [[ ${renew} == "yes" ]]; then
  LEOPTIONS="${RENEWCERT}"
else
  LEOPTIONS="${email} ${DOMAINS} ${NEWCERT}"
fi

if [[ ${onlyinsert} != "yes" ]]; then
  echo "Firing up standalone authenticator on TCP port 80 and requesting cert..."
  ${LEBINARY} --server https://acme-v01.api.letsencrypt.org/directory \
              --agree-tos --standalone --preferred-challenges http ${LEOPTIONS}
fi

if [[ ${onlyinsert} != "yes" ]] && md5sum -c "/etc/letsencrypt/live/${MAINDOMAIN}/cert.pem.md5" &>/dev/null; then
  echo "Cert has not changed, not updating controller."
  exit 0
else
  echo "Cert has changed or -i option was used, updating controller..."
  TEMPFILE=$(mktemp)
  CATEMPFILE=$(mktemp)

  # Identrust cross-signed CA cert needed by the java keystore for import.
  # Can get original here: https://www.identrust.com/certificates/trustid/root-download-x3.html
  cat > "${CATEMPFILE}" <<'_EOF'
-----BEGIN CERTIFICATE-----
MIIDSjCCAjKgAwIBAgIQRK+wgNajJ7qJMDmGLvhAazANBgkqhkiG9w0BAQUFADA/
MSQwIgYDVQQKExtEaWdpdGFsIFNpZ25hdHVyZSBUcnVzdCBDby4xFzAVBgNVBAMT
DkRTVCBSb290IENBIFgzMB4XDTAwMDkzMDIxMTIxOVoXDTIxMDkzMDE0MDExNVow
PzEkMCIGA1UEChMbRGlnaXRhbCBTaWduYXR1cmUgVHJ1c3QgQ28uMRcwFQYDVQQD
Ew5EU1QgUm9vdCBDQSBYMzCCASIwDQYJKoZIhvcNAQEBBQADggEPADCCAQoCggEB
AN+v6ZdQCINXtMxiZfaQguzH0yxrMMpb7NnDfcdAwRgUi+DoM3ZJKuM/IUmTrE4O
rz5Iy2Xu/NMhD2XSKtkyj4zl93ewEnu1lcCJo6m67XMuegwGMoOifooUMM0RoOEq
OLl5CjH9UL2AZd+3UWODyOKIYepLYYHsUmu5ouJLGiifSKOeDNoJjj4XLh7dIN9b
xiqKqy69cK3FCxolkHRyxXtqqzTWMIn/5WgTe1QLyNau7Fqckh49ZLOMxt+/yUFw
7BZy1SbsOFU5Q9D8/RhcQPGX69Wam40dutolucbY38EVAjqr2m7xPi71XAicPNaD
aeQQmxkqtilX4+U9m5/wAl0CAwEAAaNCMEAwDwYDVR0TAQH/BAUwAwEB/zAOBgNV
HQ8BAf8EBAMCAQYwHQYDVR0OBBYEFMSnsaR7LHH62+FLkHX/xBVghYkQMA0GCSqG
SIb3DQEBBQUAA4IBAQCjGiybFwBcqR7uKGY3Or+Dxz9LwwmglSBd49lZRNI+DT69
ikugdB/OEIKcdBodfpga3csTS7MgROSR6cz8faXbauX+5v3gTt23ADq1cEmv8uXr
AvHRAosZy5Q6XkjEGB5YGV8eAlrwDPGxrancWYaLbumR9YbK+rlmM6pZW87ipxZz
R8srzJmwN0jP41ZL9c8PDHIyh8bwRLtTcm1D9SZImlJnt1ir/md2cXjbDaJWFBM5
JDGFoqgCWjBH4d1QB7wCCZAA62RjYJsWvIjJEubSfZGL+T0yjWW06XyxV3bqxbYo
Ob8VZRzI9neWagqNdwvYkQsEjgfbKbYK7p2CNTUQ
-----END CERTIFICATE-----
_EOF

  md5sum "/etc/letsencrypt/live/${MAINDOMAIN}/cert.pem" > "/etc/letsencrypt/live/${MAINDOMAIN}/cert.pem.md5"
  echo "Using openssl to prepare certificate..."
  cat "/etc/letsencrypt/live/${MAINDOMAIN}/chain.pem" >> "${CATEMPFILE}"
  openssl pkcs12 -export  -passout pass:aircontrolenterprise \
          -in "/etc/letsencrypt/live/${MAINDOMAIN}/cert.pem" \
          -inkey "/etc/letsencrypt/live/${MAINDOMAIN}/privkey.pem" \
          -out "${TEMPFILE}" -name unifi \
          -CAfile "${CATEMPFILE}" -caname root

  docker container stop ${dockerContainerId}
  sleep 10
  dockerContainerId=$(sudo docker container list | grep unifi-controller | awk '{print $1}')
  echo "Removing existing certificate from Unifi protected keystore..."
  keytool -delete -alias unifi -keystore ${unifiDir}/keystore -deststorepass aircontrolenterprise

  echo "Inserting certificate into Unifi keystore..."
  keytool -trustcacerts -importkeystore \
          -deststorepass aircontrolenterprise \
          -destkeypass aircontrolenterprise \
          -destkeystore ${unifiDir}/keystore \
          -srckeystore "${TEMPFILE}" -srcstoretype PKCS12 \
          -srcstorepass aircontrolenterprise \
          -alias unifi

  sleep 2
  echo "Starting Unifi controllers..."
  docker container start ${dockerContainerId}
  ./teams.sh -b "$(hostname) - UniFi service is restarting, ssl cert should be renewed."

  echo "Done!"
fi

Unable to access old HTTPS login for WiFi router

Part of the reason some of the older sites do not work is due to insecurities in older SSL protocol’s. Some of the older versions are disabled in newer browsers thereby keeping someone from accessing the device.

Unsupported protocol

Work Around

Internet Explorer will let you change the security settings to allow older security protocols to work. Chrome and Firefox seem to have issues letting you do that.

Open Internet Explorer and then go to the Internet Options and find the Advanced tab. Scroll down and locate the “Use SSL3.0” option and enable it.

Enable SSL 3.0

You may also need to modify the Zones.

Change Internet Zones

You should now be able to accept the Security Certificate and log in.

Proceed to login page for site

This should only be done if absolutely needed and only on sites you trust. It would be a good idea to change the settings back when finished.

More info.
https://community.spiceworks.com/topic/1958251-just-purchased-a-sonicwall-via-ebay-but-after-doing-the-initial-config

Add Self Signed SSL certificate to LibreNMS in CentOS

Install mod_ssl

yum install mod_ssl -y

Create Directory for SSL key.

mkdir /etc/ssl/key
chmod 700 /etc/ssl/key

Create certificate.

openssl req -x509 -nodes -days 365 -newkey rsa:2048 -keyout /etc/pki/tls/private/localhost.key -out /etc/pki/tls/certs/localhost.crt

Fill out the info or what is applicable.

Now edit the LibreNMS Apache config file /etc/httpd/conf.d/librenms.conf

All you have to do is add the following three lines under the VirtualHost and change *:80 to *:443.

SSLEngine on
SSLCertificateFile /etc/pki/tls/certs/localhost.crt
SSL CertificateKeyFile /etc/pki/tls/private/localhost.key

So when your finished the file should look like this.

<VirtualHost *:443>
 DocumentRoot /opt/librenms/html/
 ServerName server_hostname_or_IP
 SSLEngine on
 SSLCertificateFile /etc/pki/tls/certs/localhost.crt
 SSLCertificateKeyFile /etc/pki/tls/private/localhost.key
 CustomLog /opt/librenms/logs/access_log combined
 ErrorLog /opt/librenms/logs/error_log
 AllowEncodedSlashes NoDecode
 <Directory "/opt/librenms/html/">
 Require all granted
 AllowOverride All
 Options FollowSymLinks MultiViews
 </Directory>
</VirtualHost>

Don’t forget to allow https/port 443 traffic through the firewall.  Guide here

If you have any issues, you may need to chmod the key and crt file.

chmod 644 /etc/pki/tls/certs/localhost.crt
chmod 644 /etc/pki/tls/private/localhost.key

You should now be able to access LibreNMS using https.  Note, you’ll need to allow an exception in your browser for your self signed certificate.

https://LibreNMS_IP_Address

Install LibreNMS on Ubuntu with HTTPS

The goal of this guide is to install LibreNMS on an Ubuntu Server with a self signed certificate.  Most of the steps are copied out of the LibreNMS Documentation found here.

Install required packages

sudo apt install apache2 composer fping git graphviz imagemagick libapache2-mod-php7.0 mariadb-client mariadb-server mtr-tiny nmap php7.0-cli php7.0-curl php7.0-gd php7.0-json php7.0-mcrypt php7.0-mysql php7.0-snmp php7.0-xml php7.0-zip python-memcache python-mysqldb rrdtool snmp snmpd whois

Create LibreNMS user

sudo useradd librenms -d /opt/librenms -M -r
sudo usermod -a -G librenms www-data

Install LibreNMS

cd /opt
sudo git clone https://github.com/librenms/librenms.git librenms

Configure MySQL

sudo systemctl restart mysql
sudo mysql -uroot -p

Run the following MySQL commands to create the LibreNMS user. Change password to your own password.

CREATE DATABASE librenms CHARACTER SET utf8 COLLATE utf8_unicode_ci;
CREATE USER 'librenms'@'localhost' IDENTIFIED BY 'password';
GRANT ALL PRIVILEGES ON librenms.* TO 'librenms'@'localhost';
FLUSH PRIVILEGES;
exit

Edit following file

sudo vi /etc/mysql/mariadb.conf.d/50-server.cnf

Add the following inside the [mysqld] section

innodb_file_per_table=1
sql-mode=""
lower_case_table_names=0

Restart MySQL

sudo systemctl restart mysql

Configure PHP

Edit the two files and set the time zone, date.timezone.  Example “America/New_York”

sudo vi /etc/php/7.0/apache2/php.ini
sudo vi /etc/php/7.0/cli/php.ini

Then run these commands

sudo a2enmod php7.0
sudo a2dismod mpm_event
sudo a2enmod mpm_prefork
sudo phpenmod mcrypt

Generate Self signed certificate

Enable ssl in apache

sudo a2enmod ssl

Generate Cert

sudo openssl req -x509 -nodes -days 365 -newkey rsa:2048 -keyout /etc/ssl/private/localhost.key -out /etc/ssl/certs/localhost.crt

Configure Apache

Edit the following config file

sudo vi /etc/apache2/sites-available/librenms.conf

Add the following

<VirtualHost *:443>
 DocumentRoot /opt/librenms/html/
 ServerName librenms.example.com
 SSLEngine on
 SSLCertificateFile /etc/ssl/certs/localhost.crt
 SSLCertificateKeyFile /etc/ssl/private/localhost.key
 CustomLog /opt/librenms/logs/access_log combined
 ErrorLog /opt/librenms/logs/error_log
 AllowEncodedSlashes NoDecode
 <Directory "/opt/librenms/html/">
 Require all granted
 AllowOverride All
 Options FollowSymLinks MultiViews
 </Directory>
</VirtualHost>

Run the following commands

sudo a2ensite librenms.conf
sudo a2enmod rewrite
sudo systemctl restart apache2

Configure snmpd

sudo cp /opt/librenms/snmpd.conf.example /etc/snmp/snmpd.conf

Set the SNMP community string in the following file

sudo vi /etc/snmp/snmpd.conf

Then run these commands

sudo curl -o /usr/bin/distro https://raw.githubusercontent.com/librenms/librenms-agent/master/snmp/distro
sudo chmod +x /usr/bin/distro
sudo systemctl restart snmpd

Setup Crontab

sudo cp /opt/librenms/librenms.nonroot.cron /etc/cron.d/librenms

Copy logrotate config

sudo cp /opt/librenms/misc/librenms.logrotate /etc/logrotate.d/librenms

Set permissions

mkdir -p /opt/librenms/rrd /opt/librenms/logs
sudo chown -R librenms:librenms /opt/librenms
sudo setfacl -d -m g::rwx /opt/librenms/rrd /opt/librenms/logs
sudo setfacl -R -m g::rwx /opt/librenms/rrd /opt/librenms/logs

Web Installer

Restart apache

sudo systemctl restart apache2

Finish the install by going to

https://your-server/install.php

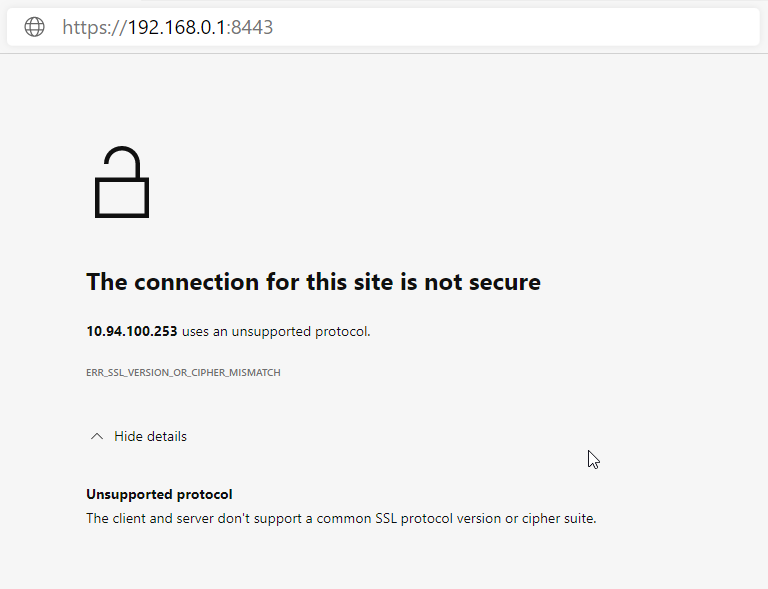
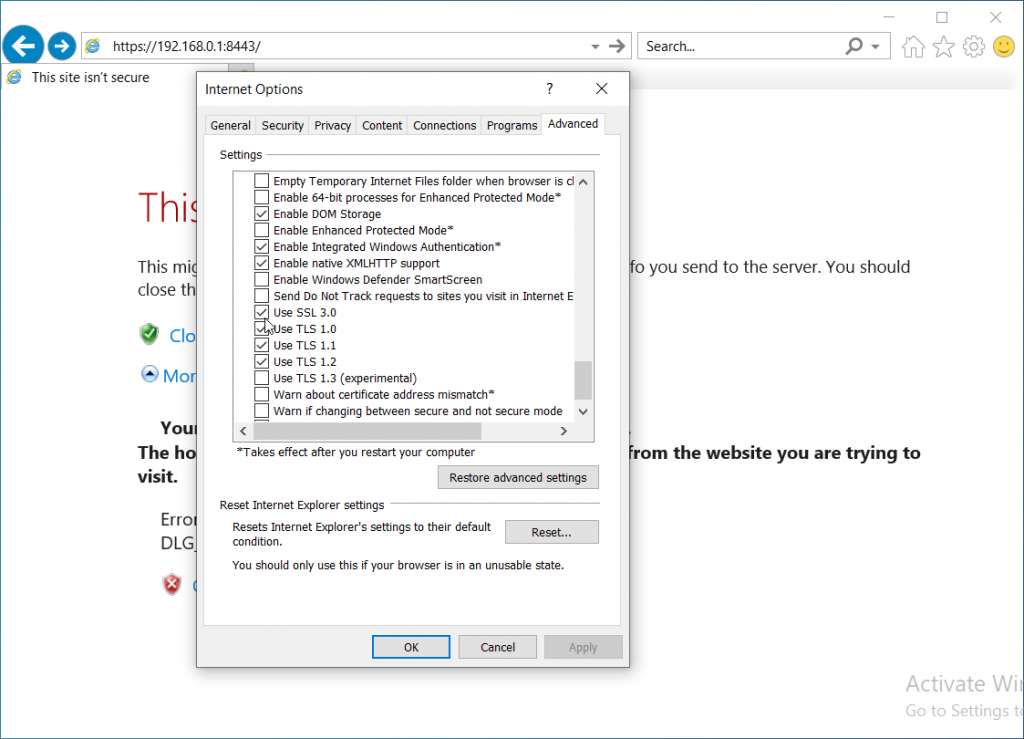
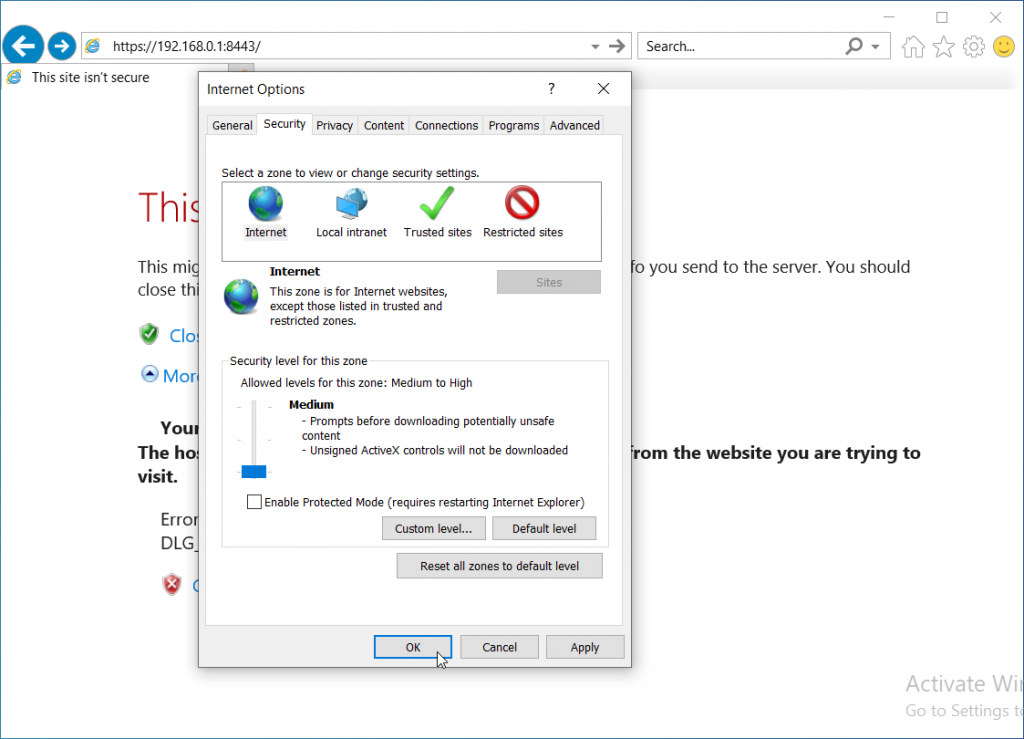
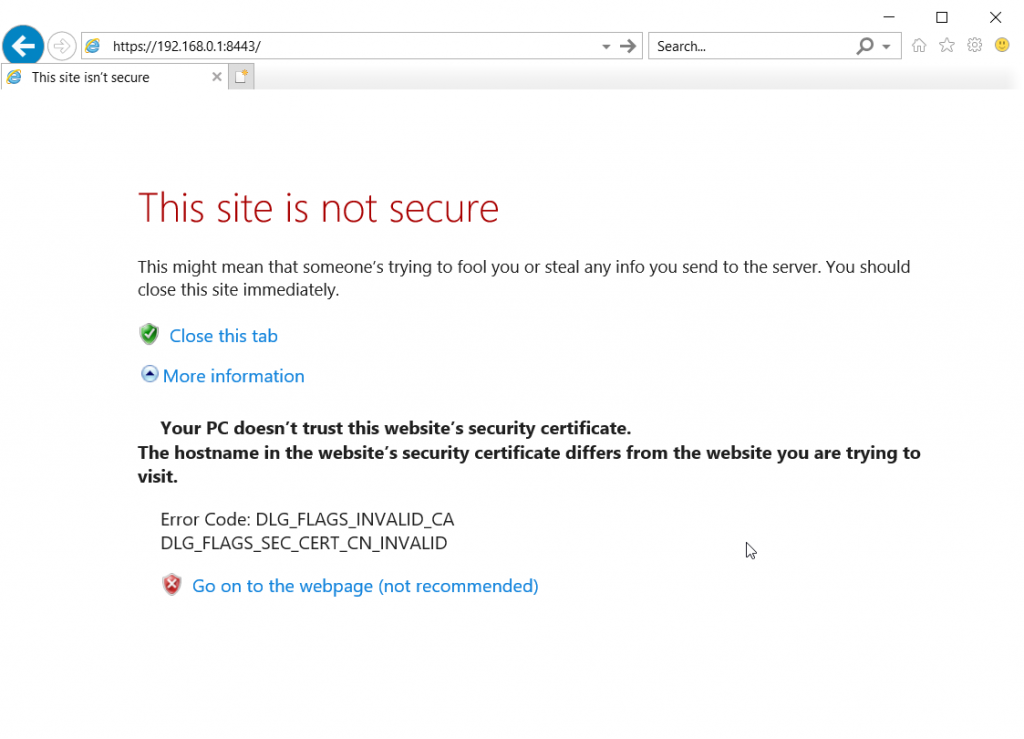
Change “your-server” to your server’s ip address, or hostname.  Since we created a self signed certificate, you’ll need to accept the https error.

Validate

Back on the command line run the php validation script

sudo /opt/librenms/validate.php

Finally log into your new LibreNMS instance by going to

https://your-server

Change “your-server” to your server’s IP address or hostname.