This was a fairly simple test to see what network connections a fresh LineageOS install on a Google Pixel 5 makes. During the initial setup, GPS was disabled. After we set it up and got a base line, we turned GPS on to see what DNS requests it made.
Testing methodology.
- A Computer was used as a Hotspot running both Network Miner 2.8 and Wireshark to log all network request
- Pixel 5 was installed with the latest version of LineageOS 20 (August 2023)
- Setup was completed without connecting to WiFi or a cellular network
- There was no SIM card in while installing, setting up, or testing
- After setup was complete, WiFi was connected to the computer running the Hotspot
- After a base line was logged, we turned on GPS
- GApps were not installed.
Fresh Install Network Requests
After setup was complete, we connected the Pixel 5 to the PC running NetworkMiner and Wireshark. It immediately made a handful of requests to the following 5 domain names
- www.google.com
- connectivitycheck.gstatic.com
- time.android.com
- g.co
- firebaseinstallations.googleapis.com
connectivitycheck.gstatic.com is used to detect if the current network has internet and also to detect if there is a captive portal that you need to log into.
time.android.com would be to check the time and make sure it is correct.
Not sure what the extra 3 are used for. It is possible that firebaseinstallations.googleapis.com is used for the Android System Intelligence, or some other app that comes by default on LineageOS.
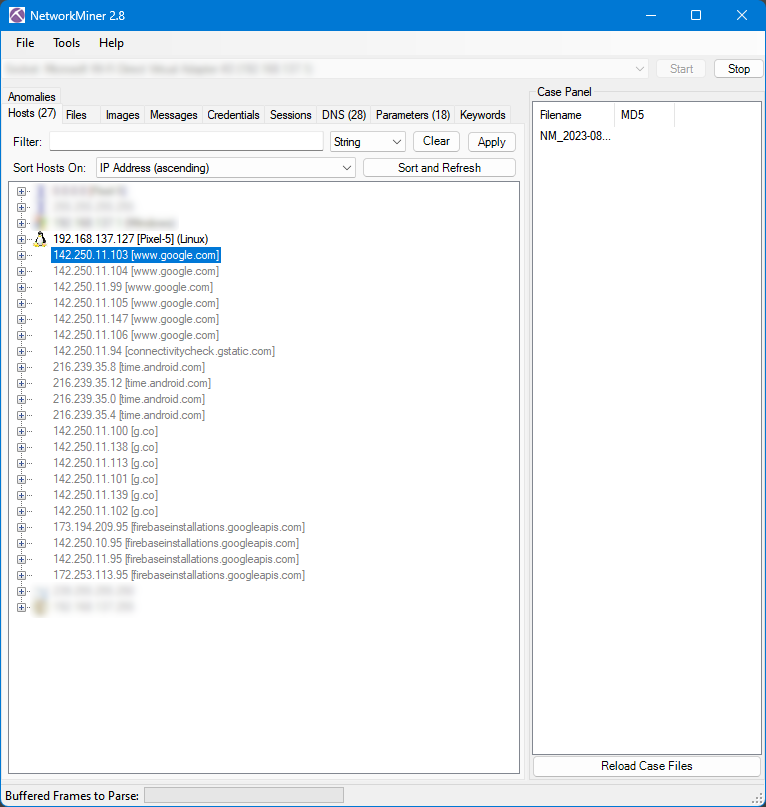
The following NetworkMiner screenshot shows all the IP addresses that were returned for the DNS queries. Note that a DNS query can return multiple IP addresses for a domain name, and then the device only use one of those IP addresses to transmit traffic.
A couple of normal network broadcast, multicast, and gateway addresses are blurred out as they are normal for devices on a local network.
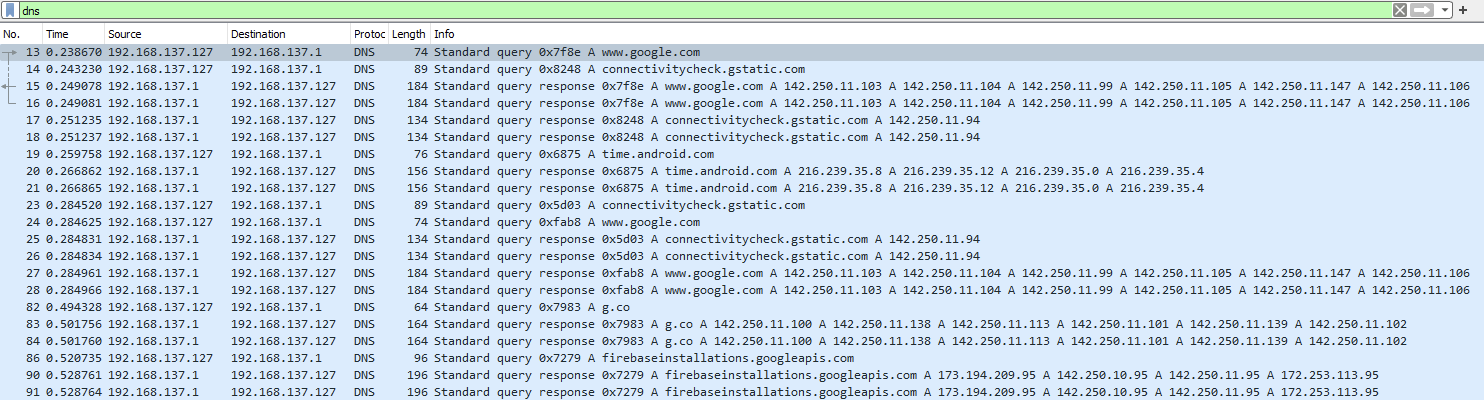
Here is a Wireshark screenshot for all the DNS requests.
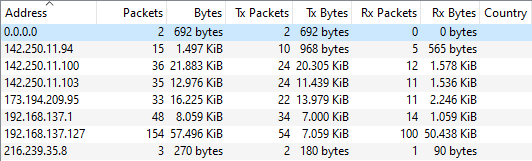
Total bandwidth sent and received for each IP
Using Wireshark, we were able to get a total amount of data sent and received for each of the domains.
- www.google.com – 12.976 KiB
- connectivitycheck.gstatic.com – 1.497 KiB
- time.android.com 270 bytes
- g.co – 21.883 KiB,
- firebaseinstallations.googleapis.com – 16.225 KiB
- Total for Pixel 5 – 52.851 KiB
Turning on GPS
Turning on GPS immediately led to a connection to xtrapath5.xboxprod.izatcloud.net.
The four lines are just different IP’s for the same domain.

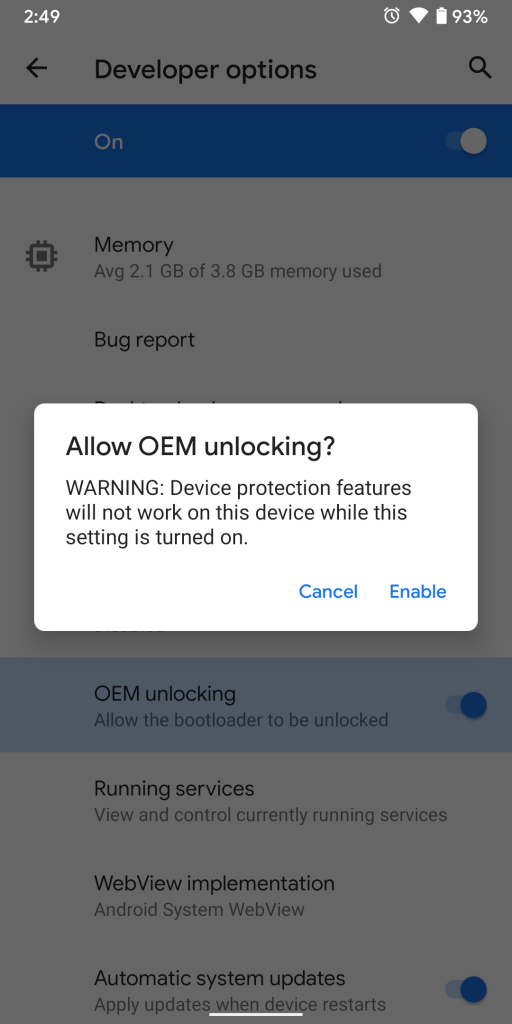
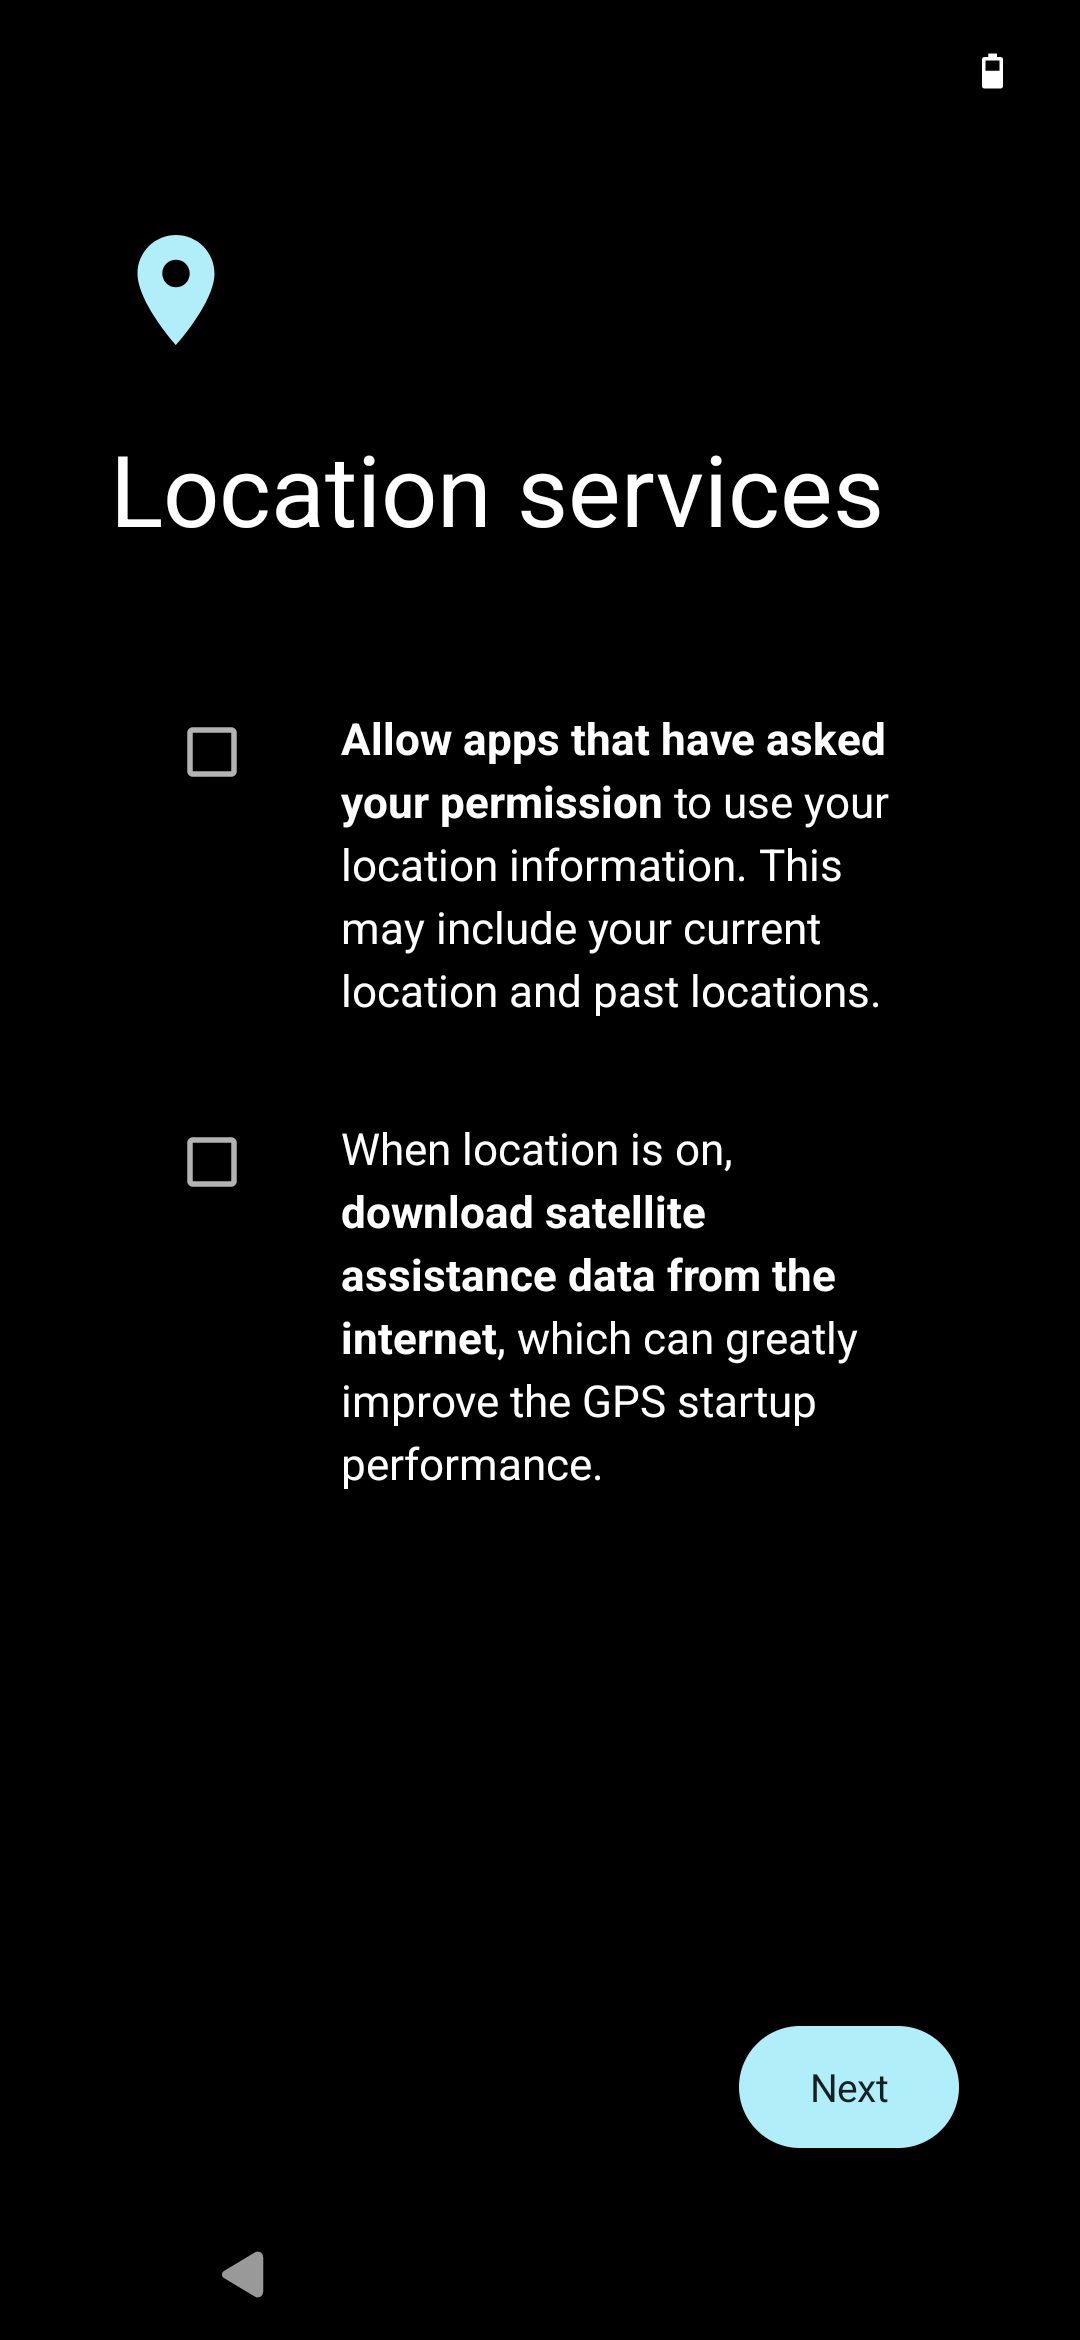
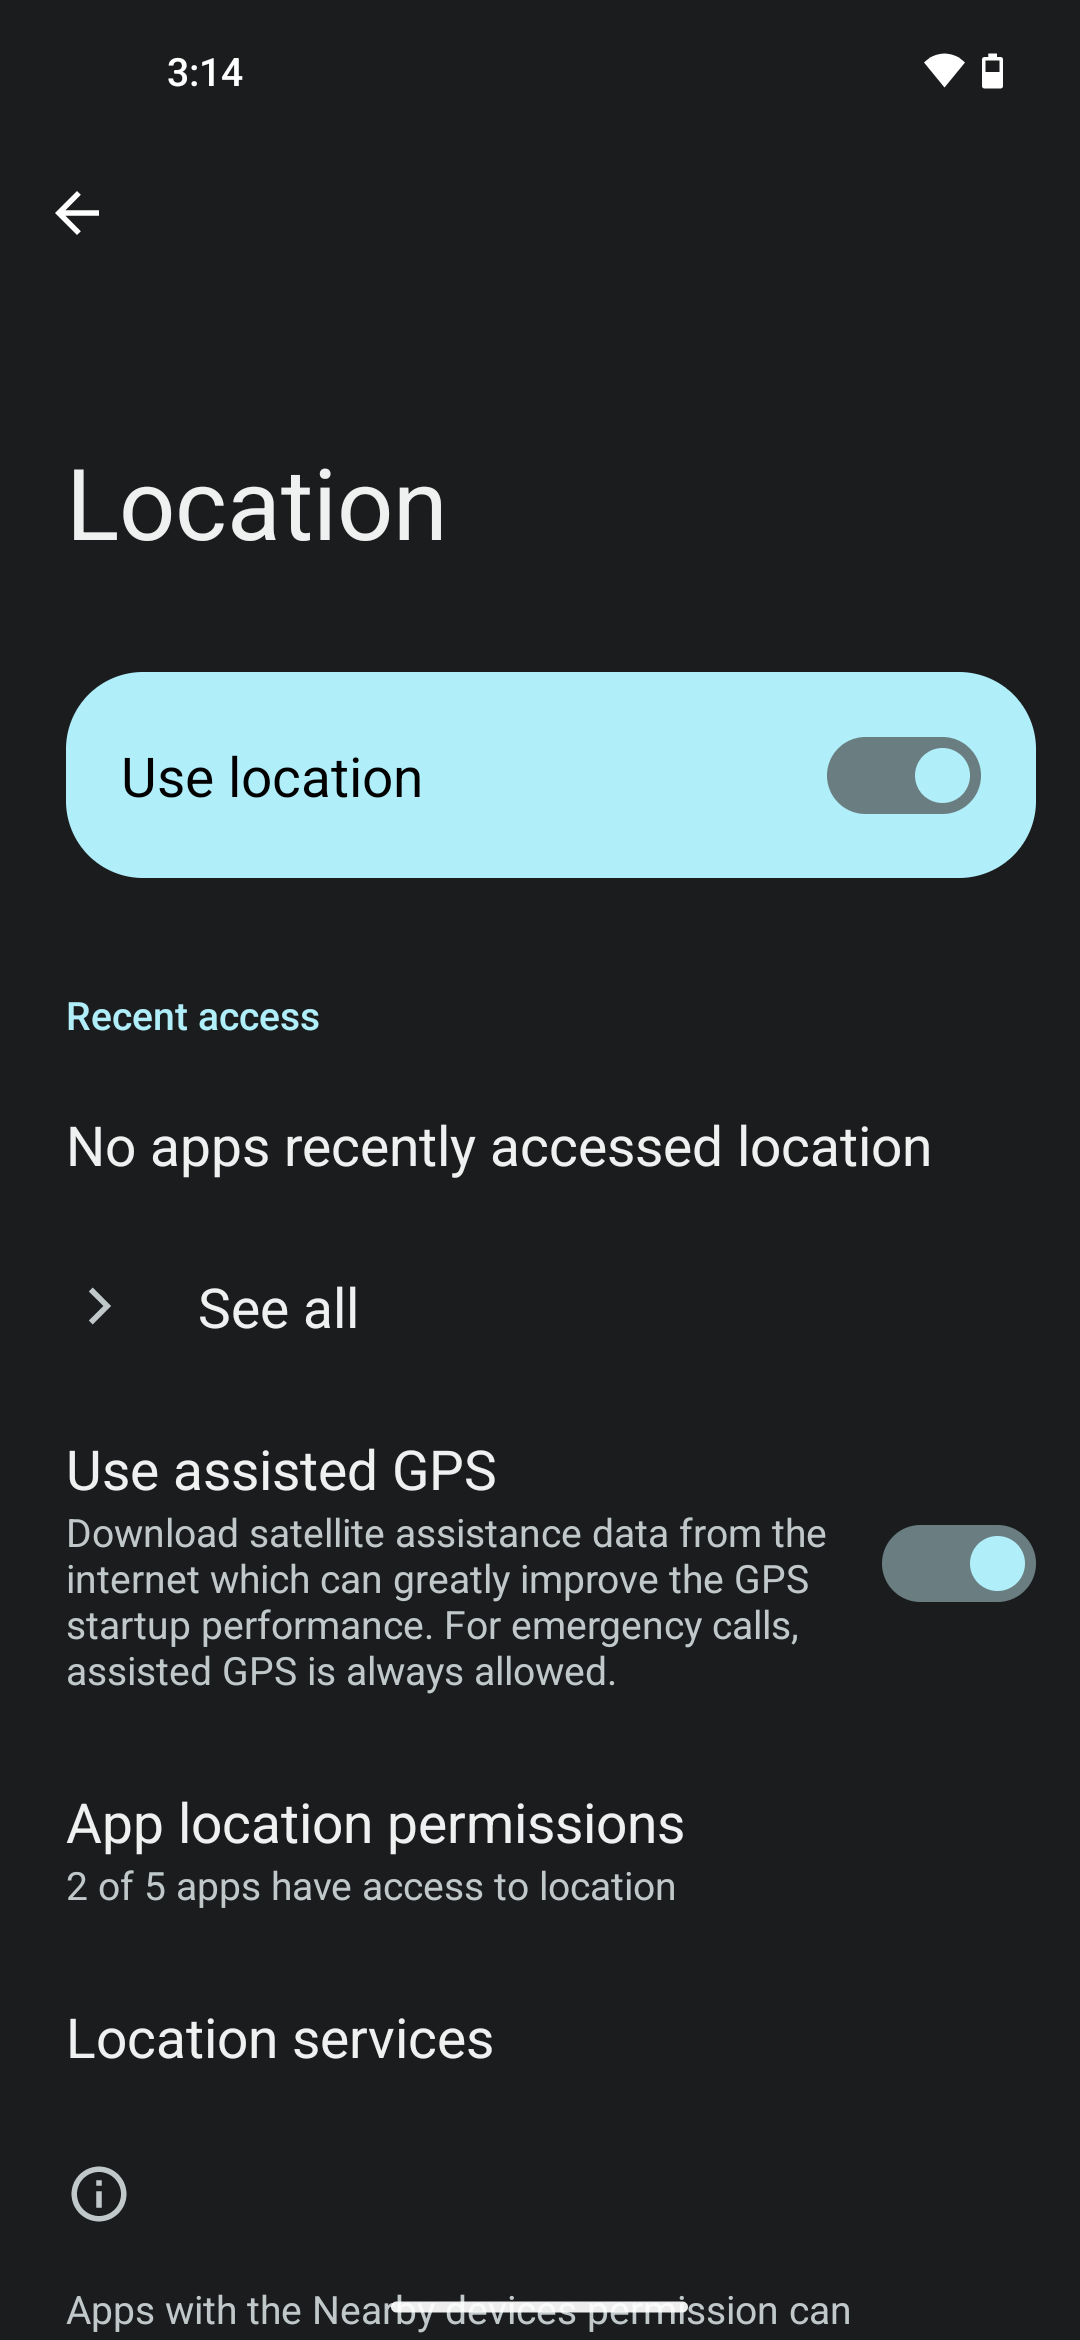
From the Location settings, we can toggle on or off the “Use assisted GPS”.
The settings say the following about Assisted GPS “Download satellite assistance data from the internet which can greatly improve the GPS startup performance. For emergency calls, assisted GPS is always allowed”
Essentially, it will download some files that help your phone find satellites faster which will get you a faster GPS lock. Without it, it can take awhile to find your position.
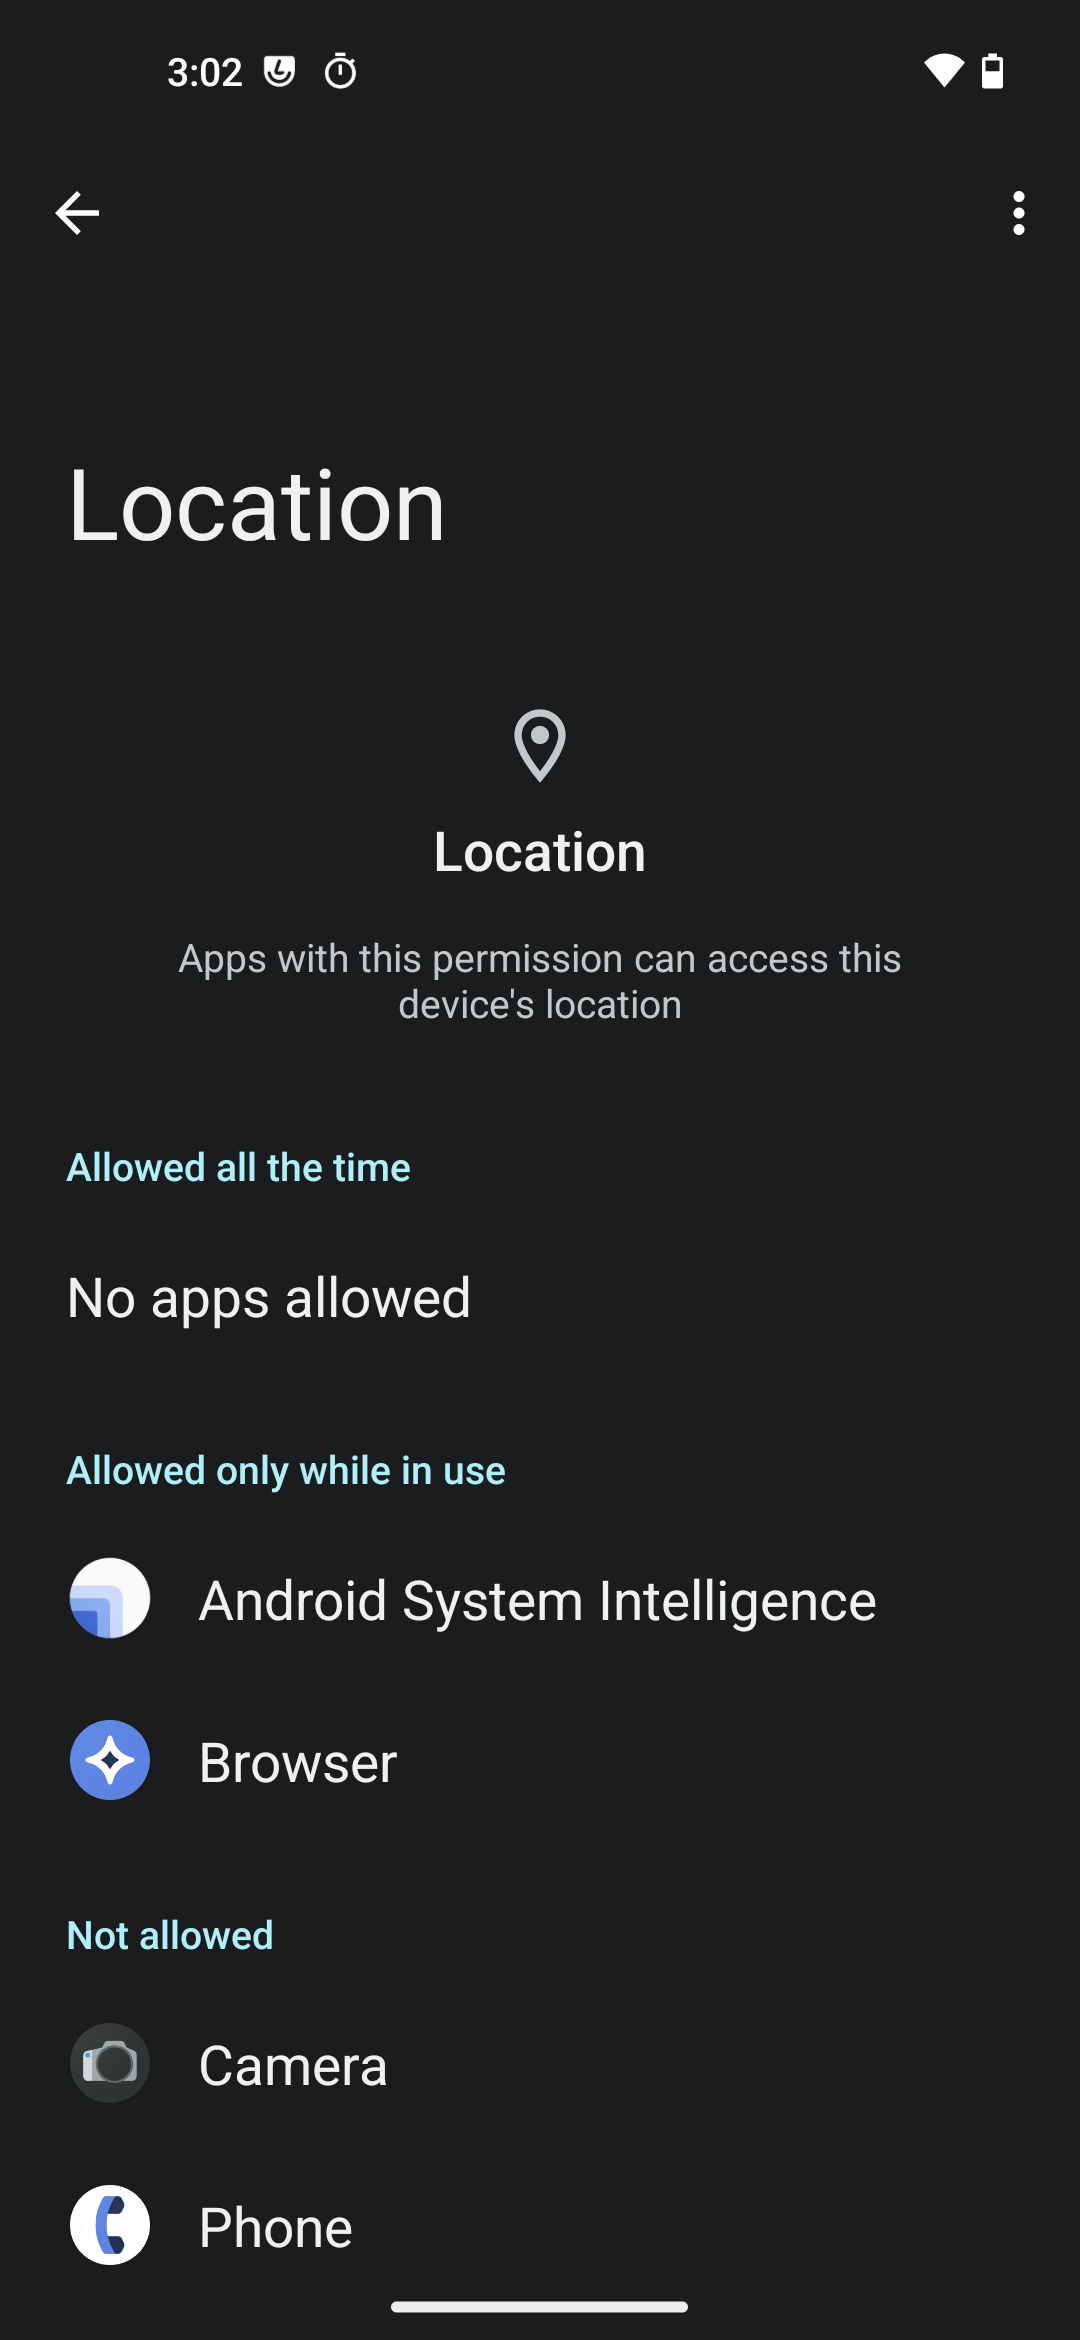
During the initial setup (First screenshot below), you can toggle on/off Assisted GPS. By default, Android System Intelligence and the Browser are allowed to use Location.
Hopefully that is a helpful overview of the default LineageOS network connections and what some of them are used for.