The dig command is apart of the bind-utils package. You can install it with.
sudo yum install bind-utils -y
Now run dig
dig localhost

The dig command is apart of the bind-utils package. You can install it with.
sudo yum install bind-utils -y
Now run dig
dig localhost
Download the correct package for your distribution of Linux from
https://teams.microsoft.com/downloads
You should be able to open the installer and it should install, if not you can run the following commands from a terminal
The install instructions are for Debian/Ubuntu/Linux Mint.
Install using dpkg
sudo dpkg -i Downloads/teams_1.2.00.32451_amd64.deb
Launch Teams by typing
teams
Or you can launch it from your Applications Menu
After Teams is installed and launched, sign in to your Microsoft account.
You can have dd show the progress of a write by specifying “status=progress” in the command line arguments.
sudo dd if=Downloads/CentOS-8-x86_64-1905-boot.iso of=/dev/sdb status=progress
Example:
bob@localhost:~$ sudo dd if=Downloads/CentOS-8-x86_64-1905-boot.iso of=/dev/sdb status=progress
559690240 bytes (560 MB, 534 MiB) copied, 96 s, 5.8 MB/s    <-- This is shown while writing.
1093632+0 records in
1093632+0 records out
559939584 bytes (560 MB, 534 MiB) copied, 96.0339 s, 5.8 MB/s
Work around is to use the -o option and specify KexAlgorithms with the correct option.
ssh -o KexAlgorithms=+diffie-hellman-group1-sha1 admin@192.168.11.1
The following are errors that are returned when trying to ssh to a device.
Cambium 450i PMP Equipment
Unable to negotiate with 192.168.0.1 port 22: no matching key exchange method found. Their offer: diffie-hellman-group1-sha1,diffie-hellman-group14-sha1
Open up “Network and Internet” settings in Control Panel.
Find your WiFi adapter, right click and select properties.
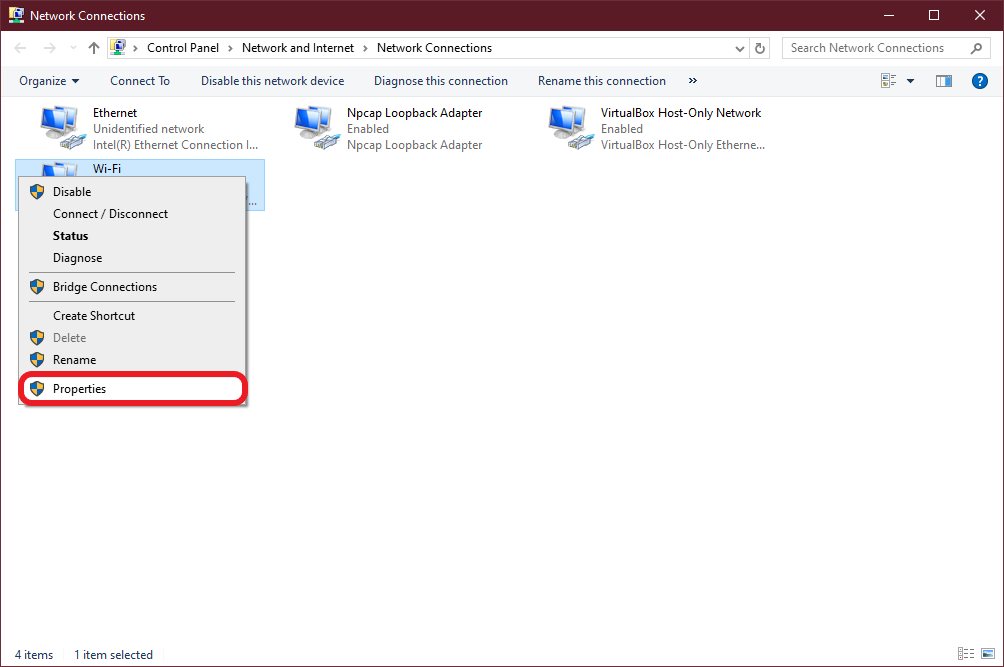
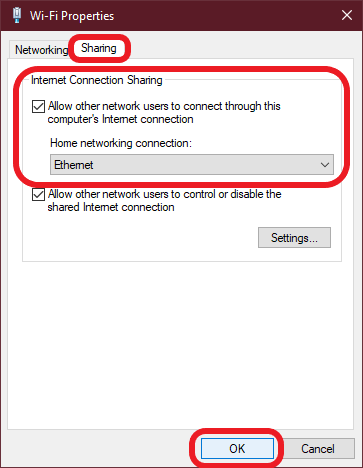
Click on Sharing, then click the box under Internet Connection Sharing. Select the Ethernet connection and save.
There are a few different ways to find out the system up time in Linux.
admin@localhost [~]# cat /proc/uptime
 306350.37 2218975.63
admin@localhost [~]#
Taking the above command one step further, we can run it in the date command to see the system start up date.
date --date="cat /proc/uptime | awk '{print $1}'seconds ago"
[admin@localhost ~]$ uptime
  6:25AM  up 2 days,  6:24, 3 users, load averages: 0.00, 0.00, 0.00
[admin@localhost ~]$
[admin@localhost ~]$ w
  6:27AM  up 2 days,  6:25, 2 users, load averages: 0.00, 0.00, 0.00
 USER             TTY      FROM              LOGIN@  IDLE WHAT
 admin       p1       localhost.  6:09AM    13 su (bash)
 admin       p2       localhost.  6:25AM     - w
[admin@localhost ~]$
Reference links
https://sharadchhetri.com/2013/03/18/4-different-commands-to-find-system-uptime-in-linux/
Edit IPF config
vi /etc/ipf.rules
Hit “i” to enter insert mode and add the following to allow SSH from the 192.168.0.0/24 ip range. Change range if needed.
pass in quick on bge0 proto tcp from 192.168.0.0/24 to any port = 22 flags S keep state
Save and exit the file by hitting “Esc” then typing “:wq” followed by enter.
And start IPF with new rules
ipf -Fa -f /etc/ipf.rules
2023 Update: Recent versions of REHL have completely disabled DES which can cause issues even when using the +ssh-rsa or +ssh-rsa. You can use the following command to enable SHA1, however, upgrading the server would be recommended.
update-crypto-policies --set DEFAULT:SHA1
Reason for it not working is some of the older weaker SSH encryption algorithms have been disabled. You can allow ssh to use it by specifying the following option.
-oHostKeyAlgorithms=+ssh-dss
The whole command would look like
ssh -o HostKeyAlgorithms=+ssh-dss root@192.168.111.4
Check and verify that DNS is not being blocked upstream by a firewall. Behavior is weird, the server can get out to the internet, access to the servers IP address is available, but can’t ping domains that are locally hosted. Are also unable to ping the domains from the internet in.
To resolve the issue either disable the DNS firewall rules, or better yet add some rules to allow access to the cPanel server.
Find active screens with
xrandr | grep " connected"Example output
HDMI-0 connected 1920x1080+0+0 (normal left inverted right x axis y axis) 527mm x 296mm
eDP-1-1 connected primary 1920x1080+0+0  (normal left inverted right x axis y axis) 294mm x 165mm
Set desired screen brightness. Range is from 0-1
xrandr --output eDP-1-1 --brightness .5