https://developer.android.com/things/hardware/wifi-adb
The following command will remove all saved networks from your Android Things devices.
adb shell am startservice -n com.google.wifisetup/.WifiSetupService -a WiFiSetupService.Reset

https://developer.android.com/things/hardware/wifi-adb
The following command will remove all saved networks from your Android Things devices.
adb shell am startservice -n com.google.wifisetup/.WifiSetupService -a WiFiSetupService.Reset
From the start menu search for “Edit environment variables for your account”
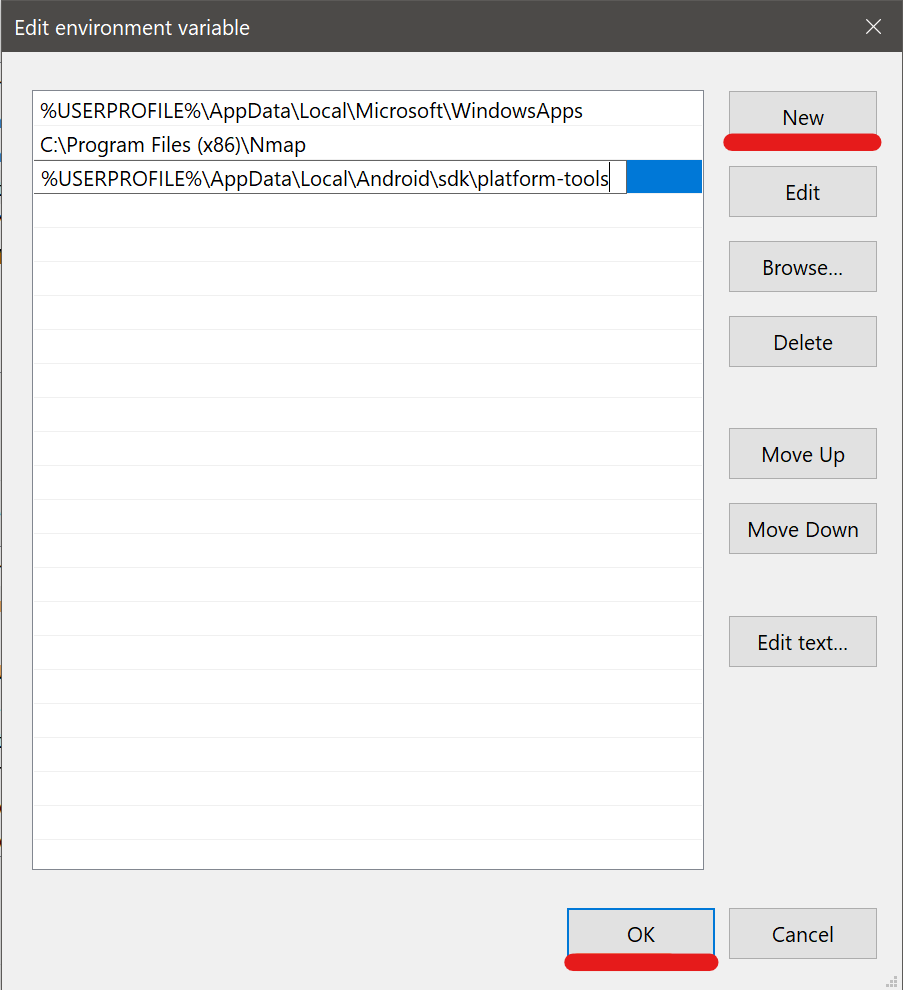
Click Path and then Edit.
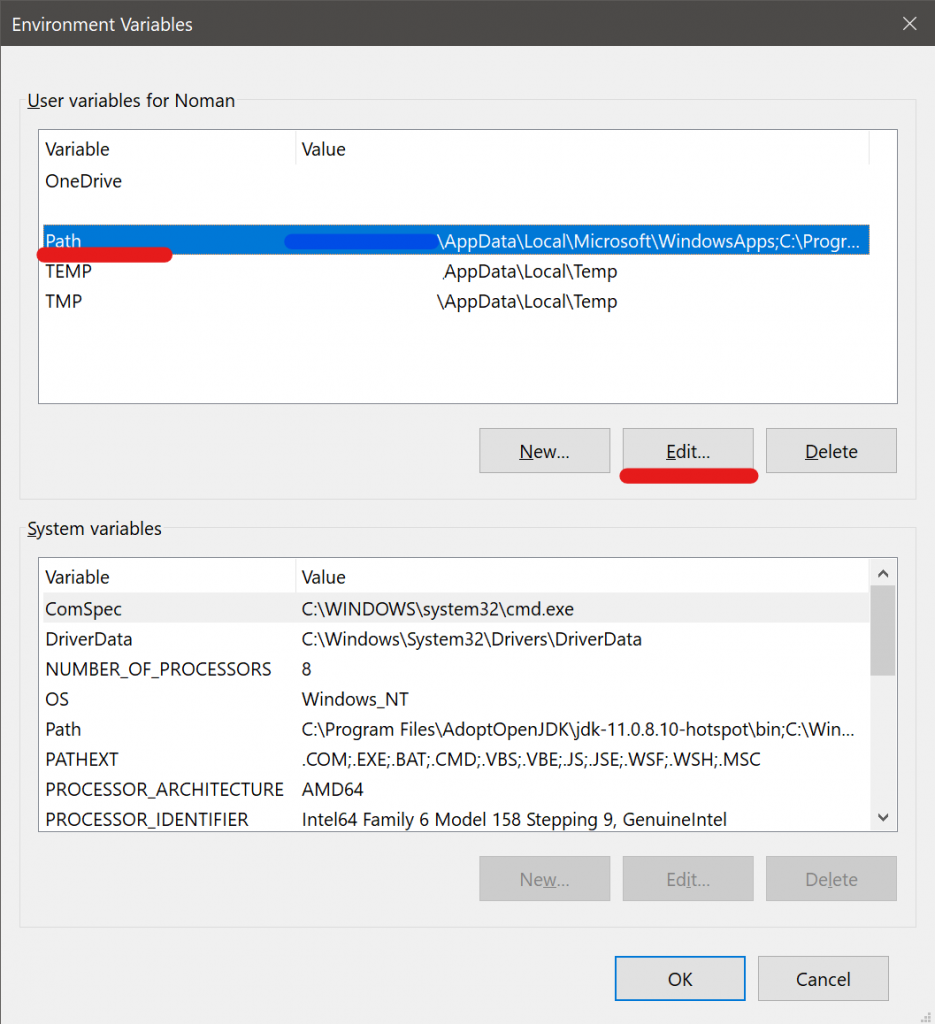
Then click new and paste in the path to the ADB directory which should be
%USERPROFILE%\AppData\Local\Android\sdk\platform-toolsAnd hit OK
You should be good now. You’ll need to relaunch and Command Prompts you have open, but you should be able to run adb without having to navigate to the adb folder.
Recently upgraded a UniFi-Video VM by creating a new VM and restoring the backup from the previous one. There was a separate virtual disk used for storing all the videos. Although once I reattached it, I had to change the owner to the unifi-video user. lt was reporting that the owner/group was 127 and 134, looks like that was the user ID from the previous VM.
Example output from ls -hla command
drwxr-xr-x 3 127 134 4.0K Jan 16 2020 176de761-8399-3bed-8ceb-917cbe4d25bd
drwxr-xr-x 2 127 134 4.0K Sep 10 12:28 21d506ef-dded-31f2-baf8-c109a7e653b9
drwxr-xr-x 4 127 134 4.0K Jan 1 2020 1a3afc4c-a030-39a1-b139-857444c8b71c
Ended up changing the owner to the unifi-video owner with the chown command. /path/to/videos is the mount point of the video drive.
chown -R unifi-video:unifi-video /path/to/videos
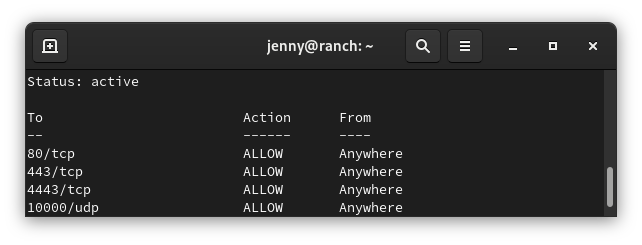
You should be able to copy and paste all the following commands in. You can check the status of the commands after with
sudo ufw status
sudo ufw allow 3478/UDP
sudo ufw allow 5514/UDP
sudo ufw allow 8080/TCP
sudo ufw allow 8443/TCP
sudo ufw allow 8880/TCP
sudo ufw allow 8843/TCP
sudo ufw allow 6789/TCP
sudo ufw allow 27117/TCP
sudo ufw allow 10001/UDP
sudo ufw allow 1900/UDP
sudo ufw allow 7080/TCP
sudo ufw allow 7443/TCP
sudo ufw allow 7445/TCP
sudo ufw allow 7446/TCP
sudo ufw allow 7447/TCP
sudo ufw allow 10001/UDP
sudo ufw allow 6666/TCP
sudo ufw allow 7004/UDP
sudo ufw allow 7442/TCP
https://help.ui.com/hc/en-us/articles/217875218-UniFi-Video-Ports-Used
https://help.ui.com/hc/en-us/articles/218506997-UniFi-Ports-Used
Below are some simple commands around working with UFW. UFW is included in Ubuntu. However it may need to be enable.
sudo ufw status
sudo systemctl stop ufw && sudo systemctl disable ufw
sudo systemctl stop ufw
sudo systemctl stop ufw
sudo ufw enable
sudo ufw allow 22/tcp
sudo ufw status numbered
Example output
sudo ufw status numbered Status: activeTo Action From-- ------ ----[1] 3478/udp ALLOW IN Anywhere [2] 5514/udp ALLOW IN Anywhere [3] 8080/tcp ALLOW IN Anywhere [4] 8443/tcp ALLOW IN Anywhere [5] 8880/tcp ALLOW IN Anywhere [6] 8843/tcp ALLOW IN Anywhere [7] 6789/tcp ALLOW IN Anywhere [8] 27117/tcp ALLOW IN Anywhere [9] 22/tcp ALLOW IN Anywhere
You need to know the number of the rule you want to delete. Replace number with the number of the rule from the status command
sudo ufw delete number
sudo ufw reset
Allow access to port from specific IP address
Example command allows access to SSH (port 22) from the 172.16.0.0/12 ip range.
sudo ufw allow proto tcp from 172.16.0.0/12 to any port 22
One note: It appears that you need to run the rule with every IP range you want to allow.
Allow access to port from all private IP ranges (RFC 1918)
If we wanted to allow SSH (port 22) from all local IP addresses, we would need to run the following three commands.
sudo ufw allow proto tcp from 10.0.0.0/8 to any port 22
sudo ufw allow proto tcp from 172.16.0.0/12 to any port 22
sudo ufw allow proto tcp from 192.168.0.0/16 to any port 22
The following link has more information regarding UFW firewall and subnets.
https://www.cyberciti.biz/faq/ufw-allow-incoming-ssh-connections-from-a-specific-ip-address-subnet-on-ubuntu-debian/
You can set the timezone using timedatectl
List time zones
timedatectl list-timezones
Set time zone. Replace America/Chicago with your timezone.
timedatectl set-timezone America/Chicago
Replace ens160 with the connection name. “vmcli con show”
sudo nmcli connection mod ens160 ipv4.method auto
Should be able to restart the networking service or reboot the server
The problem is that the code in SettingsActivity is not tied to the settings_activity.xml file. So it is using the activity_main.xml instead. It does in fact switch activities, the header at the top shows that it is in the Settings, but it shows the same information on the Main Activity. Problem showed up after copying and pasting code.
Check the following line under the initial onCreate function
override fun onCreate(savedInstanceState: Bundle?) {
        super.onCreate(savedInstanceState)
        setContentView(R.layout.activity_main)  // <-- Should be R.layout.settings_activity
The setContentView line should reflect the Layout XML file under res -> layout -> settings_activity.xml
You need to use a Theme.AppCompat theme (or descendant) with this activity.
Looks like you can get the above error resolved by adding the following to the Android Manifest file.
android:theme="@style/Theme.AppCompat.Light

First you’ll need to install the remi repo
sudo wget https://dl.fedoraproject.org/pub/epel/epel-release-latest-7.noarch.rpm
sudo wget http://rpms.remirepo.net/enterprise/remi-release-7.rpm
rpm -Uvh remi-release-7.rpm epel-release-latest-7.noarch.rpm
You’ll need to install yum-utils, disable all old php versions, and enable the remi-php74
sudo yum install -y yum-utils
sudo yum-config-manager --disable remi-php56
sudo yum-config-manager --disable remi-php71
sudo yum-config-manager --disable remi-php72
sudo yum-config-manager --disable remi-php73
sudo yum-config-manager --enable remi-php74
If you run into issues you may want to see if you have the webtatic repo installed. I had to disable it to get php to update.
vi /etc/yum.repos.d/webtatic
[webtatic]
name=Webtatic Repository EL7 - $basearch
baseurl=https://repo.webtatic.com/yum/el7/$basearch/
mirrorlist=https://mirror.webtatic.com/yum/el7/$basearch/mirrorlist
failovermethod=priority
enabled=0   <- Disabled by changing to a 0
gpgcheck=1
gpgkey=file:///etc/pki/rpm-gpg/RPM-GPG-KEY-webtatic-el7
And running the yum update should update it to php 7.4
sudo yum update
More information available here.