Started getting the following error while running ./validate.php for LibreNMS
Cannot load Zend OPcache - it was already loaded
Looks like the problem arises out of PHP trying to load two ini files for OPcache. Was trying to enable OPcache for LibreNMS so I created an opcache.ini file and put the settings in it. I missed the default 10-opcache.ini file.
Moving all the settings into the 10-opcache.ini file and deleting the created opcache.ini file resolved the issue for me.
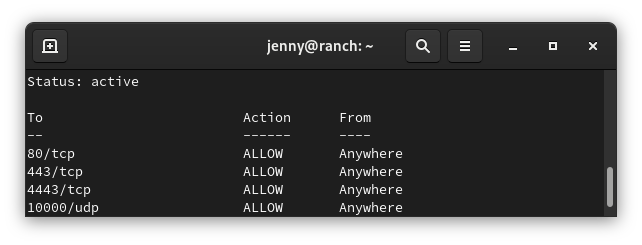
sudo ufw status numbered
Status: active
To            Action   From
--            ------   ----
[1] 3478/udp  ALLOW IN  Anywhere
[2] 5514/udp  ALLOW IN  Anywhere
[3] 8080/tcp  ALLOW IN  Anywhere
[4] 8443/tcp  ALLOW IN  Anywhere
[5] 8880/tcp  ALLOW IN  Anywhere
[6] 8843/tcp  ALLOW IN  Anywhere
[7] 6789/tcp  ALLOW IN  Anywhere
[8] 27117/tcp ALLOW IN  Anywhere
[9] 22/tcp    ALLOW IN  Anywhere
Delete rule
You need to know the number of the rule you want to delete. Replace number with the number of the rule from the status command
sudo ufw delete number
Reset rules
sudo ufw reset
Allow access to port from specific IP address
Example command allows access to SSH (port 22) from the 172.16.0.0/12 ip range.
sudo ufw allow proto tcp from 172.16.0.0/12 to any port 22
One note: It appears that you need to run the rule with every IP range you want to allow.
Allow access to port from all private IP ranges (RFC 1918)
If we wanted to allow SSH (port 22) from all local IP addresses, we would need to run the following three commands.
sudo ufw allow proto tcp from 10.0.0.0/8 to any port 22
sudo ufw allow proto tcp from 172.16.0.0/12 to any port 22
sudo ufw allow proto tcp from 192.168.0.0/16 to any port 22
Save and exit. Now when the system reboots it should automatically mount the drive. You should also be able to call “mount -a” to automatically mount everything in fstab.
From the server side, edit the /etc/ssh/sshd_config
Change, uncomment, or add
ClientAliveInterval 120
ClientAliveCountMax 15
Change the AliveInterval and CountMax as desired.
More info on the AliveIntercal and CountMax.
ClientAliveCountMax Sets the number of client alive messages which may be sent without sshd(8) receiving any messages back from the client. If this threshold is reached while client alive messages are being sent, sshd will disconnect the client, terminating the session. It is important to note that the use of client alive messages is very different from TCPKeepAlive. The client alive messages are sent through the encrypted channel and therefore will not be spoofable. The TCP keepalive option enabled by TCPKeepAlive is spoofable. The client alive mechanism is valuable when the client or server depend on knowing when a connection has become unresponsive.
The default value is 3. If ClientAliveInterval is set to 15, and ClientAliveCountMax is left at the default, unresponsive SSH clients will be disconnected after approximately 45 seconds. Setting a zero
ClientAliveCountMax disables connection termination.ClientAliveInterval Sets a timeout interval in seconds after which if no data has been received from the client, sshd(8) will send a message through the encrypted channel to request a response from the client. The default is 0, indicating that these messages will not be sent to the client.
Screen is a handy tool that can help you run scripts on servers remotely without having to worry about the session getting terminated. It seems to operate kinda like a virtual console.
Create Screen Session
Create a new session with a specified name
screen -S SessionName
Example output below. Create session named testsession and print screen sessions.
[bob@localhost imapsync]$ screen -S testsession
[bob@localhost imapsync]$ screen -ls
There are screens on:
3313.testsession (Attached)
1 Sockets in /var/run/screen/S-bob.
[bob@localhost imapsync]$
Disconnect from Screen Session
You can disconnect from a screen session by hitting ctrl + a and then ctrl +d
“ctrl + a” then “ctrl + d”
List Screen Sessions
You can list the screen sessions with
screen -ls
Example
[bob@localhost imapsync]$ screen -ls
There are screens on:
3212.testsession (Detached)
2556.xap (Detached)

2 Sockets in /var/run/screen/S-bob.
[bob@localhost imapsync]$
Connect to screen Session
You can reconnect to a screen session with
screen -r testsession
Terminate Screen Session
To terminate a screen session, connect to that session and then on a clear line hit ctrl + d
Same way as if you were closing a remote ssh connection.
This website stores cookies on your computer. These cookies are used to provide a more personalized experience and to track your whereabouts around our website in compliance with the European General Data Protection Regulation. If you decide to to opt-out of any future tracking, a cookie will be setup in your browser to remember this choice for one year.