How to Install Mikrotik RouterOS on VirtualBox


Note that there are a couple of limitations of using the Cloud Hosted Router (CHR). The main issue is that the default license doesn’t allow for more than 1Mbps on each interface.

https://help.mikrotik.com/docs/display/ROS/Cloud+Hosted+Router%2C+CHR#CloudHostedRouter,CHR-CHRLicensing

Download the VDI version of CHR from the Mikrotik downloads page.

https://mikrotik.com/download

Mikrotik has instructions for installing CHR in VirtualBox, so this post is more of just a summary.

https://wiki.mikrotik.com/wiki/Manual:CHR_VirtualBox_installation

  1. Create a VM with Type Linux, Version Other Linux (64-bit)
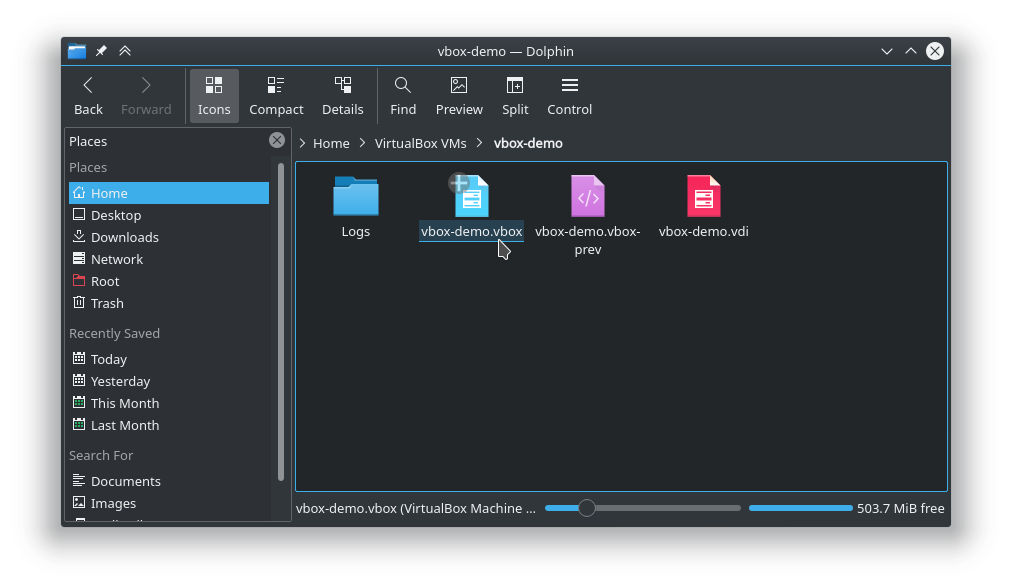
  2. While setting up the VM, select the VDI downloaded from Mikrotik as the virtual disk.
  3. Start the VM and login with admin for the username and nothing for the password.

The easiest way to spin up more vm’s to right click on the VM and Clone.

VirtualBox – Failed to acquire the VirtualBox COM object.

VirtualBox failed to acquire the VirtualBox COM object.

Under the Details it was complaining about VirtualBox.xml

Looking in Windows Explorer in the .VirtualBox folder

C:\Users\Username\.VirtualBox

it shows that the VirtualBox.xml file being empty. Delete the file. Reinstall VirtualBox. Now go to your VM’s in

C:\Users\Username\VirtualBox VMs

Open up the VM folder and double click on the “Virtual Machine Definition” file to “reimport” them into VirtualBox.

Kali Linux Hash Sum Mismatch while doing apt update

https://askubuntu.com/questions/1235914/hash-sum-mismatch-error-due-to-identical-sha1-and-md5-but-different-sha256

Looks like the problem is caused by the Windows Hypervisor Platform. Work around is to disable it.

In the Start menu search for “turn Windows features on or off”

Once open, disable “Virtual Machine Platform” and “Windows Hypervisor Platform”

Disable Virtual Machine Platform

You will need to reboot after it finishes.

VirtualBox – VERR_NEM_VM_CREATE_FAILED

Looks to be an issue if you have Windows HyperV enabled.

Search for and Open up the “Turn Windows features on or off” and make sure “Windows Hypervisor Platform” is unchecked and hit OK to apply it.

Disable Windows Hypervisor Platform

Reboot computer and launch VM

https://superuser.co/questions/1442766/virtualbox-fails-to-start-with-verr-nem-vm-create-failed

Failed to acquire the VirtualBox COM object.

It appears that the issue could be a corrupt VirtualBox.xml file. The one I had did not have anything in it. Removing or moving the file let it create a new one and let VirtualBox actually start.

mv ~/.config/VirtualBox/VirtualBox.xml{,old}

Only problem is that none of the VM’s showed up. Was able to go to the ~/VirtualBox folder in a file browser and launch the vbox file to start the VM

Install VirtualBox Guest Addition for Kali Linux

Boot up the virtual machince

Insert the “Guest Additions CD Image…” from the Devices menu

In the VM, open up Files/Nautilus or Dolphin and find the CD. Open a terminal in the same directory and execute the auto run script

sudo sh autorun.sh

It should pop up another window to install the guest additions. After it is installed, you’ll need to reboot the VM for the new changes to take effect.

Install VirtualBox Guest Additions for Fedora 22

Install kernel headers, dkms, etc

dnf -y kernel-headers kernel-devel dkms gcc gcc-c++

Reboot the VM

reboot

Mount the Guest Additions by going to menu > Devices > Insert Guest Additions CD image… or you can hit “Host + D”.

The Host key is typically the Right Ctrl(On Windows) or CMD(On OS X) key.


Installing the Guest Additions

Via the GUI

Mount the Guest Additions from your file browser, and then launch the “VBoxLinuxAdditions.run”.

You will need root privileges, so either launch your file browser as root, or drag and drop the “VBoxLinuxAdditions.run”, into a root terminal and hit Enter.

Via Command Line

mkdir /tmp/vbox
sudo mount /dev/cdrom /tmp/vbox
sudo /tmp/vbox/VBoxLinuxAdditions.run

If you run into any errors, try ejecting, and remounting the Guest Additions cd.

How to Install VirtualBox on Fedora in 10 Steps

1.  Open a terminal and change to the root user

su -

2.  Then cd into the following directory

cd /etc/yum.repos.d/

3.  Install wget.

yum install wget

4.  Download the repo files with wget.

wget http://download.virtualbox.org/virtualbox/rpm/fedora/virtualbox.repo

5.  Install the dependencies.

yum install binutils gcc make patch libgomp glibc-headers glibc-devel kernel-headers kernel-devel dkms

6.  Update your computer.

yum update

7.  Install VirtualBox.

yum install VirtualBox-4.2

8. Add the VirtualBox user to the vboxusers group

usermod -a -G vboxusers user_name

9.  Reboot your computer.

reboot

10.  Enjoy.  If you run into problems try the following.

/etc/init.d/vboxdrv setup

Note:
I have created a script that will do all this for you, download here.  All you need to do is the following 3 commands.

cd /pathto/fedora-vb-installer.sh
chmod +x fedora-vb-installer.sh
sudo ./fedora-vb-installer.sh