There appears to be a bug on the UDM Pro that you can encounter while trying to update your WAN IP addresses. The error was similar to “Can’t change IP Address “PublicIP” used in Default Network”
It appears that the issue stems from the Internet Source IP being used in the LAN Network settings.
The way to work around this is to disable the Internet Source IP. However, this is greyed out which keeps us from making any changes. We can however use the Chrome Developer tools to get around this restriction.
Enable the Legacy Interface. UniFi Network Settings -> System -> Legacy Interface
Go to Settings -> Networks -> Edit (Select Default Network)
Open up the Dev tools with Ctrl + Shift + i and select Console
Paste the following in and hit enter
$$('[disabled]').forEach( a => a.disabled=false )
Enable Internet Source IP on UDM Pro
Find “Internet Source IP”, Disable and Save!
Swap back to the new user interface and go change the WAN IP address.
Included in the FAQ is a section on “How to Disable Wireless Security on airMAX AC Devices?”
The default security configuration for AC devices since firmware version 8.5.11 was changed to WPA2 AES with a pre-shared key 0000:0000.
Ubiquiti Default AC device WPA2 Preshared key
On Ubiquiti AC radios, you can not disable WPA 2 security through the web interface. This is not necessarily bad, however, what happens if you have a client that is reset and will only connect to the default ubnt SSID?
Fortunately there is a way to disable the WPA2 Preshared key.
Log into the device over ssh.
Run the following command to disable WPA2 in the config sed -i s/aaa.1.wpa.mode=2/aaa.1.wpa.mode=0/g /tmp/system.cfg
Save the config file with /usr/etc/rc.d/rc.softrestart save
Login to the client device and configure the SSID.
After you are done, you can click the enable button to re-enable Wireless Security.
Note: aaa.1.wpa.mode=2 doesn’t appear to be on all devices. If not, change “wpasupplicant.status=enabled” to “wpasupplicant.status=disabled”
Screenshot from UI help page on Wireless Security on airMAX AC devices
Most of the heavy lifting is done by the ubntmod.sh script. All you need is the IP addresses for the access points. The script will figure out the connected devices, reboot them first, then reboot the AP.
Here is a quick run down of the steps we need to perform.
Create list of AP’s and put them into an ap.lst file
Install ubntmod.sh script
Configure usernames and passwords to use with ubntmod.sh
Setup crontab to automatically run
Create list of AP’s and put them into an ap.lst file
This is really as simple as creating the ap.lst file and filling it with the access point IP addresses. One per line. The script uses wstalist to discover connected devices.
nano ap.lst
Install ubntmod.sh script
Installing the script is really hard. 2 lines to get setup.
Setup usernames and passwords to use with ubntmod.shd
When you first run ubntmod.sh without the -y option, it should prompt you to setup usernames and passwords to use. After this is setup, the script automatically reads from the config file for future use.
You can manually modify the ubntmod.conf file update any usernames or passwords.
While the UniFi controller is nice and everything, it does make it hard to see if a device is already adopted. At least if you have a ton of sites. Fortunately, we can search the database directly to find out if a UniFi is already adopted and which site it is assigned to.
Connect to Mongo DB
First we need to connect to MongoDB. And then we need to use the ace database.
mongo -port 27117
use ace
List all the devices on the controller
This command will list all the devices on the controller. Regardless of which site they are assigned to.
db.device.find({}, { site_id:"", ip : "", name :"", mac:""})
Now we can extract the zip archive. You can do this on Windows, macOS, or Linux through the GUI or you can extract with
sudo unzip autobackup_6.2.33.zip -d unifi
This will extract all the files and folders to a directory named unifi.
cd unifi
Dump database to JSON
You should now see the db.gz file. This is a compressed archive of the database in BSON (Binary JSON) format. We can use the mongo-tools to convert this to a more human readable JSON format.
sudo apt install mongo-tools
Now we can extract the archive and pipe it through bsondump.
gunzip -c db.gz | bsondump
You can run it through grep to filter out what you need.
You can also dump the db to a json file with
bsondump --bsonFile=db --outFile=db.json
More notes on the decrypt script.
The decrypt script is really simple. It looks like it uses a key to decrypt the UniFi backup and then puts all the contents into a zip file. There is also an encryption script. Theoretically you can decrypt, make changes to the config and then reencrypt and restore to a server.
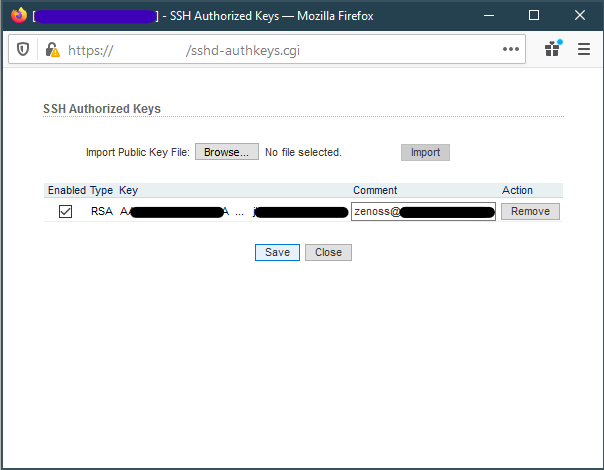
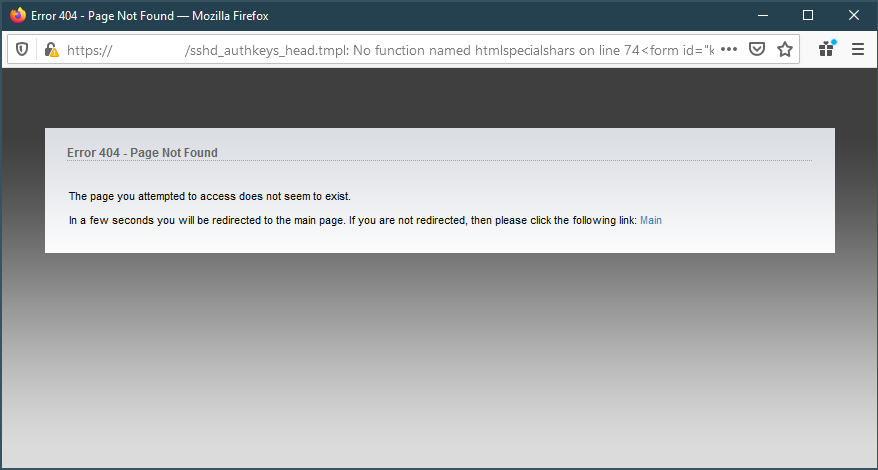
For some reason I ran into an issue where I can not remove authorized SSH Keys in AirOS version 6.3. It redirects to a 404 page and then to the main page.
Attempting to remove SSH keys in AirOS404 Error while attempting to remove SSH keys
Thankfully, we can still remove the authorized keys from the command line. For more information on making changes over SSH, refer to the following post.
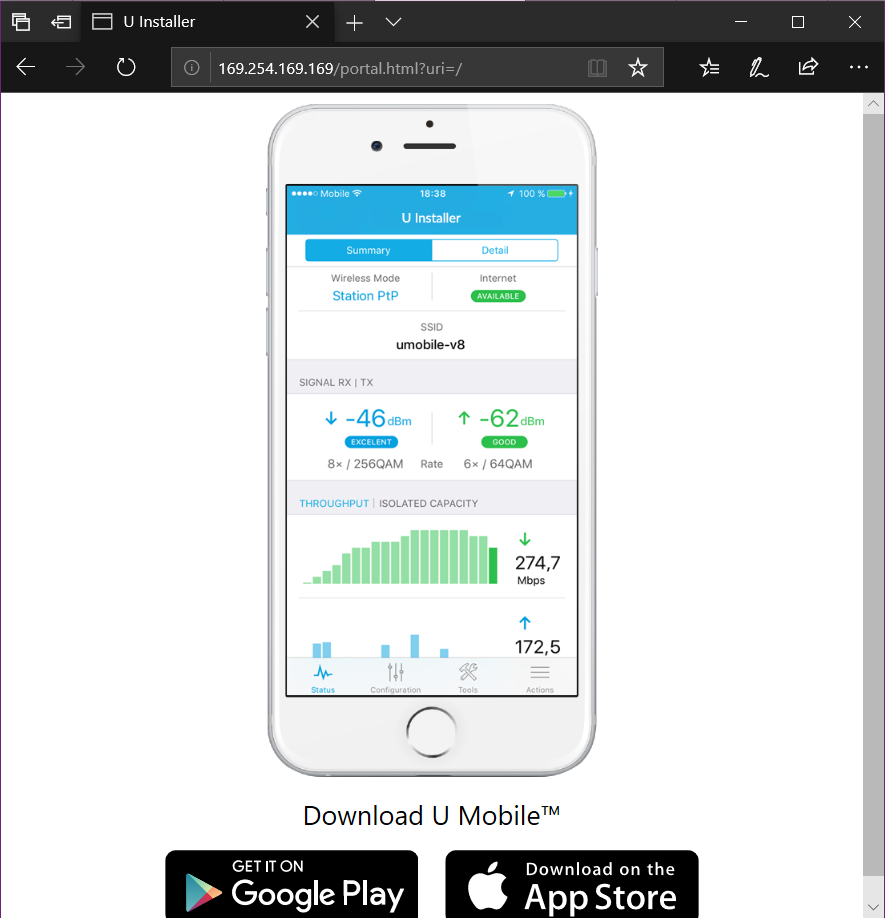
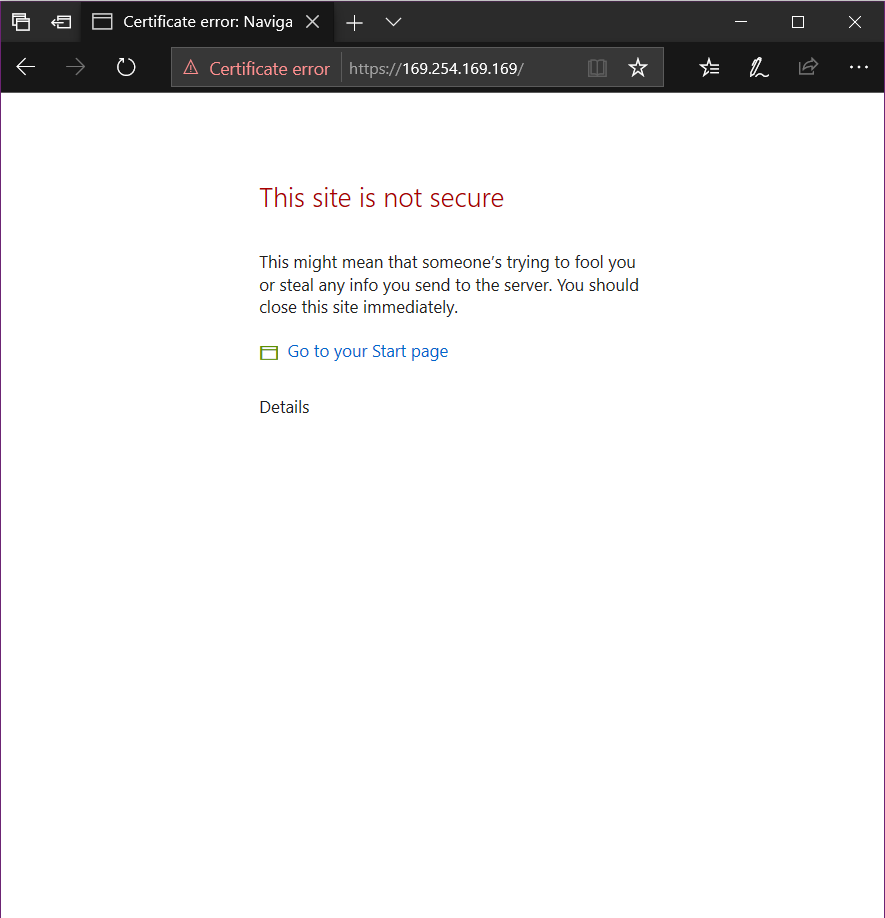
By default the U Installer redirects you to a page asking you to download the app. You can get to the actual U Installer web page by going to https://169.254.169.169
Default U Installer PageAccess U Installer Certificate Error
It has the same interface as a regular Airmax M equipment.
Recently upgraded a UniFi-Video VM by creating a new VM and restoring the backup from the previous one. There was a separate virtual disk used for storing all the videos. Although once I reattached it, I had to change the owner to the unifi-video user. lt was reporting that the owner/group was 127 and 134, looks like that was the user ID from the previous VM.
This website stores cookies on your computer. These cookies are used to provide a more personalized experience and to track your whereabouts around our website in compliance with the European General Data Protection Regulation. If you decide to to opt-out of any future tracking, a cookie will be setup in your browser to remember this choice for one year.