
The following article was helpful in getting started adding a button to the WordPress menu bar.
https://www.wpbeginner.com/wp-tutorials/how-to-add-a-button-in-your-wordpress-header-menu/
Modifying a Menu Item on a WordPress theme is not too difficult. The basic steps are
- Add Menu Item
- Add CSS Class to specific menu item
- Customize the new CSS class by using the Additional CSS Options
Add Menu Item
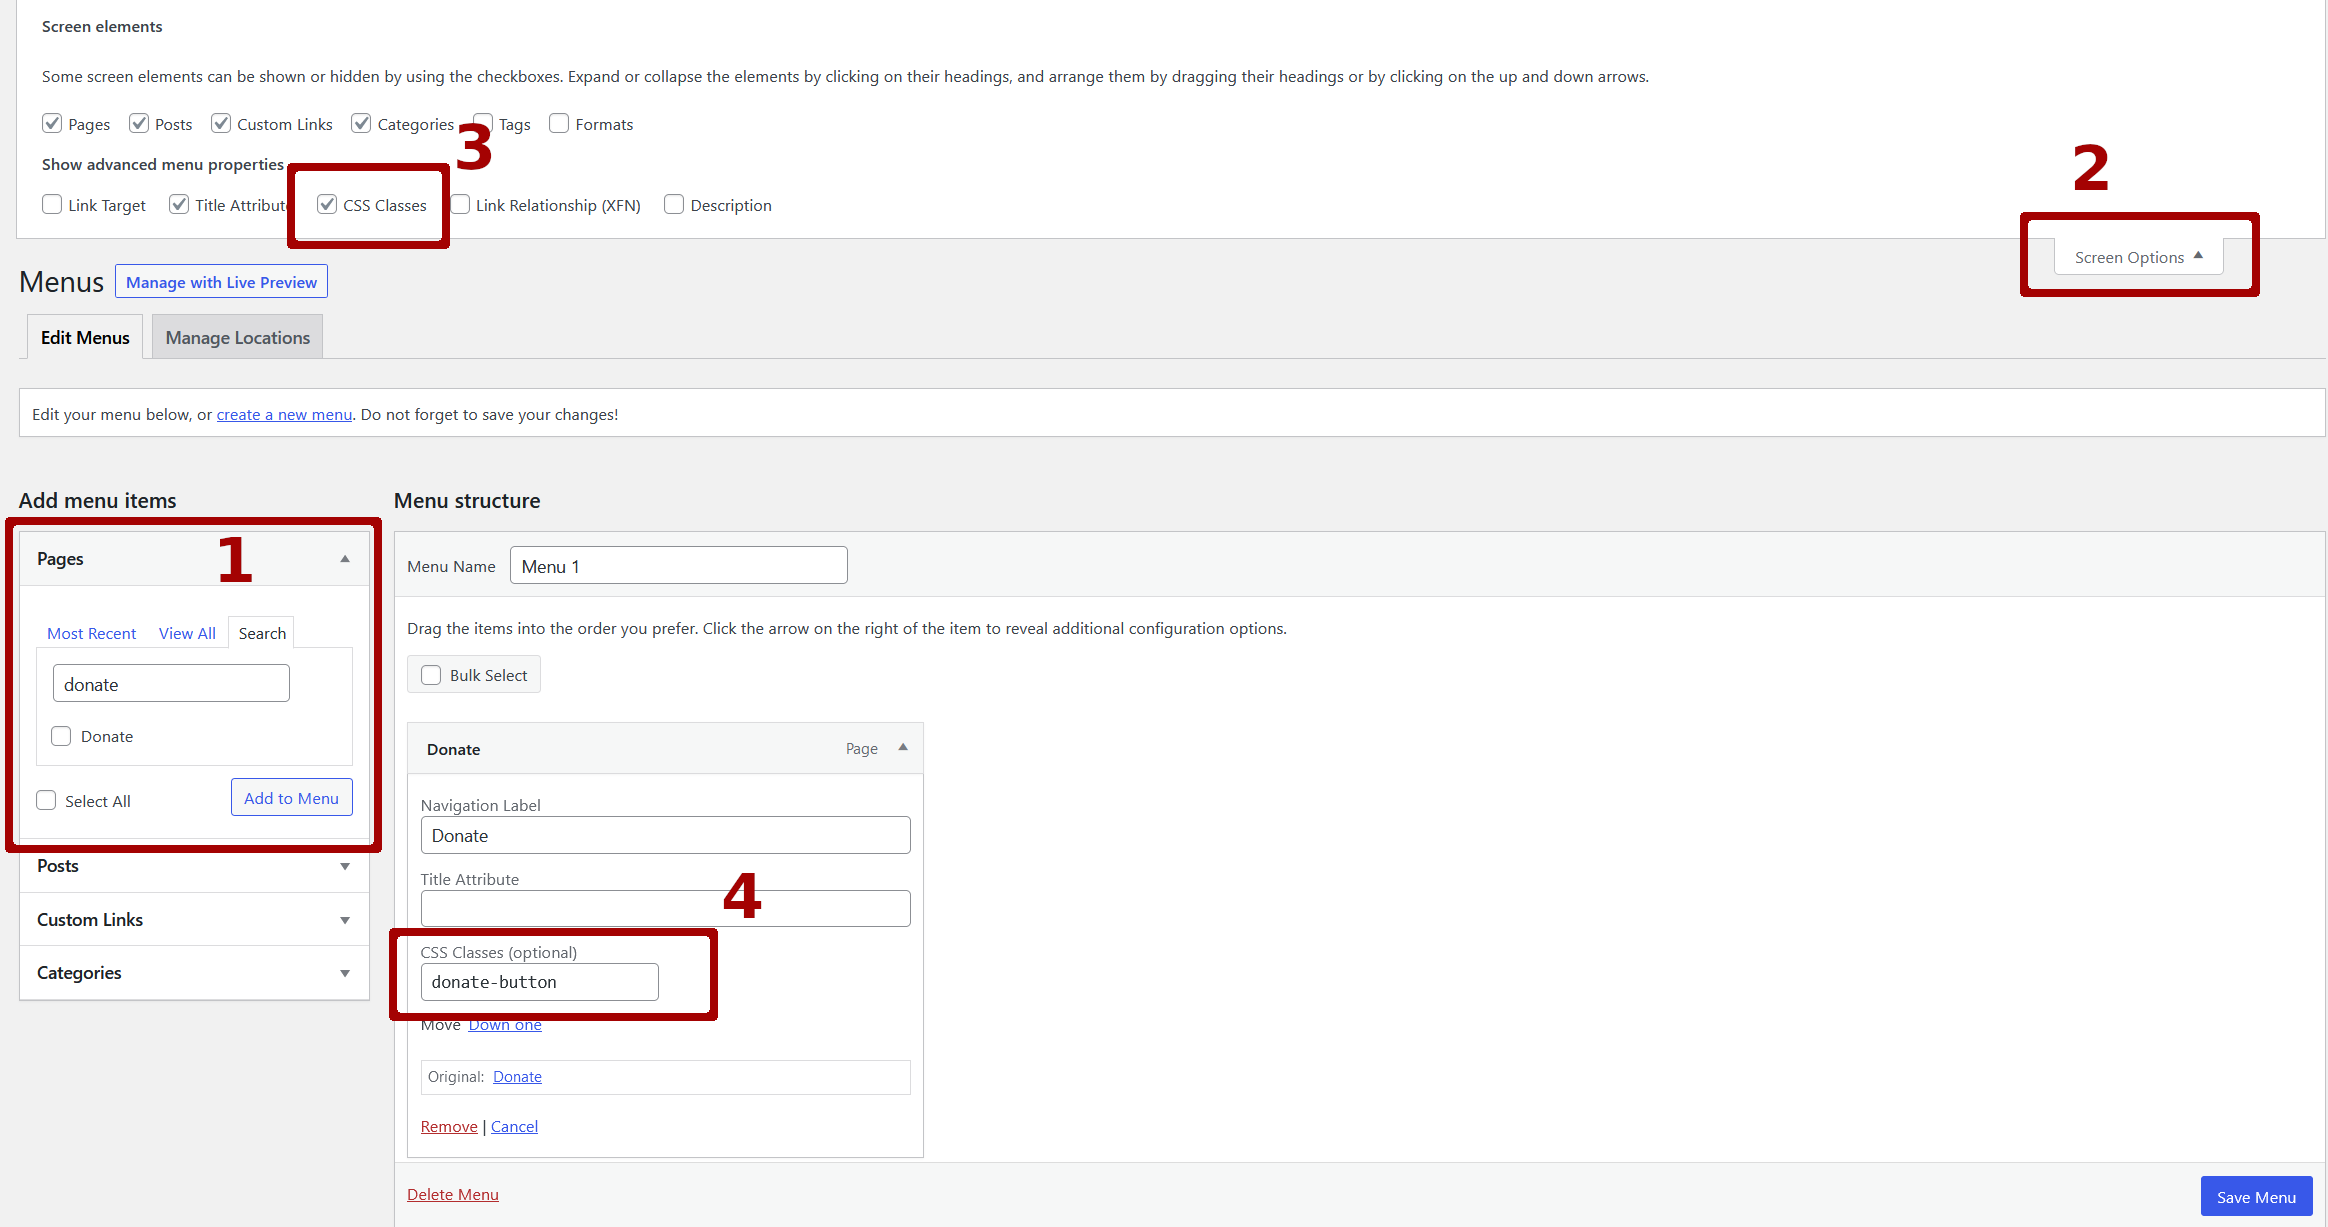
Add or customize a menu item by going to Appearance -> Menu
Add a CSS Class to Menu Item
You can add a CSS class to an existing menu item, or you can create a new menu item.
- Create Menu Item
- Select Screen Options
- Enable CSS Classes. (Needed for the next step)
- Under the Menu option, set a CSS class. (Name it something unique so it doesn’t interfere with other CSS classes. We’ll configure the CSS in the next step)
Customize CSS
Now we can setup and customize the CSS class by going to Appearance -> Customize
Now find where the “Additional CSS” setting is. If it is not under the main list, try looking under “Advanced”. The Additional CSS editor page should look like the following.
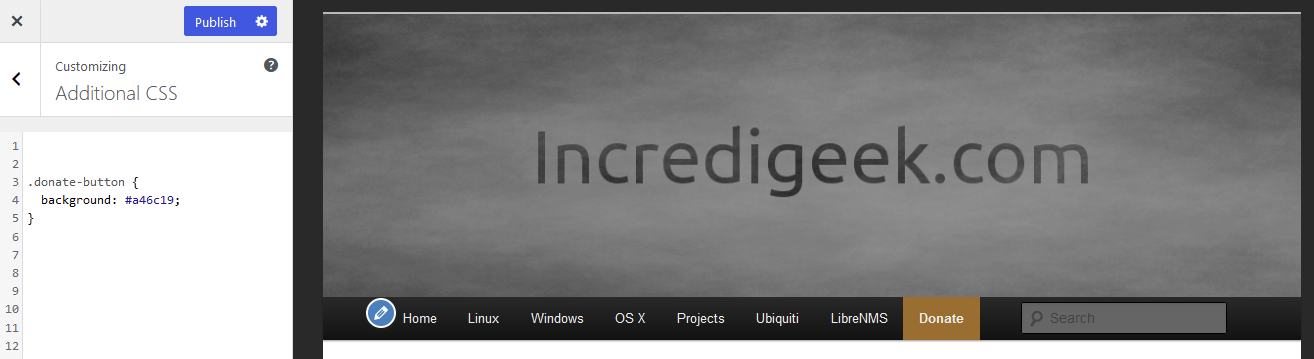
Once there, add all the CSS you want to change color, padding, etc.
You can make it look like a button by adding things like
border-radius: 5px;
padding: 0.5rem;
margin: 0.2rem;
Check out the following link for more info about buttons.