Mikrotik Recently patched CVE-2023-37099 which was a way someone with an admin account, could escalate to a “super admin”, or jail break a router.
It appears the technique has been around for about a year.
Affected versions: < 6.49.7
The good news is that someone would already have to have an account to elevate permissions. If your routers have been using strong passwords or SSH public/private keys and have internet management disabled, then you are probably fine.
Setting up OSPF between Mikrotik routers is not too difficult. The following commands should work with RouterOS version 7+. Run these commands on each Mikrotik changing out the router-id.
Create a Loop-back interface
First it would be a good idea to create an loopback interface that will stay up. We’ll use this address as the router-id. This should be unique per router.
First we’ll create the instance. Use the address from the above loopback address. Technically you can use whatever id you want as long as it is a 32 bit “address” and is unique.
IMPORTANT NOTE: If this router is also the default gateway, you’ll need to specify the “originate-default=always” option to share the default gateway over OSPF to the other routers. You don’t have to do this if you don’t want to share the default route.
Create OSPF Area
Now we can create an OSPF area. For a simple OSPF setup, we’ll just use the default 0.0.0.0 area.
Now we can add an instance. This is responsible for what networks get shared with OSPF. If you want to do all the addresses on the router, then use 0.0.0.0/0. If you only want to do specific networks, run an entry for every network, changing 0.0.0.0/0 to the network of interest.
After that we can check to make sure things worked.
/routing/ospf/neighbor/print
You should see at a neighbor. It can take a little bit for the neighbors to show up.
You can also check the routes on the router.
/ip/route/print
OSPF has a default distance of 110, so checking the routes is a quick way to verify the routes are getting updated. Do note that if you have a static route in with a lower distance, that will take precedence over OSPF.
The goal for this script is to alert us if a remote site looses power. We can do this using a Mikrotik that has two PSUs. One is plugged into battery backup and the other in the non battery plug.
In this example, we are using PSU2 “number 8” We can find the number using
/system/health/print
We can now create a new scheduler entry with the following. Change out the number 8 to your PSU number, and change the webhook to your Teams webhook.
:local curState [system/health/get value-name=value  number=8]
:local name [/system/identity/get value-name=name]
:local webhook "https://teams.webhook.microsoft.com/webhook/more"

if ($curState != $lastState) do={
if ($curState = "ok") do={
/tool fetch http-method=post http-header-field="Content-Type: application/json" http-data="{\"text\": \"$name : Power is on.\"}" url="$webhook"
}
if ($curState != "ok") do={
/tool fetch http-method=post http-header-field="Content-Type: application/json" http-data="{\"text\": \"$name : Power is off.  On battery backup\"}" url="$webhook"
}
:global lastState $curState
}
Set to the appropriate interval (i.e. 5 minutes). The script will only alert once when the power state changes. This minimizes receiving an alert every 5 minutes while the power is off.
The purpose of these scripts is to update the local DHCP lease table with a remote IP Address Management (IPAM) system.
Scheduler Script
This little script is added to the scheduler and goes through the entire DHCP lease table and uploads each MAC address and IP address pair to a website.
Change out the top three variables. May also need to change out the URL depending on how the website receives data.
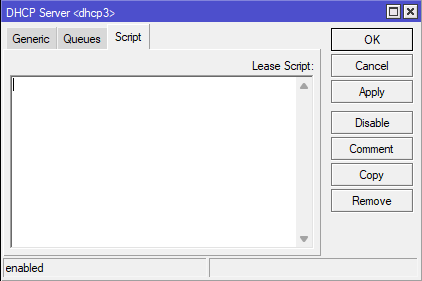
This script is to be used on the DHCP server script. Can add it by going to DHCP Server -> DHCP -> Double Click Server -> Script
Any time a new DHCP lease is obtained, this script is fired. Note that some of the variables like $leaseBound are specific to the script being used by the “DHCP server”
Also helpful to note that the script only runs if a new lease is obtained, or a lease expires and it disappears from the leases page. A DHCP renew does not trigger the script.
:local username "myapiuser"
:global password "myapipassword"
:global url "upload.incredigeek.com"

# The maximum retries
:local max 60
:local attempts 0
:local success 0
:do {
  :set attempts ($attempts+1);
  :if ($leaseBound = 0) do {
    :do {
      /tool fetch url="https://$url/api/v1/network/ipam/dynamic_ip_assignment?ip_address=$leaseActIP&mac_address=$leaseActMAC&expired=1" mode=https keep-result=no user=$username password=$password
      :set success 1;
    } on-error={
      :log error "DHCP FAILED to send unassignment to $url on attempt $attempts out of $max for $leaseActMAC / $leaseActIP";
      :delay 10s;
    }
  } else {
    :delay 1s;
    # see note below
    :local remoteID [/ip dhcp-server lease get [find where address=$leaseActIP] agent-remote-id];
    :do {
      /tool fetch url="https://$url/api/v1/network/ipam/dynamic_ip_assignment?ip_address=$leaseActIP&mac_address=$leaseActMAC&expired=0" mode=https keep-result=no user=$username password=$password
      :set success 1;
    } on-error={
      :log error "DHCP FAILED to send assignment to $url on attempt $attempts out of $max for $leaseActMAC / $leaseActIP";
      :delay 10s;
    }
  }
  :if ($success) do {
    :log info "DHCP lease message successfully sent $leaseActMAC / $leaseActIP to $url";
    :set attempts $max;  # break out of the do..while loop
  }
} while ( $attempts < $max )
}
The following is the correct syntax needed to send a message to Microsoft Teams from a Mikrotik router. You will need a valid Teams webhook to send to.
Change “Test Message” out for your message. You should receive a “status: finished” response.
Here are the commands you’ll need to harden SSH on your Mikrotik Routers. It looks like it still can use SSH-RSA, but it does get rid of most of the weaker crytpo algorithms.
With support for DES being dropped, you may be faced with having to upgrade device settings to AES. In this post we’ll explore changing the settings in LibreNMS for all Mikrotik devices and then touch on making changes to a group of Mikrotik devices.
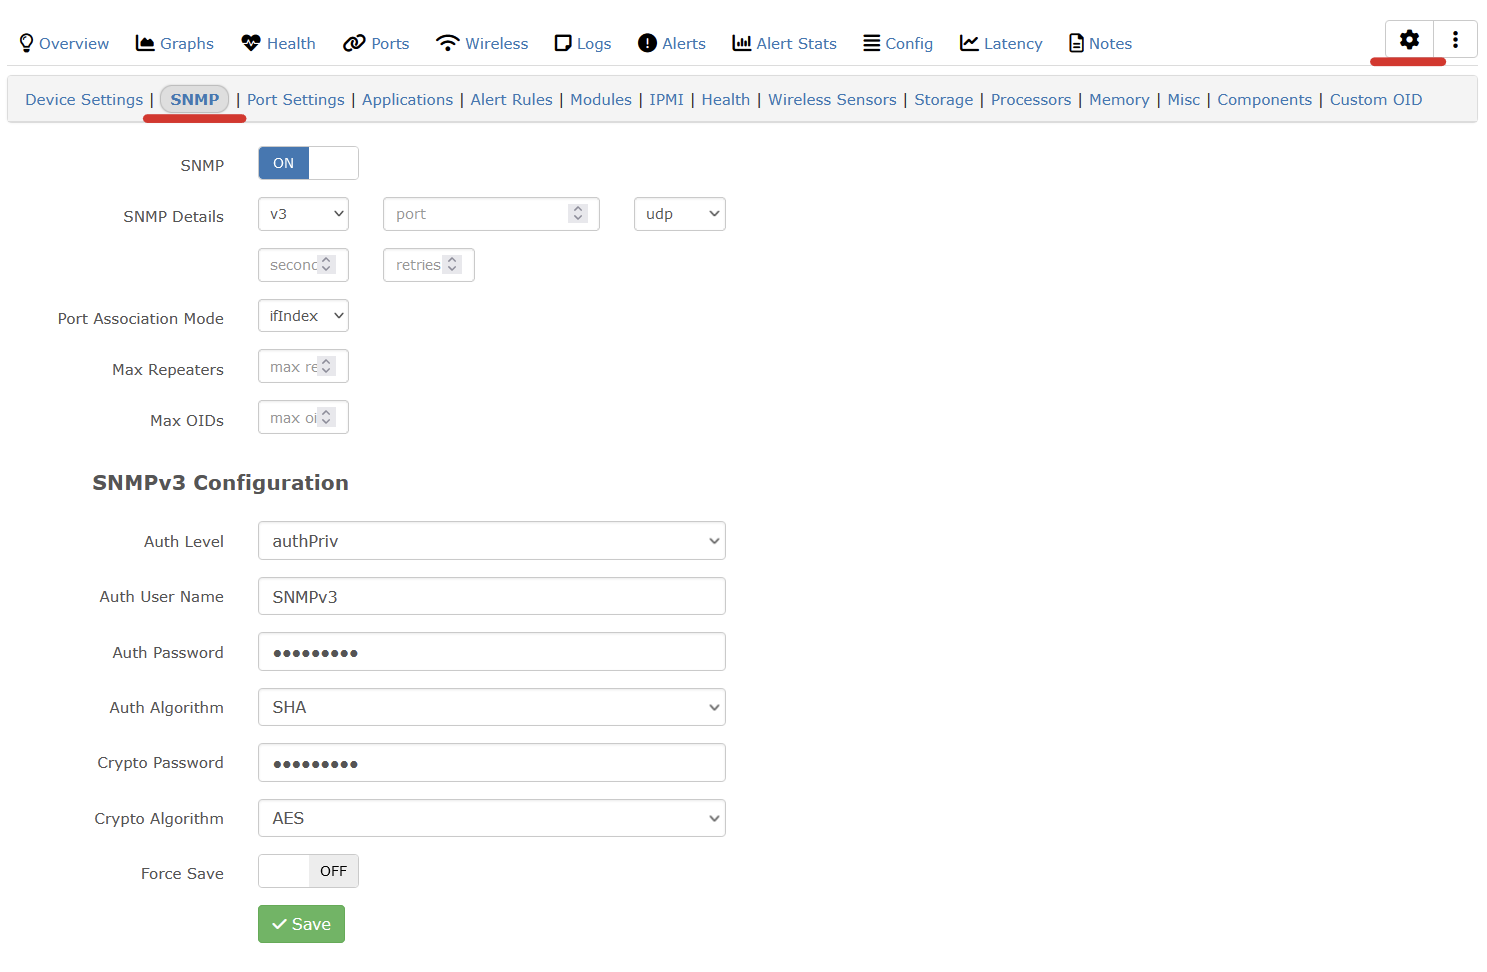
Upgrading SNMP Settings for Devices in LibreNMS
In LibreNMS, we can go to Device -> Device Settings (Gear on the right hand side) -> SNMP, to set the SNMP settings for that device.
Since this would get rather boring to change on multiple devices, and these settings are all in a MySQL database, we can skip using the mouse and use a few MySQL commands to update multiple devices at once.
Log into the LibreNMS server over ssh and then connect to the MySQL database
mysql -u librenms -p librenms
First we can get a list of all the devices (Mikrotik routers in this example) and show the hostname with the SNMP authentication and cryptography algorithms.
select hostname,authalgo,cryptoalgo from devices where os="routeros";
Now if we want to update the cryptography settings for all of our Mikorotik devices, we can do the following.
update devices cryptoalgo set cryptoalgo="AES" where os="routeros";
This will set all of the devices to use AES for the cryptography algorithm.
We can also change the authentication algorithm to SHA with this
update devices authalgo set authalgo="SHA" where os="routeros";
LibreNMS update device SNMP settings
Bulk updating of Network Devices
The bottom “script” can be used for changing SNMP settings on multiple Mikrotik devices.
Create a mikrotik.lst file with all the IP addresses of all the devices you need to update. Can you use the above MySQL commands to get a list from LibreNMS.
Change the following options in the script
routerpassword to the Mikrotik password
admin to your username
encryptionpassword to your SNMP encryption password
authpassword to your authentication password
addresses=192.168.0.0/16 to the list of IP addresses that should be able to access SNMP info on the mikrotik device. AKA your LibreNMS server.
SNMPname to your SNMP username
for ip in `cat mikrotik.lst`
do
echo $ip
timeout 15 sshpass -p 'routerpassword' ssh -o StrictHostKeyChecking=no admin@${ip} -p1022 '/snmp community set addresses=192.168.0.0/16 authentication-protocol=SHA1 authentication-password=authpassword encryption-protocol=AES encryption-password=encryptionpassword security=private read-access=yes write-access=no SNMPname'
done
Copy and paste the above “code” in a shell script file.
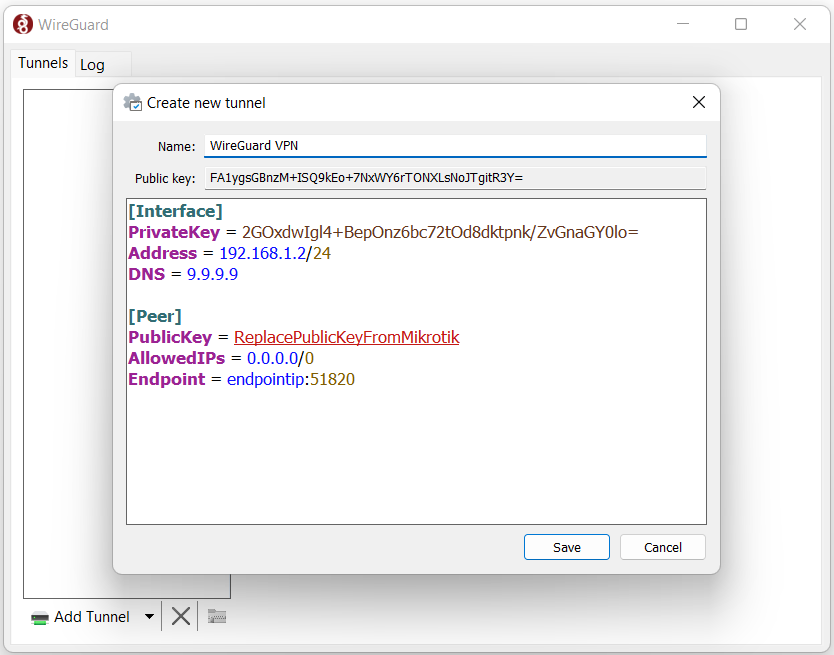
Note that the 192.168.1.2/32 is important. If you have multiple clients connected and one of them is setup with a /24 instead of a /32, it will cause issues. I think this is because WireGuard tries to route the whole /24 over that peer.
Also note that you can not use DHCP with WireGuard. Each client will have a static IP address assigned in the config. In this example, 192.168.1.2.
You should now be all set up and able to connect from your device.
Troubleshooting
Some issues you may run into.
Unable to have two devices connected at the same time.
First, you’ll need to have one Peer per Client connection. Either that, or do not connect at the same time.
Second, check and verify that each peer has the ClientIP/32 in the Allowed Address.
For example, if the WireGuard interface is using 192.168.1.0/24, and one of the peers has 192.168.1.4/24 in the Allowed Address option, then only one client will work. It appears that the MikroTik will attempt to route all 192.168.1.0/24 request to 192.168.1.4.
This website stores cookies on your computer. These cookies are used to provide a more personalized experience and to track your whereabouts around our website in compliance with the European General Data Protection Regulation. If you decide to to opt-out of any future tracking, a cookie will be setup in your browser to remember this choice for one year.