
You may need to upgrade your MikroTik if the WireGuard options are not available.
Quick overview of setting up a MikroTik Router as a VPN appliance.
- Configure WireGuard Interface on MikroTik Router
- Copy interface public key
- Add IP address on WireGuard interface
- Create WireGuard client config
- Use above interface public key
- Copy the client Public Key
- Create a WireGuard Peer on the MikroTik Router
- Use client Public Key
- Assign proper IP address
Configure WireGuard on Router
First we need to create a WireGuard interface to use.
/interface/wireguard add listen-port=51820 mtu=1420 name=wireguard1
We’ll need to copy the public key, shown in the following command, for use in the client config.
/interfaces/wireguard print
Next we’ll configure an IP address/range for the new WireGuard interface.
/ip/address add address=192.168.1.1/24 network=192.168.1.0 interface=wireguard1
Configure WireGuard Client
Download and install the WireGuard application on your computer or phone.
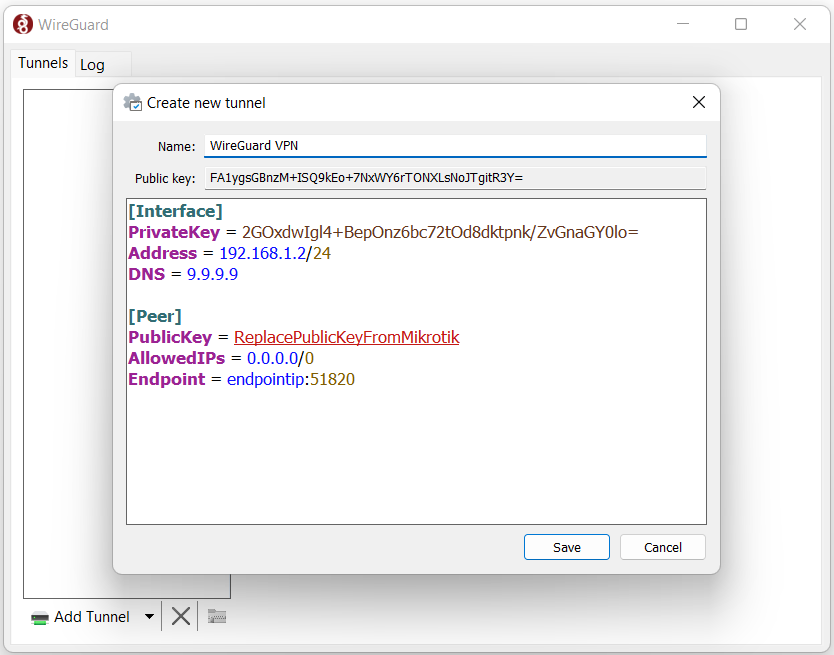
Create an empty config (Ctrl +N), click edit, add the following.
Address = 192.168.1.2/24
DNS = 9.9.9.9

[Peer]
PublicKey = ReplaceWithInterfacePublicKeyFromMikrotik
AllowedIPs = 0.0.0.0/0
Endpoint = endpointip:51820
Here is a screenshot as an example. We need to copy the public key. We’ll use that when we create the peer.
Create WireGuard Peer
Now lets create a peer. Back on the MikroTik, run the following command. Change the allowed address and public key.
/interface/wireguard/peers add allowed-address=192.128.1.2/32 interface=wireguard1 public-key="PublicKeyFromClientCreatedInNextStep"
Note that the 192.168.1.2/32 is important. If you have multiple clients connected and one of them is setup with a /24 instead of a /32, it will cause issues. I think this is because WireGuard tries to route the whole /24 over that peer.
Also note that you can not use DHCP with WireGuard. Each client will have a static IP address assigned in the config. In this example, 192.168.1.2.
You should now be all set up and able to connect from your device.
Troubleshooting
Some issues you may run into.
Unable to have two devices connected at the same time.
First, you’ll need to have one Peer per Client connection. Either that, or do not connect at the same time.
Second, check and verify that each peer has the ClientIP/32 in the Allowed Address.
For example, if the WireGuard interface is using 192.168.1.0/24, and one of the peers has 192.168.1.4/24 in the Allowed Address option, then only one client will work. It appears that the MikroTik will attempt to route all 192.168.1.0/24 request to 192.168.1.4.