Open Tools -> Accounts -> Select account and hit Properties -> Servers & Advanced
Change the server settings and ports and Apply.


Open Tools -> Accounts -> Select account and hit Properties -> Servers & Advanced
Change the server settings and ports and Apply.
You may get the following alert in LibreNMS. Basically you need to install python 3 to keep things up to date.
Python 3 is required to run LibreNMS as of May, 2020. You need to install Python 3 to continue to receive updates. If you do not install Python 3 and required packages, LibreNMS will continue to function but stop receiving bug fixes and updates.
Install Python 3 with yum, or apt if you are on a Debian based distro.
sudo yum install python3
sudo pip3 install -r /opt/librenms/requirements.txt
Run the following commands to make sure that LibreNMS is working correctly and is up to date.
cd /opt/librenms
sudo ./validate.php
sudo ./daily.sh
https://help.ui.com/hc/en-us/articles/204977444-airFiber-Updating-the-Firmware
Quick list of commands
ssh ubnt@192.168.1.20  <- Replace with username and IP address
cd /tmp
wget http://dl.ui.com/firmwares/airfiber11X/v4.1.0/AF11.v4.1.0.bin
mv AF11.v4.1.0.bin fwupdate.bin
/sbin/fwupdate -m
/sbin/fwupdate -m
Wait for it to finish upgrading
Screen is a handy tool that can help you run scripts on servers remotely without having to worry about the session getting terminated. It seems to operate kinda like a virtual console.
Create a new session with a specified name
screen -S SessionName
Example output below. Create session named testsession and print screen sessions.
[bob@localhost imapsync]$ screen -S testsession
[bob@localhost imapsync]$ screen -ls
There are screens on:
3313.testsession (Attached)
1 Sockets in /var/run/screen/S-bob.
[bob@localhost imapsync]$
You can disconnect from a screen session by hitting ctrl + a and then ctrl +d
“ctrl + a” then “ctrl + d”
You can list the screen sessions with
screen -ls
Example
[bob@localhost imapsync]$ screen -ls
There are screens on:
3212.testsession (Detached)
2556.xap (Detached)

2 Sockets in /var/run/screen/S-bob.
[bob@localhost imapsync]$
You can reconnect to a screen session with
screen -r testsession
To terminate a screen session, connect to that session and then on a clear line hit ctrl + d
Same way as if you were closing a remote ssh connection.
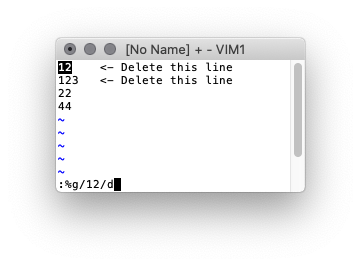
In Vi you can use the following command to search for a pattern and delete all those lines
:%g/pattern-to-search-for/d
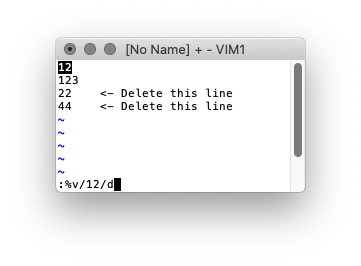
To inverse the operation and delete all lines not matching the pattern, change g to v
:%v/pattern-to-search-for/d
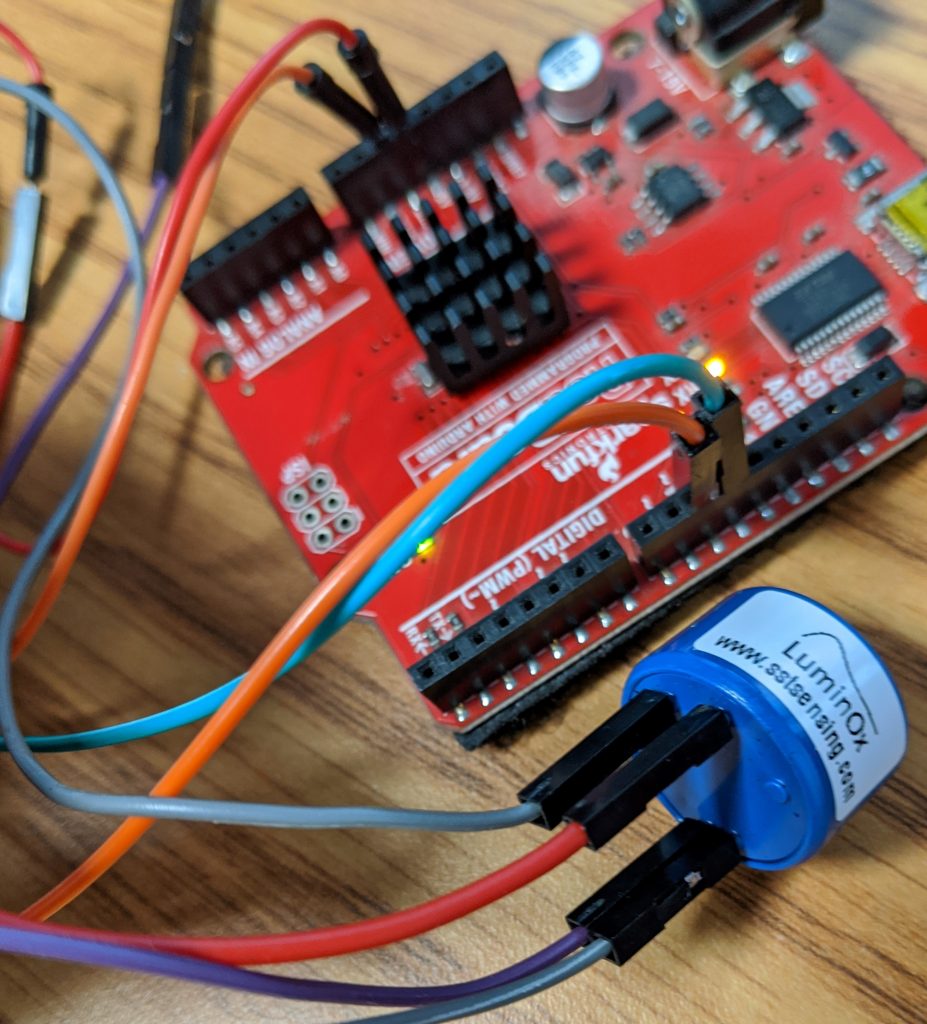
The LuminOx Oxygen sensor seems to be a pretty decent O2 sensor and easy to get setup and running.
| Pin | Designation |
| 1 | Vs (+5V) |
| 2 | GND (0V) |
| 3 | 3.3V UART* Sensor Transmit |
| 4 | 3.3V UART* Sensor Receive |
| * 5V tolerant |
Fortunately wiring up the LuminOx O2 Sensor to an Arduino is super easy
In the code example below we will use pins 10 and 11 to communicate with the sensor. So you can wire it up as follows
sensor pin 1 -> 5V power
sensor pin 2 -> Ground
sensor pin 3 -> pin 10
sensor pin 4 -> pin 11

Should be able to just copy and past the code into the arduino editor and upload it.
#include <SoftwareSerial.h>
SoftwareSerial mySerial(10, 11); // RX (O2 Pin 3), TX (O2 Pin 4)
void setup() {
Serial.begin(9600);
mySerial.begin(9600);
}
void loop() {
if (mySerial.available()) {
Serial.write(mySerial.read());
}
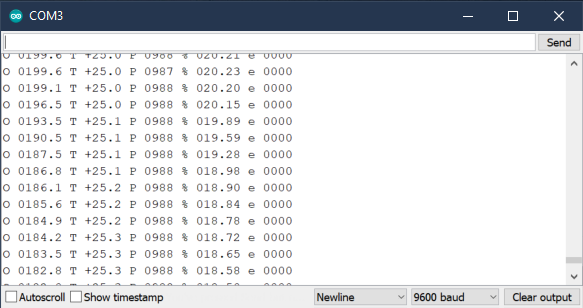
}Open up the serial console to view the sensor output
Helpful links
Datasheet: https://www.sstsensing.com/product/luminox-optical-oxygen-sensors-2/
Arduino forum: https://forum.arduino.cc/index.php?topic=601622.15
Sketch uses 444 bytes (1%) of program storage space. Maximum is 32256 bytes.

Looks like this can randomly happen. Things to try to resolve the problem
More information here
https://arduino.stackexchange.com/questions/23620/problem-uploading-to-arduino-uno
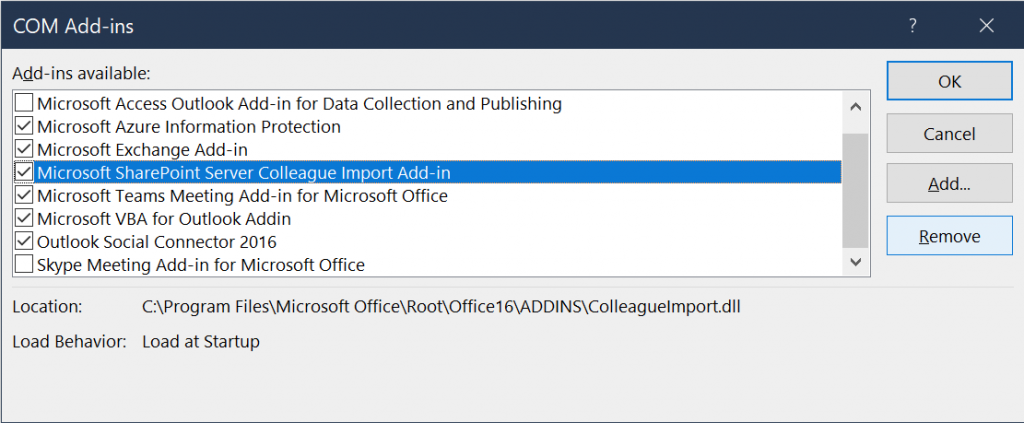
In the Outlook “Tell me what you want to do” search area, type COM Add-ins and Launch the COM Add-ins
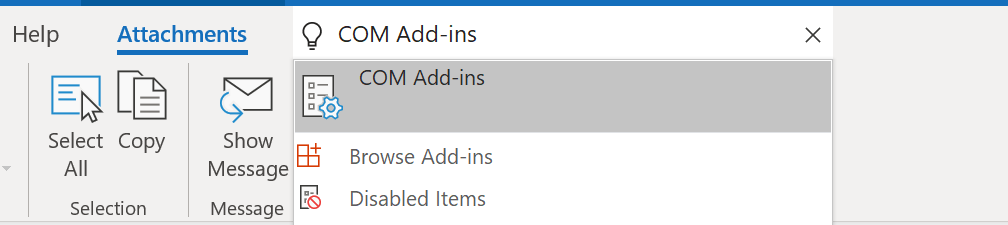
Find the Add-in and remove it
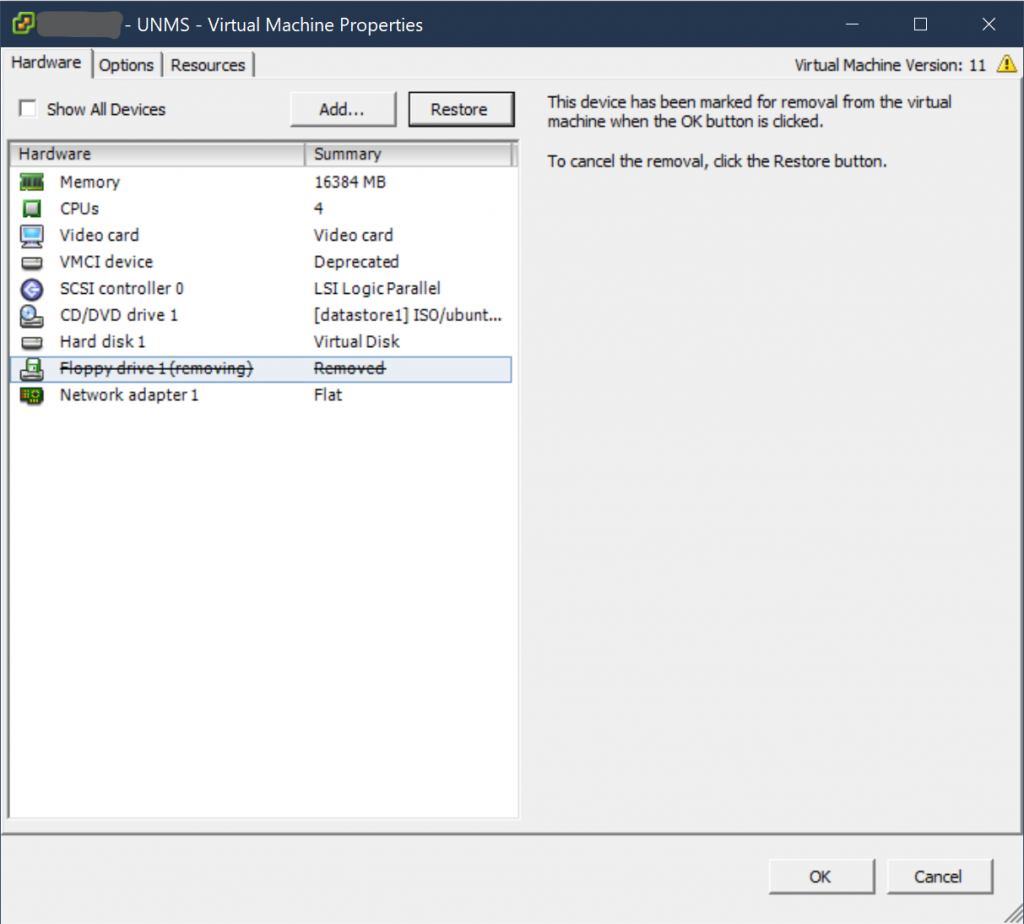
More info here https://askubuntu.com/questions/1102580/print-req-error-i-0-error
Looks like the following error is due to there not being a floppy drive.
print_req_error: I/O error, dev fd0, sector 0
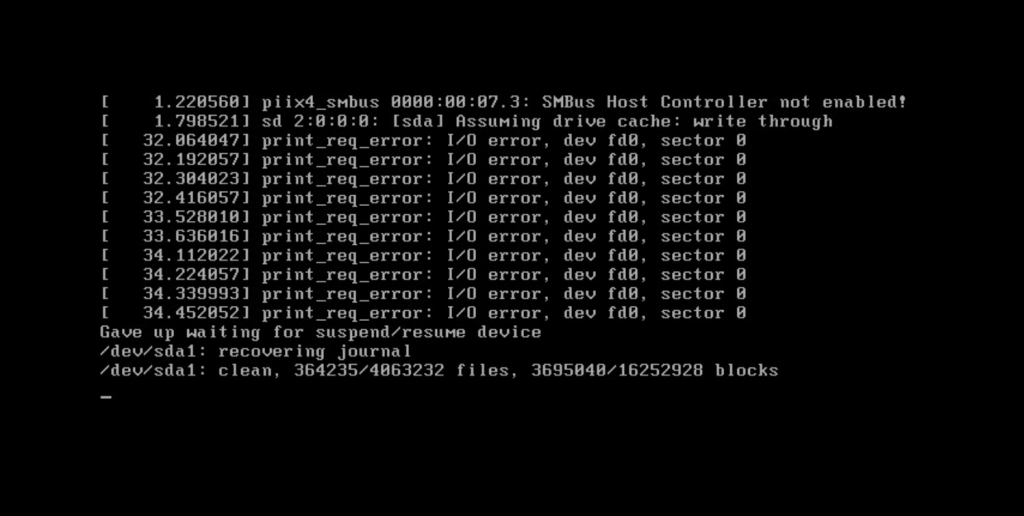
Disabling the Floppy Drive in the vSphere VM settings resolves the problem.
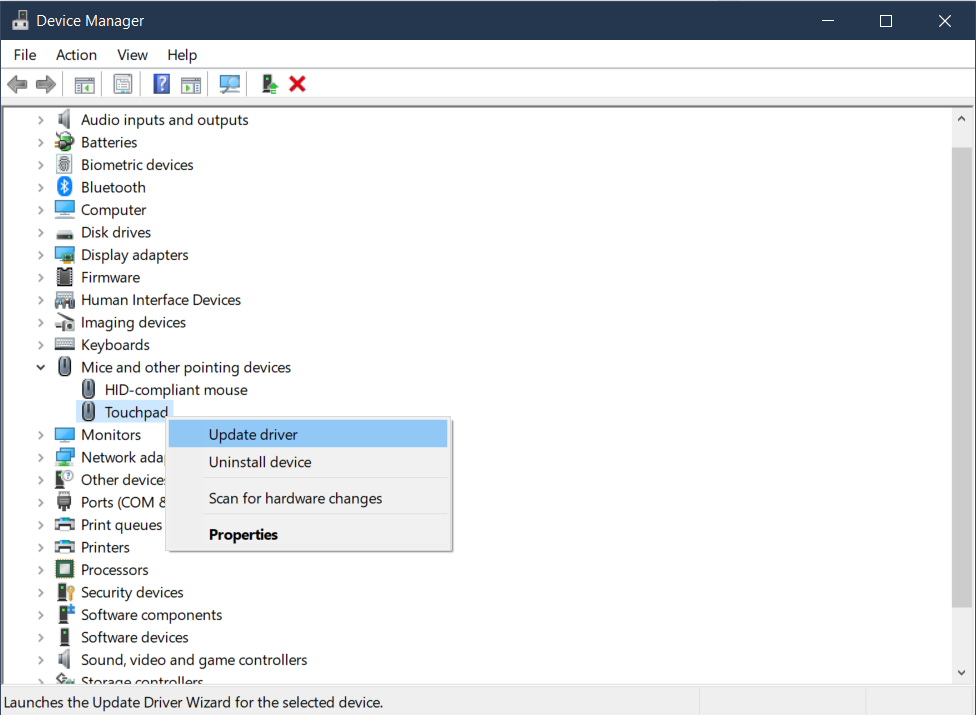
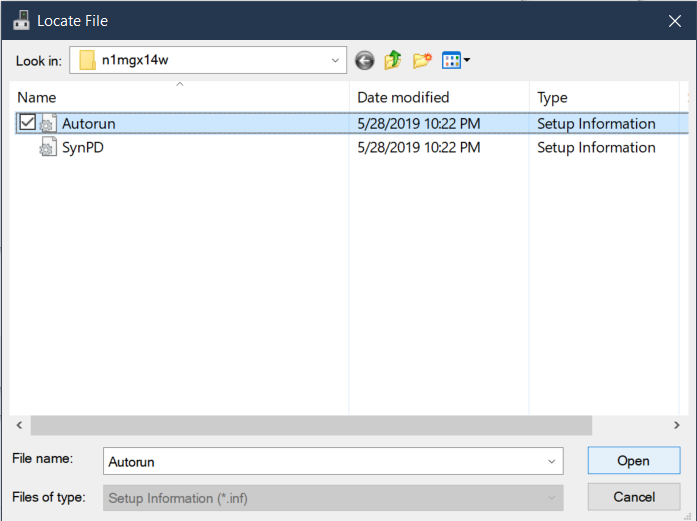
https://www.howtogeek.com/325347/how-to-enable-microsofts-precision-touchpad-drivers-on-your-laptop/
Download and extract the Lenovo driver
https://download.lenovo.com/pccbbs/mobiles/n1mgx14w.zip
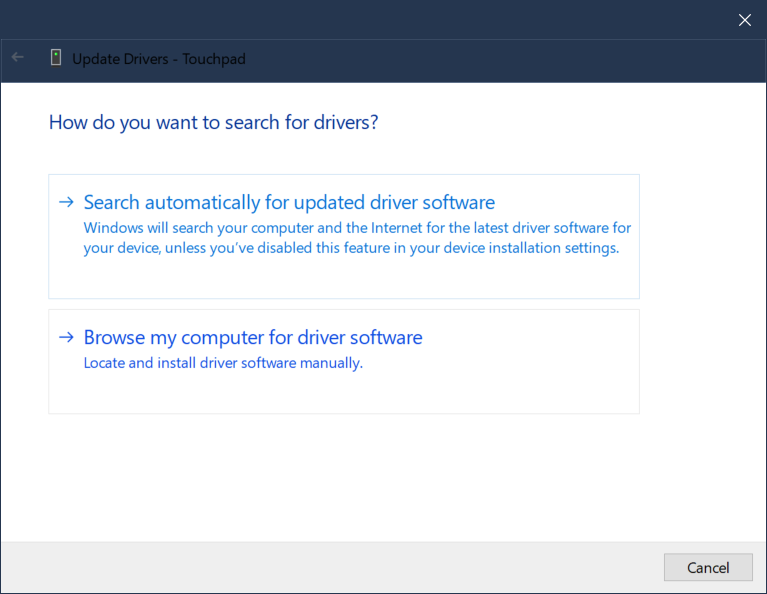
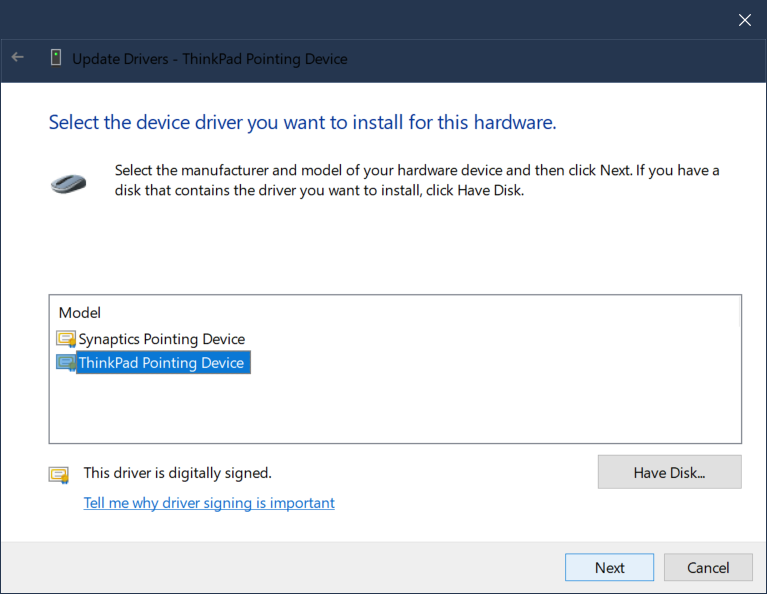
Open Device manager, right click on the touchpad and select Update driver
Browse My computer for Driver Software
Let me pick from a list of available drivers on my computer
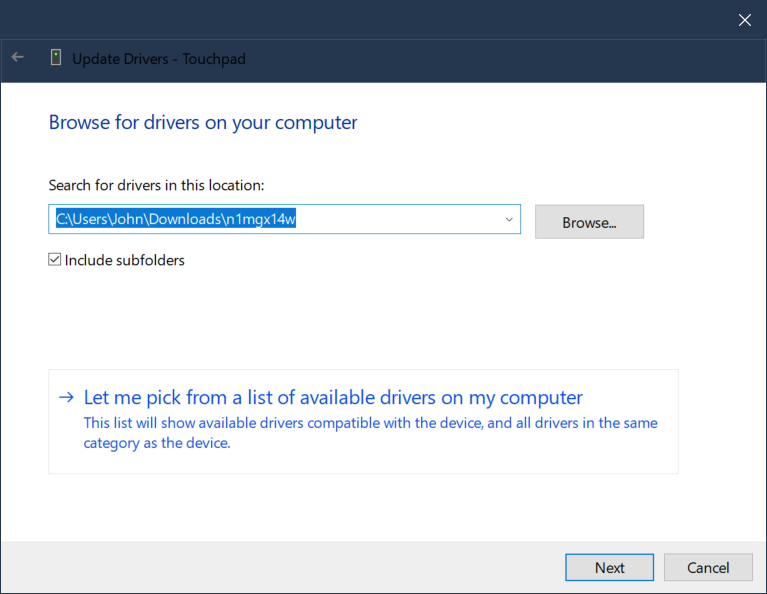
On the pop up select have disk
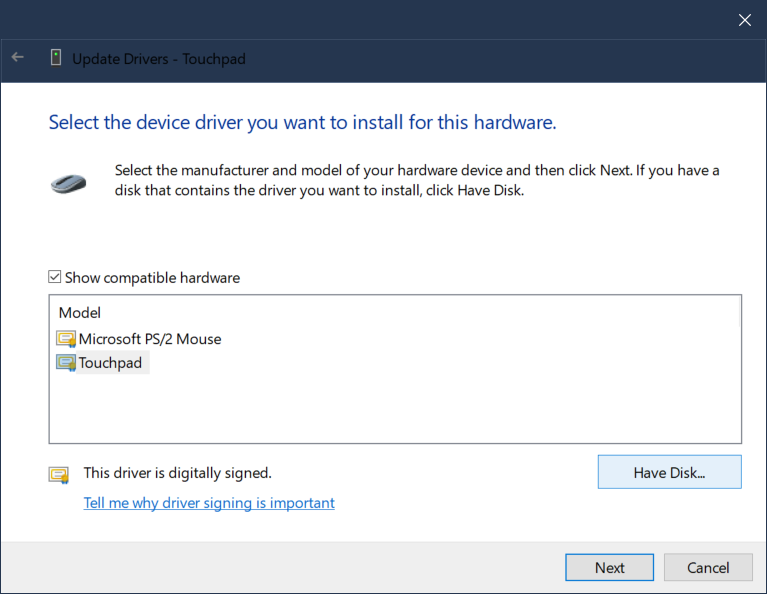
Navigate to the extracted Lenovo driver and select Autorun.inf
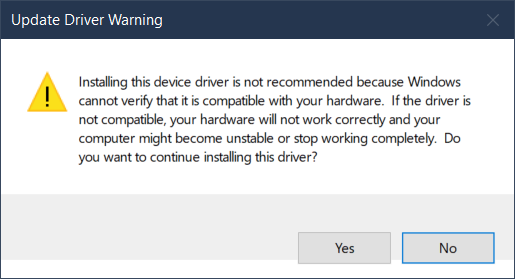
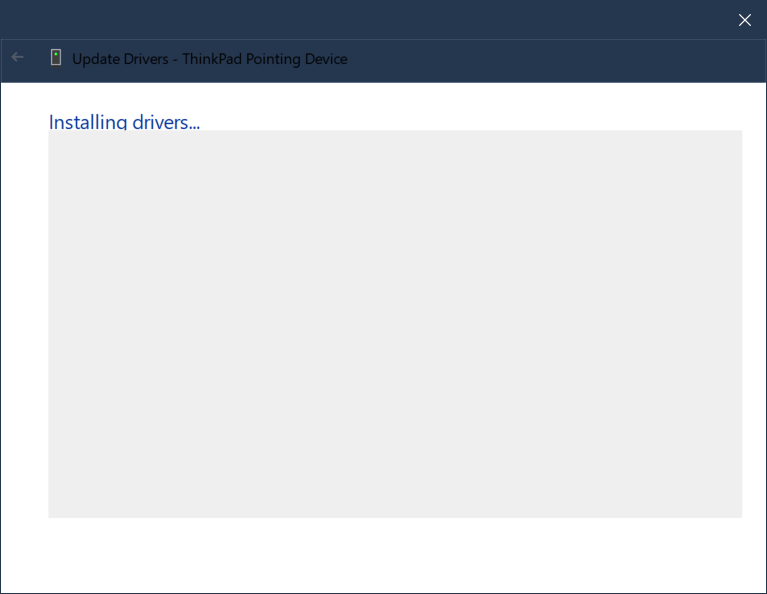
Open, select next, install, accept the warning
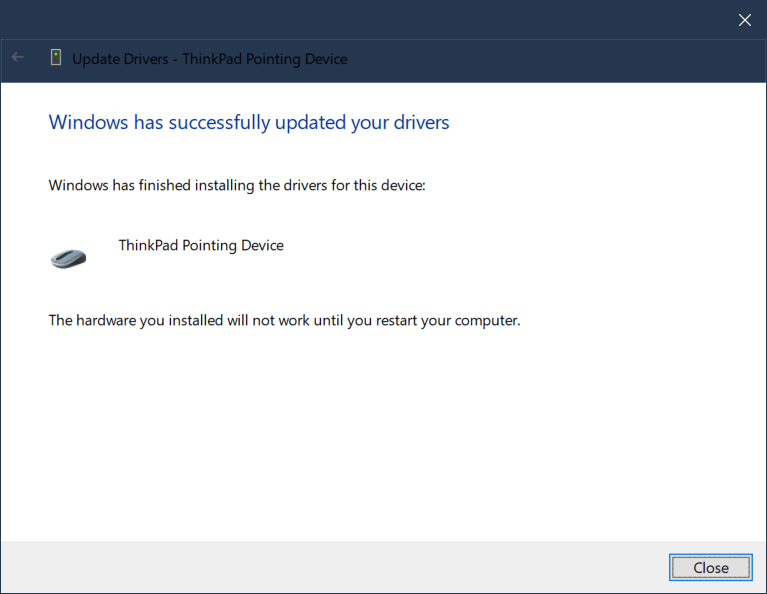
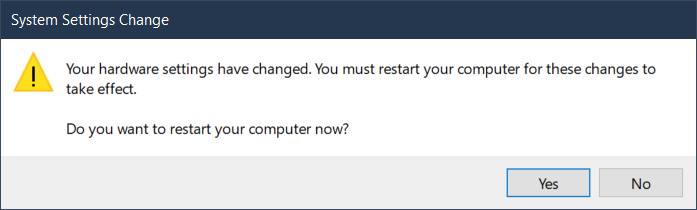
After you restart your computer you can go to the Windows settings and tweak the precision settings
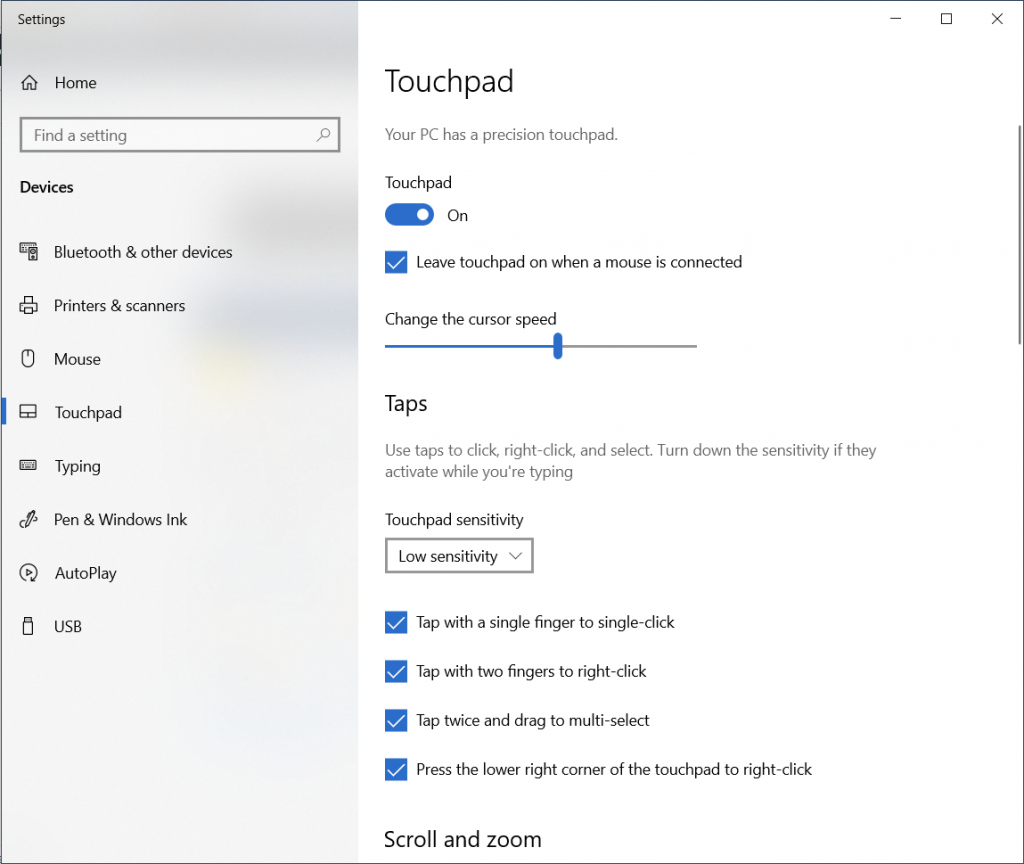
Other interesting touch pad stuff