semanage Allow and Delete ports in CentOS

The commands are for CentOS, but should work on Fedora and RedHat.

If semanage is not installed refer to here.

You would typically use this along with the systems firewall to allow a port through.  Guide for firewalld and iptables.  If you change it in the firewall and fail to add/edit it in semanage you can potentially get weird behavior like sshd not wanting to start after changing the port.

Add port

semanage port -a -t ssh_port_t -p tcp 2222

The above command allows the sshd service to start, using port 2222.

List allowed ports

semanage port -l

You can use grep to filter the results

Example:

[admin@localhost ~]# semanage port -l | grep ssh
ssh_port_t tcp 2222, 22
[admin@localhost ~]#

Delete port

semanage port -d -p tcp 2222

Other examples

Allow SNMP

semanage port -a -t snmp_port_t -p udp 161


SNMPv3 snmpwalk

Where AuthPass is your SNMPv3 Authorization password and CryptoPass is your SNMPv3 Encryption password.

snmpwalk -v3 -a MD5 -A AuthPass -x DES -X CryptoPass -l authPriv -u privUser localhost

If your not using encryption you should be able to drop the “-x des” and “-X CryptoPass” option, and change the “-l” option “authPriv” to “authNoPriv”

Setup SNMP on XenServer

log into the Xenserver via SSH, or get a console through XenCenter.

Open up the snmpd.conf file with your favorite text editor, nano, vi etc.

vi /etc/snmp/snmpd.conf

Find the line the following line

com2sec notConfigUser default public

and change the source “default” to the allowed IP ranges and the community “public” to whatever you want your new community string to be.

Example:

com2sec notConfigUser 192.168.1.0/24 privateString

Save, exit and start snmpd

service snmpd start

Add the following line in your iptables config.  It needs to be above the COMMIT line.

-A RH-Firewall-1-INPUT -s 0.0.0.0/0 -m udp -p udp --dport 161 -j ACCEPT

Restart iptables

service iptables restart

You should be good to go.

Setup SNMPv3 on ESXI VMware server

SSH into the VMware server

ssh root@vmwareserver

Set the auth and priv types

esxcli system snmp set -a MD5 -x AES128

Generate hashes

The hashes are needed to create the user.  Replace authpass and privhash to the password you want.

esxcli system snmp hash --auth-hash authpass --priv-hash privhash --raw-secret

Create user 

Replace authhash and privhash with the auth and priv hashes returned from the above command.

esxcli system snmp set -e yes -C contact@incredigeek.com -u snmpuser/authhash/privhash/priv


Single line Command

Change authpassword and privpassword to your authentication and private passwords.

authpass="authpassword" && privpass="privpassword" && esxcli system snmp set -a MD5 -x AES128 && esxcli system snmp hash --auth-hash ${authpass} --priv-hash ${privpass} --raw-secret && esxcli system snmp set -e yes -C ${contact} -u snmpuser/${authhash}/${privhash}/priv


View SNMP Configuration

esxcli system snmp get

Setup SNMP v3 on Debian or Ubuntu

All the following commands should work on Ubuntu, or just about any other Debian based Linux distro.  If you have a firewall on the server, you’ll need to allow UDP on port 161.

Install SNMP

Install snmp, snmpd, and libsnmp.

sudo apt-get -y install snmp snmpd libsnmp-dev

Stop the snmpd service so we can add a user

sudo service snmpd stop

Add SNMP v3 user

  • Change AuthPassword to your Authentication password
  • Change CryptoPassword to your Crypto Password
  • Change privUser to your private users username
sudo net-snmp-config --create-snmpv3-user -ro -A AuthPassword -X CryptoPassword -a MD5 -x AES privUser

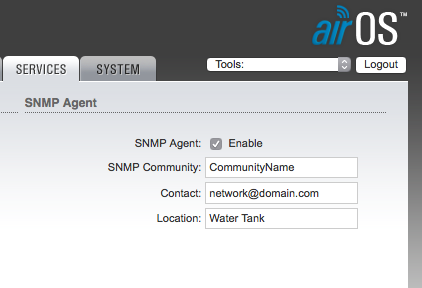
Change System Location, System Contact, and allow SNMP on all interfaces

Open up the SNMP config file usually in /etc/snmp/snmpd.conf

vi /etc/snmp/snmpd.conf

Search for “sysLocation”  and change to whatever your system location is.

Search for “sysContact” and change it.  It should be right underneath sysLocation.

Now allow SNMP on all interfaces.  Find the following line and comment it out.

agentAddress udp:127.0.0.1:161

Add a # to the beginning.

#agentAddress udp:127.0.0.1:161

Now find this line (should be a couple lines down from the line you just commented out)

#agentAddress udp:161,udp6:[::1]:161

and uncomment it

agentAddress udp:161,udp6:[::1]:161

That will enable it so you can read the SNMP info using the servers IP address, as opposed to being limited to localhost.

Start the SNMP service and Test

Start the SNMP service

service snmpd start

Test with

snmpwalk -v3 -a MD5 -A AuthPassword -X CryptoPassword -l authNoPriv -u privUser localhost


Setting up SNMP V3 on CentOS

Install SNMP.

yum install net-snmp net-snmp-utils

Configure the SNMP V3 user by running the following command and then following the prompts it gives you.

net-snmp-create-v3-user

Example: The username is “snmpadmin” and the password is”r123456″

[root@localhost ~]# net-snmp-create-v3-user
Enter a SNMPv3 user name to create:
snmpadmin
Enter authentication pass-phrase:
r123456
Enter encryption pass-phrase:
  [press return to reuse the authentication pass-phrase]

adding the following line to /var/lib/net-snmp/snmpd.conf:
   createUser snmpadmin MD5 "r123456" DES
adding the following line to /etc/snmp/snmpd.conf:
   rwuser snmpadmin
[root@localhost ~]#

Change the syslocation and syscontact in the /etc/snmp/snmpd.conf file.

vi /etc/snmp/snmpd.conf

Start snmpd service

service snmpd start

Configure snmp to start on system boot.

chkconfig snmpd on

Test and make sure snmp is working

replace “password” and “username” with the ones you setup when you created the SNMP V3 user.

snmpwalk -v3 -a MD5 -A password -x DES -X password -l authPriv -u privuser localhost

If you receive something like “snmpwalk: Timeout” then something is not working correctly.  Check to make sure the service is started, and make sure that your firewall is not blocking SNMP.

If you are running a firewall, run the following commands to allow it through.

firewall-cmd --zone=public --add-port=161/udp --permanent
semanage port -a -t snmp_port_t -p udp 161
firewall-cmd --reload

On iptables you should be able to do

 iptables -A INPUT -p tcp -m state --state NEW -m tcp --dport 161 -j ACCEPT

or add it to /etc/sysconfig/iptables and then restart iptables

SNMP and Shell Script

First you will need to make sure SNMP is installed.

apt-get install snmpd snmp snmp-mibs-downloader

You’ll need to configure a new snmpd.conf file with

snmpconf

Run through the steps and when your done replace your current snmpd.conf file in /etc/snmp/ with the new one.

Now open up your new snmpd.conf file

vi /etc/snmp/snmpd.conf

and add the following to the bottom of the file.

extend myshscript /path/to/your.sh

Save and close the file and restart the snmpd service.

service snmpd restart

Now we need to find the OID of our new data point.  Do this by running

snmpwalk -v2c -c public localhost .1.3.6.1.4.1.8072.1.3.2

It should display something similar to the following.

root@localhost:/etc/snmp# snmpwalk -v2c -c public localhost .1.3.6.1.4.1.8072.1.3.2
iso.3.6.1.4.1.8072.1.3.2.1.0 = INTEGER: 1
iso.3.6.1.4.1.8072.1.3.2.2.1.2.4.118.111.108.116 = STRING: "/etc/snmp/volt.sh"
iso.3.6.1.4.1.8072.1.3.2.3.1.4.4.118.111.108.116 = INTEGER: 0
iso.3.6.1.4.1.8072.1.3.2.4.1.2.4.118.111.108.116.1 = STRING: "14.3"
root@localhost:/etc/snmp#

The OID we are interested in is the one on the last line.  If you run a snmpwalk command with the OID you should get your data point.

root@localhost:/etc/snmp# snmpwalk -v2c -c public localhost 1.3.6.1.4.1.8072.1.3.2.4.1.2.4.118.111.108.116.1
iso.3.6.1.4.1.8072.1.3.2.4.1.2.4.118.111.108.116.1 = STRING: "14.3"
root@localhost:/etc/snmp#

All that’s left is to add the OID to your SNMP monitor.  If You run into issues with your SNMP server not monitoring the OID, you might need do what I did in the above command, replace the beginning of the OID “iso.” with a “1”.


Basic snmpwalk Commands

A snmpwalk basically allows you to walk out all the SNMP OIDs for a device.  The following command shows all SNMP data that can be acquired on “localhost”.  You can change “localhost” to an ip address or hostname if you want to view SNMP data on a remote machine.

snmpwalk -v 2c -c public localhost

The above command starts an snmpwalk against “localhost”, using SNMP version “2c”, and the community string “public”.  You should change the SNMP version and community string to what ever you have setup on your network.

If you just want to view one OID then you can just append that OID to the end of the above command.

snmpwalk -v 2c -c public 192.168.1.58 1.2.840.10036.3.1.2.1.4

Setup SNMP for Ubiquiti Radios

First lets install SNMP.

On Red Hat type systems such as Fedora and CentOS do the following

yum install -y net-snmp net-snmp-utils

If you are using a Debian based distro the you can use apt.

apt-get install snmp

You will need to make sure that SNMP is turned on in the radio under the Services tab.

Be sure to remember the SNMP Community string as that is needed in the next step.

Now try to connect to the device with the following command.

snmpwalk -v1 -c comunityname 192.168.1.20

You should receive something like the following.

...
IF-MIB::ifSpecific.5 = OID: SNMPv2-SMI::zeroDotZero
SNMPv2-MIB::snmpInPkts.0 = Counter32: 484
SNMPv2-MIB::snmpOutPkts.0 = Counter32: 471
SNMPv2-MIB::snmpInBadVersions.0 = Counter32: 0
SNMPv2-MIB::snmpInBadCommunityNames.0 = Counter32: 12
SNMPv2-MIB::snmpInBadCommunityUses.0 = Counter32: 0
...

If you received

Timeout: No Response from 192.168.1.20

Then either the SNMP Community name is wrong or the ip address is unreachable.

The following command will list all the interfaces on the device.

snmpwalk -v1 -c comunityname 192.168.1.20 ifDescr
IF-MIB::ifDescr.1 = STRING: lo
IF-MIB::ifDescr.2 = STRING: eth0
IF-MIB::ifDescr.3 = STRING: eth1
IF-MIB::ifDescr.4 = STRING: wifi0
IF-MIB::ifDescr.5 = STRING: ath0
IF-MIB::ifDescr.6 = STRING: br0

Notice the number at the end of the ifDescr, That number identifies the interface.  You will need that for the next command.

Now lets check the signal. Note that the last number of the OID(the OID is the last string of numbers) is the interface number of ath0.  Yours could be different depending on how you have the radio setup.

snmpwalk -v1 -c communityname 192.168.1.20 1.3.6.1.4.1.14988.1.1.1.1.1.4.5

Here is a short list of OID’s.  To use them just run the above command but replace the OID with the one you want.

RxRate of 5'th interface (ath0) of the device (bps): 1.3.6.1.4.1.14988.1.1.1.1.1.3.5
TxRate of 5'th interface (ath0) of the device (bps): 1.3.6.1.4.1.14988.1.1.1.1.1.2.5
Channel: 1.3.6.1.4.1.14988.1.1.1.1.1.7.5
Firmware Version: 1.2.840.10036.3.1.2.1.4
Hostname: 1.3.6.1.4.1.14988.1.1.1.1.1.5
AP MAC: 1.3.6.1.4.1.14988.1.1.1.1.1.6
Station MAC: 1.2.840.10036.1.1.1.1
Signal 1.3.6.1.4.1.41112.1.4.5.1.5.1 (OID seems to vary a little bit, from nanoBeam to nanoStation)