You can test if a router is acting as an open DNS resolver by running the following command from a Linux terminal. If you need to install dig, refer to here for Debian/Ubuntu and here for RPM/CentOS/Fedora Distros.
Replace 192.168.88.1 with the host you want to test against.
;; connection timed out; no servers could be reached
Then you are unable to use that router to resolve DNS.
Example running the command against a Mikrotik router with Remote DNS turned on Then adding a firewall rule to block unwanted request.
bob@localhost:~$ dig +short test.openresolver.com TXT @192.168.88.1
"open-resolver-detected"
bob@localhost:~$
<<-- Put firewall rule on router -->>
bob@localhost:~$ dig +short test.openresolver.com TXT @192.168.88.1
;; connection timed out; no servers could be reached
bob@localhost:~$
Extra notes
If you have firewall rules allowing your IP address to use the router for DNS, then the above command to test will show it as an Open Resolver. Ideally you would want a connection from the outside to test. Or you can use this link and test it from the website. https://www.openresolver.com
Check and verify that DNS is not being blocked upstream by a firewall. Behavior is weird, the server can get out to the internet, access to the servers IP address is available, but can’t ping domains that are locally hosted. Are also unable to ping the domains from the internet in.
To resolve the issue either disable the DNS firewall rules, or better yet add some rules to allow access to the cPanel server.
Dig is a DNS lookup utility. It is included in most Linux distributions by default, but if it isn’t you can easily install dig with the following command.
The dig utility is apart of the dnsutils package
sudo apt-get install dnsutils -y
After it is installed, we can verify that it is working with
dig -v
For more information on how to use dig, refer to the following link.
The following is copied and pasted from the dig man page.
NAME
dig - DNS lookup utility
SYNOPSISdig [@server] [-baddress] [-cclass] [-ffilename] [-kfilename] [-m] [-pport#] [-qname]
[-ttype] [-v] [-xaddr] [-y[hmac:]name:key] [[-4] | [-6]] [name] [type] [class]
[queryopt...]
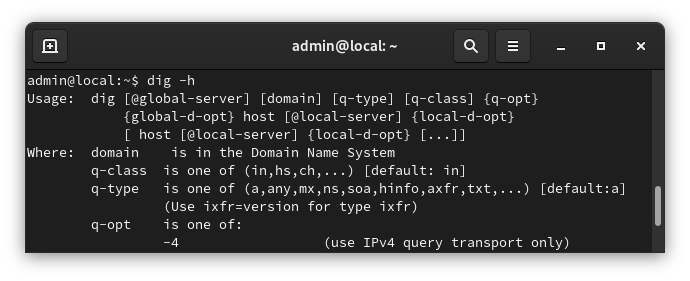
dig [-h]
dig [global-queryopt...] [query...]
DESCRIPTIONdig is a flexible tool for interrogating DNS name servers. It performs DNS lookups and
displays the answers that are returned from the name server(s) that were queried. Most DNS
administrators use dig to troubleshoot DNS problems because of its flexibility, ease of use
and clarity of output. Other lookup tools tend to have less functionality than dig.
Although dig is normally used with command-line arguments, it also has a batch mode of
operation for reading lookup requests from a file. A brief summary of its command-line
arguments and options is printed when the -h option is given. Unlike earlier versions, the
BIND 9 implementation of dig allows multiple lookups to be issued from the command line.
Unless it is told to query a specific name server, dig will try each of the servers listed
in /etc/resolv.conf. If no usable server addresses are found, dig will send the query to the
local host.
When no command line arguments or options are given, dig will perform an NS query for "."
(the root).
It is possible to set per-user defaults for dig via ${HOME}/.digrc. This file is read and
any options in it are applied before the command line arguments. The -r option disables this
feature, for scripts that need predictable behaviour.
The IN and CH class names overlap with the IN and CH top level domain names. Either use the
-t and -c options to specify the type and class, use the -q the specify the domain name, or
use "IN." and "CH." when looking up these top level domains.
SIMPLEUSAGE
A typical invocation of dig looks like:
dig @server name type
where:
server
is the name or IP address of the name server to query. This can be an IPv4 address in
dotted-decimal notation or an IPv6 address in colon-delimited notation. When the
supplied server argument is a hostname, dig resolves that name before querying that name
server.
If no server argument is provided, dig consults /etc/resolv.conf; if an address is found
there, it queries the name server at that address. If either of the -4 or -6 options are
in use, then only addresses for the corresponding transport will be tried. If no usable
addresses are found, dig will send the query to the local host. The reply from the name
server that responds is displayed.
name
is the name of the resource record that is to be looked up.
type
indicates what type of query is required — ANY, A, MX, SIG, etc. type can be any valid
query type. If no type argument is supplied, dig will perform a lookup for an A record.
Search /etc/named.conf to find the zone file for the domain.
Find the domain name and see where the zone file is. Example zone block.
zone "incredigeek.com" in {
 type master;
 file "/var/named/mzones/incredigeek.com.hosts";
 allow-query { any; };
 forwarders {};
};
The file is /var/named/mzones/incredigeek.com.hosts
Edit your zone file by opening it up in a text editor.
Example. Text in bold added for comments.
$TTL 21600
$ORIGIN com.
incredigeek IN SOA dns1.dns-server.com. dns2.dns-server.com.(
 0000147 ; serial  <- This needs to be incremented so it is greater than the previous version of this file
 43200 ; refresh (12 hours)
 7200 ; retry (2 hours)
 604800 ; expire (7 days)
 21600 ) ; minimum
 NS dns1.dns-server.com.
 NS dns2.dns-server.com.
 300 A 10.0.0.11   <- A record for root domain
$ORIGIN incredigeek.com.
localhost IN A 127.0.0.1
www 300 IN A 10.0.0.11  <- www subdomain A record
login 300 IN A 10.0.0.12 <- another subdomain A record
Windows has a similar file like the Linux /etc/hosts file. It is located in
Windows\System32\drivers\etc\hosts
You’ll need to have administrator privileges to modify the file. So you can launch notepad as Administrator then open the file. If you don’t see the file make sure the drop down across from “File name:” is set to “All Files”.