There are a couple different options for undeleting files for XFS filesystems.
TestDisk
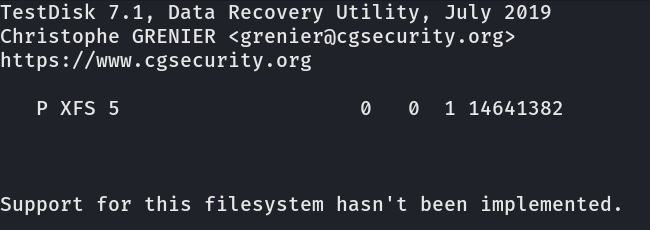
TestDisk is a great command line recovery tool. Unfortunately, it can be slightly more difficult on systems using XFS compared to EXT4 systems. TestDisk does not support undeleting a file in place on XFS.
You can still recover files using TestDisk, you just need to recover the whole drive and dig through the recovery results to find the files you want.
xfs_undelete
There is also another utility that can be helpful. xfs_undelete
You will need a different filesystem to save the files to. Otherwise you will receive the following error.
Your output directory is  /home/bob/recovery/
That is within the filesystem  /  you want to recover files
from. This isn't feasible as it would overwrite the deleted files you wanted to
recover. Please specify the option -o /path/to/output_directory on another (rw
mounted) filesystem or run xfs_undelete from within a directory on that
filesystem so the recovered files could be written there. They cannot be
recovered in place.
It’s not the greatest idea to recover on the system while running. Ideally, shut the system down, plug the drive into another machine as read only, and copy the files off.
You could also boot up in single user mode or a live Linux iso/thumbdrive and mount another recovery drive. Should work for both physical and virtual environments.
Changes are made to the /etc/rsyslog.conf config file.
For this example, we will be configuring our named.log file to not exceed 50MiB, and then we’ll have a rotated log “.1” that is also 50MiB. Total it should not exceed 100BMiB.
First we need to create an out channel, and then we assign the out channel to a logging channel. We also need a script that rotates the logs.
On our line that is logging named, at the end add :$log_rotation
Example:
local0.* /var/log/named.log:$log_rotation
Script to Rotate Log
Somewhere on the system, create a rotate.sh script. Name it whatever you want, just be sure the path and name in the rsyslog.conf is the same.
Add the following one line to move the current log to a rotate log.
mv -f /var/log/named.log /var/log/named.log.1
As the log fills up and hits ~50MiB, the named.sh script will run which rotates(moves) the log file to logfile.log.1. This will keep our usage for named.log to 100MiB.
In this post we will be using systemd to run a node application. This is helpful as it will automatically start the app when the server starts so we don’t have to manually. These steps can easily be modified to run a bash script, or any other application.
This is super simple. We create a .service file in /lib/systemd/system. When we enable the service, it will create a symlink to this file.
sudo vim /lib/systemd/system/whisperweb.service
Customize systemd file
Change the settings as appropriate. It would be a good idea to run any service as a limited user that only has the rights needed to get the job done. Do note that you will need to have any prerequisites installed and available for that user to use. I.e. libraries installed with npm etc.
[Unit]
Description=Simple Whisper Web Interface Service File
After=network.target

[Service]
Type=simple
User=whisperuser
ExecStart=/usr/bin/node mainssl.js
WorkingDirectory=/home/whisperuser/
Restart=on-failure

[Install]
WantedBy=multi-user.target
Enable systemd file
Enabling the service will create a symlink that will then run this service file on system boot.
sudo systemctl enable whisperweb.service
And now we can start the service.
sudo systemctl start whisperweb.service
We can verify that the service is running by running
sudo systemctl status whisperweb.service
The following article has some great explanations on what different options in the unit file mean and do.
We will setup a simple systemd service to automatically run a bash script on system boot.
Create systemd file
Create the service file with
vi /etc/systemd/system/multi-user.target.wants/bashscript.service
Now fill out the file. Change the Description and ExecStart. After= means only start this unit after the other units have finished. This is needed if we need to make a network connection. If our script runs before the network is up, the connection will fail.
[Unit]
Description=systemd Unit File to Launch Bash Script on System Boot
After=network.target
After=syslog.target

[Install]
WantedBy=multi-user.target

[Service]
ExecStart=/home/user/script.sh
Change the ExecStart to your bash script and save the file
Enable systemd file
Now that the file is created, we need to enable the service so it starts on system boot
systemctl enable bashscript.service
You should get the following output.
Created symlink /etc/systemd/system/multi-user.target.wants/bash.service → /etc/systemd/system/bash.service.
Now to test, reboot your system, or start the service with
It appears that NVIDIA has limited the number of NVEncoding streams on consumer GPUs. Guess it is so people have to buy the more expensive professional cards.
Fortunately, the limit is only applied to the driver, and there is a patch available that let’s us bypass the limiter.
It’s fairly easy to send a message to a Telegram Channel using curl. Copy and paste the following command in, replacing the API_TOKEN, chat_id, and test_message, with the appropriate items.
The following can be added to the .htaccess file to redirect all http request to https.
RewriteEngine On
RewriteCond %{HTTPS} off
RewriteRule ^(.*)$ https://%{HTTP_HOST}%{REQUEST_URI} [R=301,L]
RewriteEngine On – Allows the rewrite capabilities. If it was off, the last rule “RewriteRule” would not work. RewriteCond – This is a conditional that says if the current request is using HTTPS, don’t rewrite. If this option was not here, we would get an infinite redirect loop. RewriteRule – This is the actual rule that rewrites or redirects any HTTP request to HTTPS. the R=301 means that it redirects using a 301 status code.
The following links provide more detail and info on htaccess redirects.